
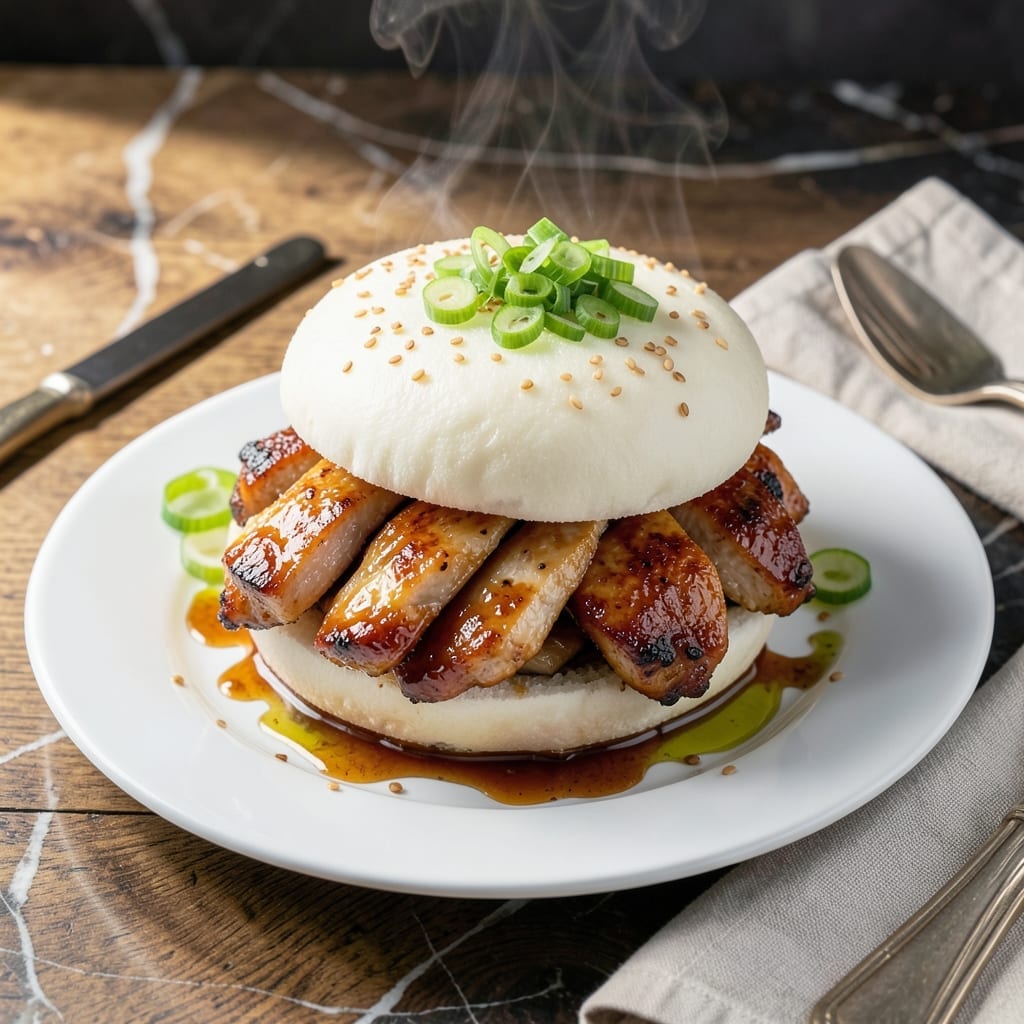
This Disney-inspired creation brings the magic of Epcot straight to your kitchen. The sweet-savory teriyaki glaze pairs perfectly with tender chicken and a soft, steamy bun.
I developed this recipe after countless visits to the park, determined to recreate that signature balance of flavors. The chicken stays juicy while the teriyaki reduces to a glossy, umami-rich coating.
Each bite delivers the same nostalgia as the original—sweet, sticky, and utterly satisfying. The bun, lightly toasted, holds everything together without falling apart.
Serve warm for an authentic taste of the parks. This version stays true to the original while being simple to make at home.
Ingredients for Teriyaki Chicken Bun Epcot
Sweet teriyaki, tender chicken, and soft buns bring Epcot magic to your kitchen table.
| Ingredient | Amount | Notes |
|---|---|---|
| Boneless Skinless Chicken Thighs 🍗 | 1 ½ lb | Pounded to even thickness |
| Soy Sauce 🫒 | ½ cup | Low-sodium preferred for balance |
| Water 💧 | ¼ cup | For teriyaki glaze consistency |
| Brown Sugar 🍚 | ⅓ cup | Packed, for rich sweetness |
| Fresh Garlic Cloves 🧄 | 3 cloves | Minced for teriyaki glaze |
| Fresh Ginger Root 🌿 | 1 tbsp | Grated, for aromatic depth |
| Rice Vinegar 🍯 | 2 tbsp | Adds subtle tang to glaze |
| Cornstarch 🌾 | 1 tbsp | For thickening teriyaki sauce |
| Vegetable Oil 🫒 | 2 tbsp | High smoke point for cooking |
| Soft Hamburger Buns 🍞 | 4 whole | Lightly toasted before serving |
| Sesame Seeds 🌰 | 1 tbsp | Toasted, for garnish |
| Green Onions 🧅 | 2 whole | Thinly sliced for garnish |
| Salt 🧂 | ½ tsp | Kosher or sea salt |
| Black Pepper 🌶️ | ¼ tsp | Freshly ground preferred |
The chicken is everything here. Thighs stay juicier than breasts—look for skinless, boneless at Whole Foods or your regular supermarket. I always grab the organic ones when they’re on sale (worth the extra dollar or two). For the soy sauce, Kikkoman low-sodium is my go-to—consistent flavor, every time. The ginger? Fresh grated only, none of that powdered stuff (it just doesn’t compare).
No rice vinegar? Apple cider vinegar in a pinch. Brown sugar can be swapped for honey, but the molasses notes in brown sugar really make the glaze. If you’re gluten-free, tamari instead of soy sauce works perfectly. The buns can be brioche if you want extra richness (and let’s be real, who doesn’t). For the cornstarch, arrowroot powder is an equal swap if that’s what you’ve got.
Cooked chicken keeps 3-4 days in the fridge, but the buns are best fresh. The teriyaki glaze actually improves overnight—store it in a jar and it’ll keep for 1 week. Reheat everything gently to keep the chicken tender (microwave works, but stovetop is better).
Why You’ll Love This Recipe
- One-Pan Wonder: I love that I can sear the chicken thighs and whisk the soy, brown sugar, and garlic in the same pan—hardly any cleanup.
- Sweet-Garlicky Bite: The brown sugar caramelizes while the fresh garlic cloves add a punch that makes these buns ridiculously good.
- Crowd-Pleasing Meal: I’ve served these at casual lunches and game nights, and they disappear every time.
- Budget Stretcher: Boneless thighs stay juicy and cost less than breasts, so I get flavor and savings in one go.
Step-by-Step Instructions for Teriyaki Chicken Bun
Here’s how to nail this Disney-inspired dish with perfect texture every time.
Step 1: Prepare the Teriyaki Glaze
In a small saucepan, combine the 0.5 cup soy sauce, 0.25 cup water, 0.33 cup brown sugar, 3 cloves minced fresh garlic cloves, and 1 tbsp grated fresh ginger root. Bring to a simmer over medium heat.
Stir in the 2 tbsp rice vinegar, then create a slurry with the 1 tbsp cornstarch and 2 tbsp water (from the measured 0.25 cup water). Whisk this into the saucepan and cook for 2-3 minutes until the mixture thickens to a glossy glaze that coats the back of a spoon.
Step 2: Cook the Chicken to Juicy Perfection
Season the 1.5 lb boneless skinless chicken thighs with 0.5 tsp salt and 0.25 tsp black pepper. Heat the 2 tbsp vegetable oil in a large skillet over medium-high heat until shimmering.
Add the chicken and cook for 5-6 minutes per side until golden brown and the internal temperature reaches 165°F. The thighs should release easily from the pan when properly seared. Pour half the teriyaki glaze over the chicken during the last 2 minutes of cooking, turning to coat evenly.
Step 3: Toast the Buns and Finish the Chicken
Lightly toast the 4 whole soft hamburger buns in the same skillet (wipe it clean first) or in a toaster until golden brown. This takes about 1-2 minutes per side. Keep them warm while you finish the chicken.
Slice the cooked chicken into strips and toss with the remaining teriyaki glaze. The sauce should cling to the chicken with a beautiful sheen. If it’s too thick, thin with a splash of water from the tap.
Step 4: Assemble and Garnish
Place the glazed chicken strips on the bottom half of each toasted bun. The buns should be sturdy enough to hold the juicy chicken without falling apart. Drizzle any remaining sauce from the pan over the chicken.
Sprinkle with the 1 tbsp sesame seeds (lightly toasted if you prefer extra crunch) and the 2 whole thinly sliced green onions. Serve immediately while the chicken is hot and the buns are still slightly warm. The contrast of textures—tender chicken, soft buns, and crunchy seeds—makes this dish special.
Pro Tips For Making Teriyaki Chicken Bun Epcot
- Simmer the Sauce: Let the soy sauce, brown sugar, and garlic mixture reduce for at least 5-7 minutes on medium-low heat—this thickens it just enough to cling to the chicken without being watery.
- Trim the Fat: Even though they’re boneless, chicken thighs often have excess fat or silver skin; trimming these bits prevents chewy texture and lets the teriyaki flavor shine.
- Skip Overcooking: Pull the chicken off the heat at 165°F internal temp; thighs dry out fast if left too long, and residual heat will finish the job while you rest the meat.
- Use Fresh Garlic: I learned this the hard way—pre-minced garlic from a jar lacks the sharp, bright punch fresh cloves bring, and it’s the difference between good and wow in this dish.
Best Sauces and Condiments for These Flavors
Sweet Heat Sauces
Add sriracha mayo by mixing 2 tbsp mayo with 1 tsp sriracha for a spicy kick that cuts through the sweetness. I also love gochujang—just 1 tsp blended with 1 tbsp honey adds Korean-inspired depth. 🌶️
Umami Boosters
Drizzle with eel sauce (available at Asian markets) for extra richness. A sprinkle of furikake adds seaweed and sesame flavor. For a tangy twist, serve with pickled ginger on the side—it cleanses the palate beautifully.
Fresh and Crunchy
Top with quick-pickled cucumbers—slice ½ English cucumber thin and soak in ¼ cup rice vinegar with 1 tsp sugar for 15 minutes. The acidity balances the teriyaki perfectly. Shredded cabbage adds crunch without overpowering.
Creamy Complements
Spread wasabi mayo on the bun before adding chicken—mix 2 tbsp mayo with ½ tsp wasabi paste. For a milder option, avocado slices add creamy texture. Both pair surprisingly well with the sweet glaze.
I always keep these sauces in small squeeze bottles for easy drizzling. 💡
Nutrition Facts
Frequently Asked Questions
Can I use chicken breast instead of thighs?
Yes, but thighs stay juicier. If using breast, pound to ½-inch thickness and cook for 4-5 minutes per side to prevent dryness. Brining for 30 minutes first helps too.
How do I make the glaze thicker?
Simmer longer or add more cornstarch slurry. Mix 1 tsp cornstarch with 1 tbsp cold water, then whisk into the sauce. Cook for 1-2 minutes until glossy.
Can I prepare this ahead of time?
Cook chicken and glaze up to 2 days ahead. Store separately in the fridge. Reheat chicken gently in the microwave or skillet, then assemble with fresh toasted buns.
What’s the best way to toast the buns?
Use the same skillet after cooking chicken (wipe clean first). Toast for 1-2 minutes per side over medium heat until golden brown. Avoid over-toasting or they’ll be too crispy.

- Jollof Rice Sauce Recipe: West African Tomato and Spice Infusion - September 25, 2026
- Japanese Rice Soup Recipe: Umami-Rich Comfort in a Bowl - September 25, 2026
- Homemade Cream Of Rice Recipe: Silk-Smooth Breakfast in Minutes - September 25, 2026