
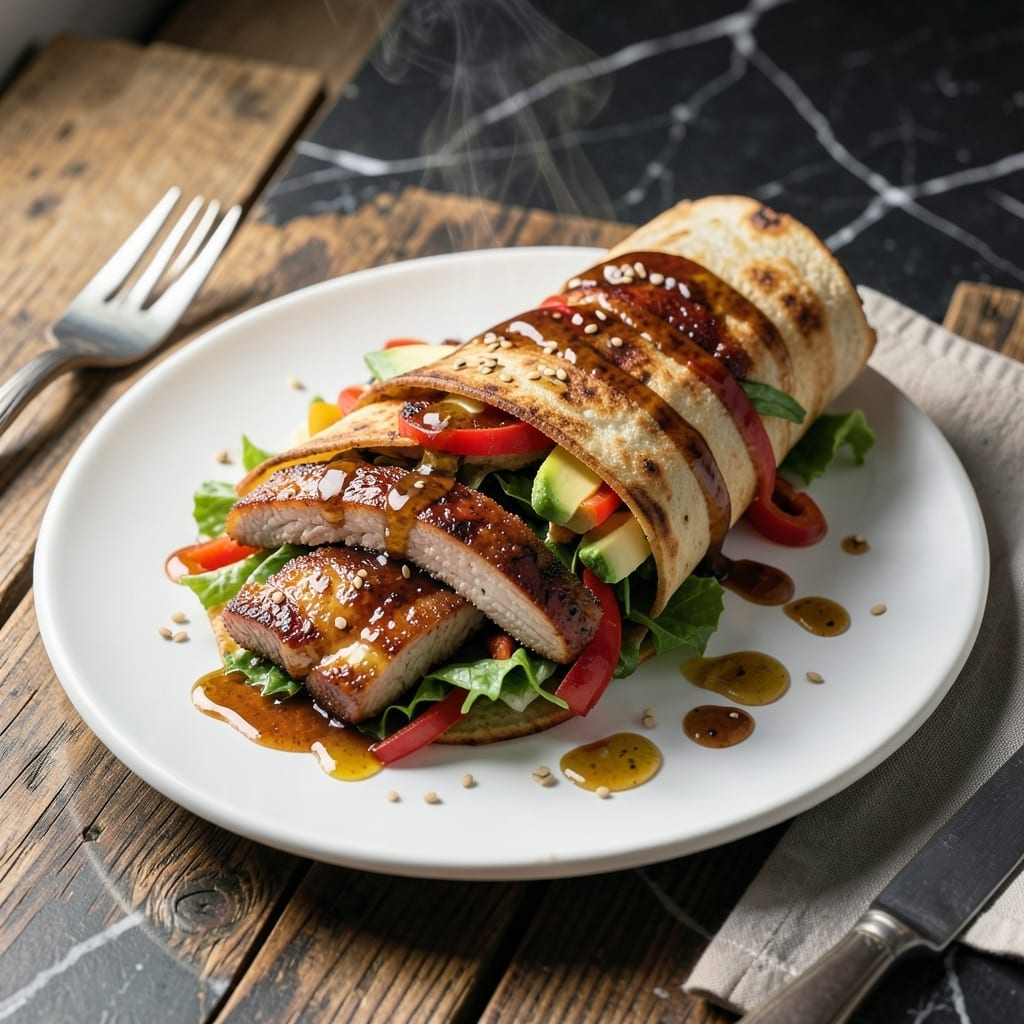
This teriyaki chicken wrap brings together tender chicken, sweet-savory sauce, and fresh vegetables in a perfectly portable package. The secret lies in the balance of flavors and textures.
I developed this recipe to create a satisfying meal that’s as convenient as it is delicious. The chicken is marinated in a simple teriyaki sauce before being cooked to juicy perfection.
Each bite delivers a harmony of tastes—the sweet glaze of the teriyaki, the crunch of fresh veggies, and the soft wrap holding it all together.
Perfect for lunch on the go or a quick dinner solution. This dish proves that handheld meals can be both practical and flavorful.
Ingredients for Teriyaki Chicken Wrap
Tender chicken, vibrant veggies, and a glossy teriyaki glaze wrapped up perfect for any meal.
| Ingredient | Amount | Notes |
|---|---|---|
| Boneless Skinless Chicken Breasts 🍗 | 1 ½ lb | Pounded to even thickness |
| Soy Sauce 🫒 | ½ cup | Low-sodium preferred |
| Brown Sugar 🍚 | ¼ cup | Packed, for sweetness |
| Fresh Ginger 🌿 | 1 tbsp | Minced or grated |
| Garlic Cloves 🧄 | 3 cloves | Minced finely |
| Rice Vinegar 💧 | 2 tbsp | For acidity balance |
| Sesame Oil 🫒 | 1 tsp | Toasted variety preferred |
| Cornstarch 🌾 | 1 tbsp | For sauce thickening |
| Large Flour Tortillas 🌯 | 4 pieces | Burrito-sized, about 10-inch |
| Romaine Lettuce 🥬 | 2 cups | Shredded thinly |
| Carrots 🥕 | 1 cup | Julienned or shredded |
| Red Bell Pepper 🌶️ | 1 whole | Thinly sliced |
| Cucumber 🥒 | ½ whole | Thinly sliced |
| Green Onions 🧅 | 4 whole | Thinly sliced |
| Sesame Seeds 🌾 | 2 tbsp | Toasted for garnish |
The chicken really shines when it’s pounded to even thickness—Costco carries great pre-trimmed breasts, but any supermarket works. For the soy sauce, Kikkoman low-sodium is my go-to (less salty, more balanced). Fresh ginger and garlic are non-negotiable here—they add that bright, zingy depth. Don’t skip the rice vinegar; it keeps the sauce from being cloyingly sweet.
No brown sugar? Coconut sugar or granulated sugar works in a pinch. Out of rice vinegar? Apple cider vinegar at half the amount gets you close. Can’t find sesame oil? Skip it, but add a pinch of toasted sesame seeds to the marinade. The tortillas should be soft and pliable—Mission brand holds up well without tearing.
Marinated chicken keeps 2 days in the fridge. Wraps are best eaten fresh, but you can prep components ahead. Store veggies in airtight containers with a damp paper towel for 3-4 days. Toast sesame seeds just before using for maximum crunch.
Why You’ll Love This Recipe
- 20-Minute Meal: I can slice the chicken, whip up the teriyaki sauce with soy, brown sugar, and ginger, and have wraps ready before the rice cooker beeps.
- Sweet-Savory Magic: That sticky glaze from the brown sugar and garlic cloves makes every bite crave-worthy. Honestly, I lick the pan when no one’s looking.
- Lunchbox Hero: These wraps stay fresh in the fridge for days, and my kids actually eat them cold. Between us, I pack one for myself too.
- Pantry Friendly: I always have soy sauce and brown sugar on hand, so this feels like a free meal. One pound of chicken stretches to four generous servings.
Step-by-Step Instructions for Teriyaki Chicken Wraps
Here’s my foolproof method for building these flavor-packed wraps with perfect texture every time.
Step 1: Pound and Marinate the Chicken
Start by pounding the 1.5 lb boneless skinless chicken breasts to an even ½-inch thickness using a meat mallet. This ensures even cooking and prevents dry spots. I place the chicken between sheets of plastic wrap to contain the splatter.
In a bowl, whisk together the 0.5 cup soy sauce, 0.25 cup brown sugar, 1 tbsp fresh ginger, 3 cloves garlic cloves, 2 tbsp rice vinegar, and 1 tsp sesame oil. Add the pounded chicken, ensuring it’s fully coated. Let it marinate for at least 20 minutes—this infuses maximum flavor.
Step 2: Cook Chicken and Thicken Sauce
Remove the chicken from the marinade (reserve the liquid) and grill or pan-sear over medium-high heat for 5-6 minutes per side until cooked through and the internal temperature reaches 165°F. The chicken should have a light caramelization from the sugar in the marinade.
While the chicken rests, pour the reserved marinade into a saucepan and bring to a simmer. Mix 1 tbsp cornstarch with 2 tbsp water to make a slurry, then whisk it into the simmering marinade. Cook for 1-2 minutes until the sauce thickens to a glossy, syrup-like consistency that coats the back of a spoon.
Step 3: Slice and Toss with Sauce
Slice the cooked chicken into thin strips against the grain for maximum tenderness. In a large bowl, combine the sliced chicken with about half of the thickened teriyaki sauce. Toss to coat evenly—the sauce should cling to every piece without pooling at the bottom.
Here’s the thing—I always reserve some sauce for drizzling later. This keeps the wraps from getting soggy while still delivering that bold teriyaki flavor in every bite. Let the chicken cool slightly before assembling.
Step 4: Assemble the Wraps
Lay out the 4 pieces large flour tortillas and divide the sauced chicken among them, placing it in the center of each. Top with 2 cups romaine lettuce, 1 cup carrots, 1 whole red bell pepper (thinly sliced), 0.5 whole cucumber (thinly sliced), and 4 whole green onions (thinly sliced).
Drizzle with the remaining teriyaki sauce and sprinkle with 2 tbsp sesame seeds. Fold the sides of each tortilla inward, then roll tightly from the bottom up, tucking in the fillings as you go. The wrap should be snug but not bursting.
Step 5: Rest and Serve
Place the assembled wraps seam-side down on a cutting board and let them rest for 5 minutes. This allows the fillings to settle and the tortilla to soften slightly, making them easier to eat without falling apart.
Slice each wrap in half diagonally for a restaurant-style presentation. The ideal wrap holds its shape when picked up, with a perfect balance of crisp veggies, tender chicken, and that sticky-sweet teriyaki sauce in every bite. Serve immediately while the chicken is still warm.
Pro Tips For Making Teriyaki Chicken Wrap
- Slice Against Grain: Cut the cooked chicken breasts into thin strips against the grain for a tender bite—I learned this the hard way after chewing through rubbery wraps.
- Bloom Ginger and Garlic: Sauté the minced ginger and garlic in oil for 30 seconds before adding liquids to wake up their flavors, or your teriyaki will taste flat.
- Reduce the Sauce: Simmer the soy sauce and brown sugar mixture until it thickens enough to coat the back of a spoon, or your wrap will be a soggy mess.
- Warm the Tortillas: Heat your wraps for 10-15 seconds in a dry pan before assembling to prevent them from tearing when folded—sounds simple, but it saves every single time.
Serving Suggestions for This Recipe
Plating for Impact
Slice each wrap diagonally into 2 equal halves to reveal the colorful layers inside. Arrange on a platter with the cut sides facing up so guests can see the teriyaki-glazed chicken and fresh veggies. I love using a white rectangular platter for contrast. 💫
Dipping Sauces
Offer extra teriyaki sauce for dipping on the side—it’s perfect for those who want more glaze. A small bowl of sriracha mayo (mix ½ cup mayo with 1 tbsp sriracha) adds a spicy kick that pairs beautifully with the sweetness.
Side Pairings
Serve with crispy potato wedges or sweet potato fries for a hearty meal. The saltiness of the fries balances the sweet teriyaki perfectly. For a lighter option, edamame with sea salt is a refreshing contrast.
Garnish Like a Pro
Sprinkle extra toasted sesame seeds on top just before serving for added crunch and visual appeal. A light drizzle of teriyaki sauce over the sliced wraps makes them look restaurant-ready. Fresh cilantro leaves add a pop of green if desired.
Portable Presentation
For picnics or lunches, wrap each half tightly in parchment paper and secure with a sticker or twine. This keeps them intact and makes them easy to grab and go. I always pack a small container of extra sauce for dipping on the side.
Kid-Friendly Twist
Cut wraps into bite-sized pinwheels for little ones—they’re fun to eat and less messy. Serve with apple slices and a small cup of sauce for dipping. This presentation always gets my kids excited to dig in.
Nutrition Facts
Frequently Asked Questions
Can I use chicken thighs instead of breasts?
Boneless thighs work great and often stay juicier. Cook to 165°F and slice thinly. The flavor will be richer with a slightly different texture.
How do I keep the wrap from getting soggy?
Assemble just before serving. Pat veggies dry, use room-temp chicken, and only drizzle sauce on the filling—not the tortilla. This prevents moisture buildup.
What’s the best way to store leftovers?
Wrap tightly in foil or parchment and refrigerate for up to 2 days. Reheat in a dry skillet over medium heat for 2-3 minutes to restore crispness.
Can I make this gluten-free?
Swap soy sauce for tamari and use gluten-free tortillas. Check all labels, as some sauces contain hidden gluten. The rest of the recipe remains unchanged.

- Jollof Rice Sauce Recipe: West African Tomato and Spice Infusion - September 25, 2026
- Japanese Rice Soup Recipe: Umami-Rich Comfort in a Bowl - September 25, 2026
- Homemade Cream Of Rice Recipe: Silk-Smooth Breakfast in Minutes - September 25, 2026