
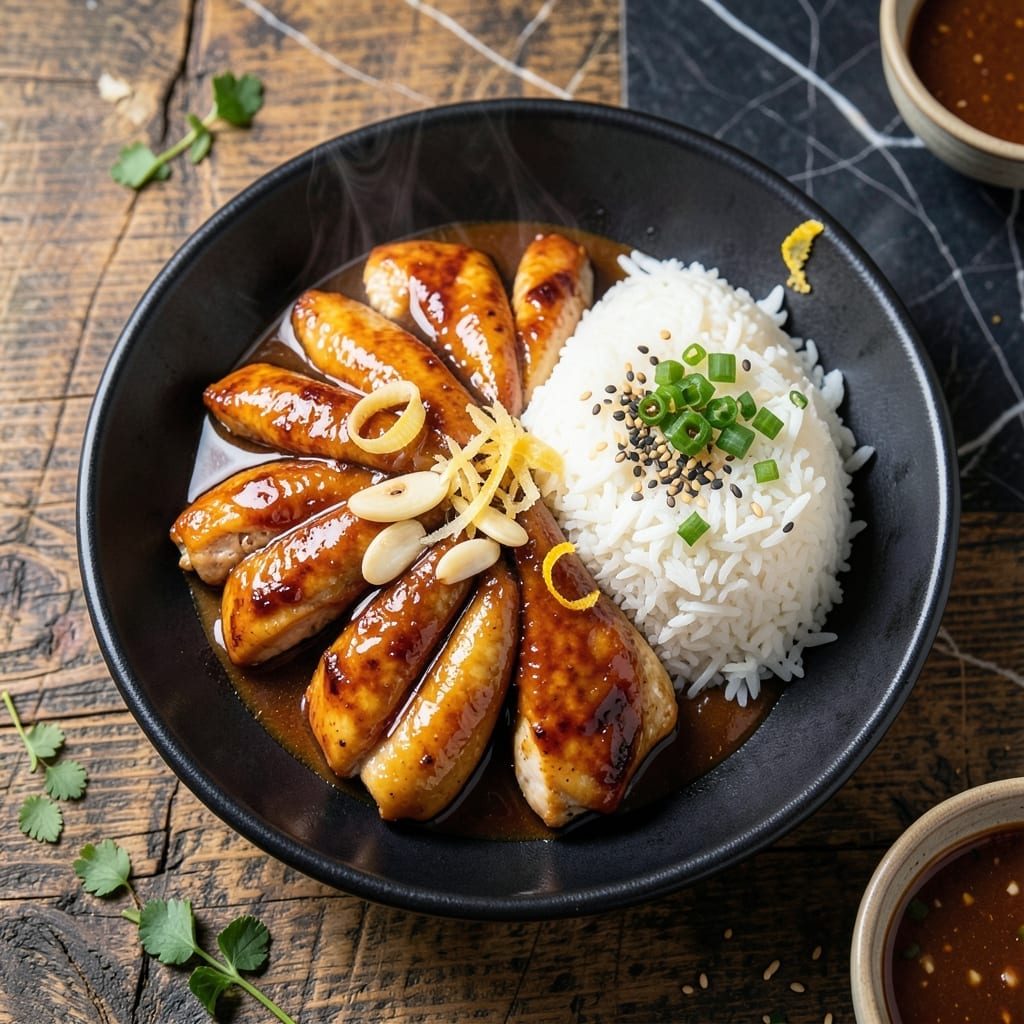
This teriyaki chicken delivers perfectly glazed results every time with a balance of sweet and savory flavors that never disappoints. The secret lies in a homemade sauce that caramelizes beautifully on the chicken as it cooks.
I developed this method after testing countless variations to achieve that ideal sticky glaze without burning. The sauce simmers to just the right consistency, creating a perfect coating that clings to each piece.
The chicken stays juicy inside while developing a glossy exterior that looks as impressive as it tastes. A quick sear before glazing adds depth to the flavor profile.
Serve over steamed rice with steamed vegetables for a complete meal that comes together effortlessly. The results speak for themselves.
Ingredients for Terryaki Chicken
A handful of pantry staples transforms into that signature sweet-savory glaze everyone craves.
| Ingredient | Amount | Notes |
|---|---|---|
| Boneless Skinless Chicken Thighs 🍗 | 1 ½ lb | Patted dry for even searing |
| Soy Sauce 🫒 | ½ cup | Low-sodium preferred for balance |
| Brown Sugar 🍚 | ⅓ cup | Packed, light or dark |
| Honey 🍯 | ¼ cup | Pure, for natural sweetness |
| Fresh Garlic Cloves 🧄 | 3 cloves | Minced finely for sauce |
| Fresh Ginger Root 🌿 | 1 tbsp | Grated, for zesty depth |
| Rice Vinegar 🍶 | 2 tbsp | Unseasoned variety preferred |
| Sesame Oil 🫒 | 1 tsp | Toasted for rich aroma |
| Cornstarch 🌾 | 1 tbsp | For thickening the sauce |
| Water 💧 | ¼ cup | Cold, for slurry |
| Neutral Cooking Oil 🫒 | 2 tbsp | Vegetable or canola for searing |
| Sesame Seeds 🌰 | 1 tbsp | Toasted for garnish |
| Green Onions 🧅 | 3 whole | Thinly sliced for topping |
The chicken makes the difference here. Boneless, skinless thighs stay juicier than breasts during cooking—look for uniform thickness so everything finishes at the same time. Most supermarkets carry them pre-trimmed, but Costco offers great bulk options for larger batches. The soy sauce is non-negotiable; Kikkoman or San-J are reliable choices for consistent flavor.
Swap honey for maple syrup if needed, though the flavor profile shifts slightly sweeter. No fresh ginger? Ground ginger at one-quarter the amount works in a pinch. The rice vinegar adds essential acidity—apple cider vinegar can substitute but has a more pronounced taste. For a gluten-free version, tamari replaces soy sauce one-to-one, and cornstarch can be swapped for arrowroot powder.
The sauce thickens as it cools, so don’t over-reduce during cooking. Store leftovers in an airtight container—they’ll keep 4-5 days in the fridge or freeze for 3 months. Reheat gently to preserve that glossy finish.
Why You’ll Love This Recipe
- One Pan Wonder: I toss everything in, let the chicken soak up that garlic and honey, and dinner’s done in one go.
- Sweet-Savory Magic: The brown sugar and soy sauce caramelize into this sticky, finger-licking glaze that coats every bite.
- Meal Prep Hero: I make a double batch on Sunday—reheats beautifully and tastes even better the next day.
- Budget Friendly: Chicken thighs stay juicy and cheap, and the sauce is just pantry staples I always have on hand.
Step-by-Step Instructions for Teriyaki Chicken
This method ensures a glossy glaze and tender chicken with balanced sweet-savory depth every time.
Step 1: Prepare the Teriyaki Sauce Base
In a medium bowl, combine the 0.5 cup soy sauce, 0.33 cup brown sugar, 0.25 cup honey, 2 tablespoons rice vinegar, 1 teaspoon sesame oil, 3 cloves minced fresh garlic cloves, and 1 tablespoon grated fresh ginger root. Whisk vigorously until the brown sugar fully dissolves and the mixture becomes smooth.
Taste and adjust the balance if needed—this foundation should be rich and complex, with no granular texture. The ginger and garlic will mellow as the sauce cooks, so don’t be shy with their intensity at this stage.
Step 2: Sear the Chicken Thighs
Pat the 1.5 lb boneless skinless chicken thighs dry with paper towels to ensure even browning. Heat 2 tablespoons neutral cooking oil in a large skillet over medium-high heat until it shimmers. Add the chicken in a single layer, being careful not to crowd the pan.
Sear undisturbed for 5-6 minutes per side until the chicken develops a deep golden crust and reaches an internal temperature of 165°F. The thighs should release easily from the pan when properly seared—this prevents tearing and preserves the juices.
Step 3: Glaze and Thicken the Sauce
Pour the prepared sauce over the seared chicken in the skillet. Reduce heat to medium-low and simmer for 3-4 minutes, spooning the sauce over the thighs to coat them evenly. This builds layers of flavor as the sauce reduces slightly.
In a small bowl, whisk together the 1 tablespoon cornstarch and 0.25 cup cold water to create a smooth slurry. Slowly drizzle this into the simmering sauce while stirring constantly. Cook for an additional 1-2 minutes until the sauce thickens to a glossy, syrup-like consistency that clings to the chicken.
Step 4: Rest and Garnish
Transfer the glazed chicken to a serving platter and let it rest for 5 minutes. This allows the juices to redistribute, ensuring every bite is moist and flavorful. The sauce will continue to thicken slightly as it cools.
Sprinkle with the 1 tablespoon sesame seeds and 3 whole thinly sliced green onions just before serving. The seeds add a nutty crunch, while the green onions provide a fresh, sharp contrast to the rich teriyaki glaze. Serve immediately over steamed rice or with your favorite sides.
Pro Tips For Making Terryaki Chicken
- Sear First, Simmer Later: I learned this the hard way—browning the chicken thighs in a hot pan before adding the teriyaki sauce builds way more flavor than just boiling them in the liquid.
- Mince the Garlic: Fresh garlic cloves release more aroma when finely minced, and it distributes evenly through the sauce instead of leaving big chunks in your teriyaki chicken.
- Skip the Overcrowding: Resist the urge to dump all the chicken in at once; cooking in batches guarantees a good sear and prevents steaming the meat in its own juices.
- Reduce the Sauce: After cooking the chicken, let the teriyaki sauce simmer for 3-4 minutes to thicken—it clings better to the meat and tastes richer than a watery glaze.
Regional Styles of This Dish
Hawaiian Style
In Hawaii, this dish often features a lighter sauce with added pineapple juice for tropical sweetness. I use ½ cup pineapple juice in place of water for the slurry, which complements the chicken beautifully. The acidity balances the richness perfectly. 🌺
Japanese Tradition
Traditional Japanese versions use mirin instead of brown sugar, creating a more authentic flavor. Replace the brown sugar with ⅓ cup mirin for depth. The sauce reduces to a glossier finish that’s less sweet but more complex.
Korean Twist
Korean adaptations add gochujang for a spicy kick. Mix 1 tbsp gochujang into the sauce base for heat. I love how the smoky, spicy notes contrast with the sweet glaze.
Chinese American
This version often includes oyster sauce for umami depth. Add 1 tbsp oyster sauce to the soy sauce base for a richer, more savory profile. It’s a staple in many takeout menus.
Thai Fusion
Thai-inspired teriyaki incorporates lemongrass and lime juice. Simmer 1 stalk bruised lemongrass with the sauce, then finish with 1 tbsp lime juice. The citrus brightens the dish wonderfully.
Nutrition Facts
Frequently Asked Questions
Can I use chicken breasts instead of thighs?
Yes, but thighs stay juicier. If using breasts, reduce cooking time to 4-5 minutes per side and monitor internal temperature to avoid dryness.
How do I prevent the sauce from burning?
Keep heat at medium-low after searing and stir frequently. The sugar in the sauce can scorch if left unattended. A heavy-bottomed pan helps distribute heat evenly.
Can I make this ahead of time?
Cook and store in an airtight container for up to 4-5 days. Reheat gently on the stovetop with a splash of water to restore the glaze.
What’s the best way to thicken the sauce?
A cornstarch slurry (1 tbsp cornstarch + ¼ cup cold water) works best. Add slowly while stirring to avoid lumps. The sauce should coat the back of a spoon.

- Jollof Rice Sauce Recipe: West African Tomato and Spice Infusion - September 25, 2026
- Japanese Rice Soup Recipe: Umami-Rich Comfort in a Bowl - September 25, 2026
- Homemade Cream Of Rice Recipe: Silk-Smooth Breakfast in Minutes - September 25, 2026