
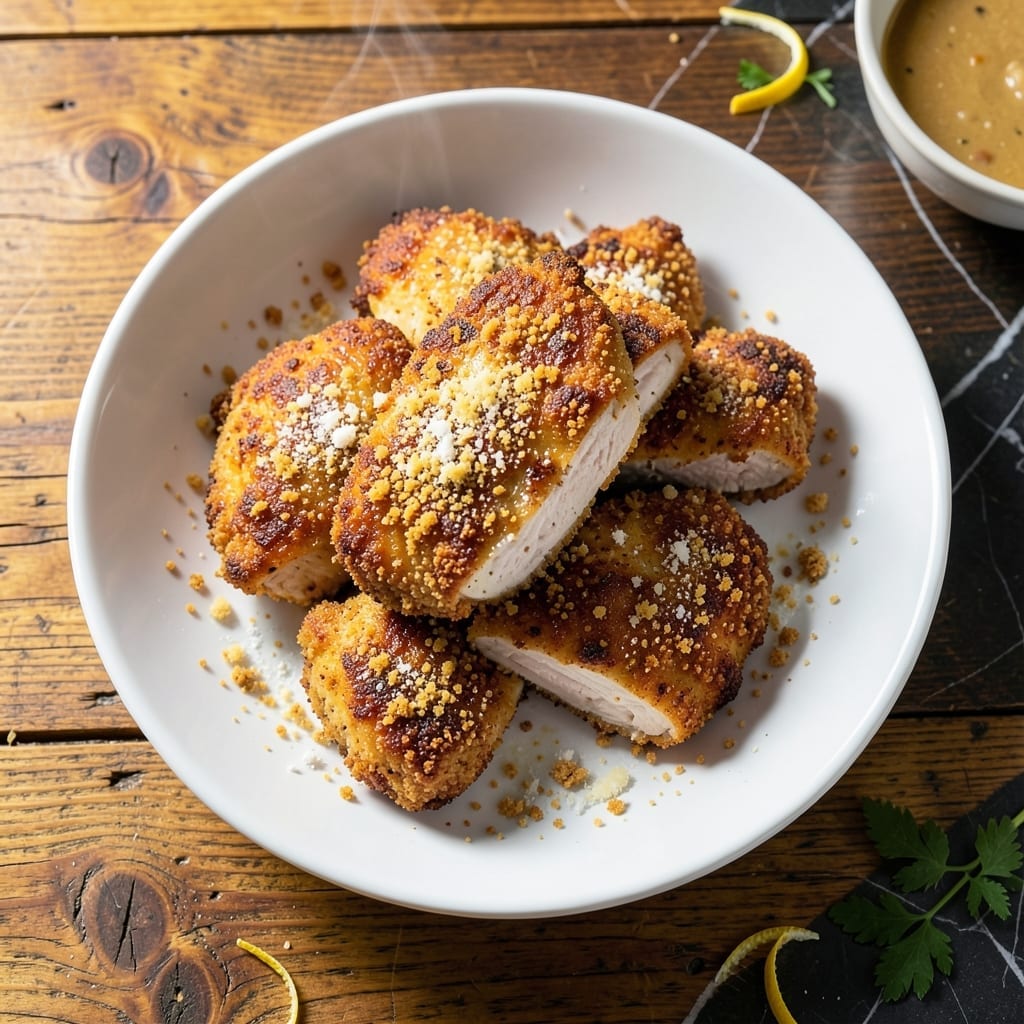
This viral chicken breast delivers on its promise of a crispy parmesan crust that stays golden until the last bite.
I tested this method repeatedly to perfect the texture—tender inside, shatteringly crispy outside. The secret lies in pressing the coating firmly onto the chicken before baking.
With just 30 minutes in the oven, you’ll have restaurant-quality results. The parmesan creates a flavorful crust that locks in moisture while developing that coveted crunch.
Serve it hot for maximum crispiness, when the cheese is still bubbling and the edges are perfectly browned. This dish proves simple ingredients can create extraordinary flavor.
Ingredients for Tik Tok Chicken Breast
Pantry staples and fresh Parmesan create that viral crispy crust everyone raves about.
| Ingredient | Amount | Notes |
|---|---|---|
| Boneless Skinless Chicken Breasts 🍗 | 1 ½ lb | Pounded to even thickness |
| All-Purpose Flour 🌾 | ½ cup | For initial dredging |
| Large Eggs 🥚 | 2 whole | Beaten for binding |
| Panko Breadcrumbs 🍞 | 1 cup | For extra crispiness |
| Parmesan Cheese 🧀 | 1 cup | Freshly grated from block |
| Garlic Powder 🧄 | 1 tsp | For seasoning blend |
| Onion Powder 🧅 | 1 tsp | For depth of flavor |
| Dried Italian Seasoning 🌿 | 1 tsp | Oregano, basil, thyme blend |
| Salt 🧂 | 1 tsp | Kosher or sea salt |
| Black Pepper 🌶️ | ½ tsp | Freshly ground preferred |
| Paprika 🌶️ | ½ tsp | Sweet or smoked variety |
| Olive Oil 🫒 | ¼ cup | For drizzling before baking |
| Butter 🧈 | 2 tbsp | Melted for topping |
The Parmesan is non-negotiable here. Grab a wedge of Parmigiano-Reggiano from the specialty cheese section—pre-grated lacks the melt and texture you need. The panko breadcrumbs are what give you that shatteringly crispy coating (regular breadcrumbs won’t cut it). Most supermarkets carry it in the baking aisle. For the chicken, uniform thickness is key to even cooking, so pound those breasts to about ¾-inch.
No panko? Crush saltine crackers for a similar crunch. Out of Parmesan? Pecorino Romano has a sharper bite but works. The Italian seasoning can be replaced with equal parts dried oregano and basil. If you’re avoiding gluten, gluten-free panko (like from Kikkoman) works perfectly. The olive oil can be swapped for avocado oil if that’s your preference.
The breaded chicken keeps in the fridge for up to 1 day before baking (cover tightly). Leftovers? They reheat surprisingly well in the toaster oven for 4-5 days. For freezing, bake first, then freeze—reheat from frozen in the oven for best texture.
Why You’ll Love This Recipe
- Minimal Effort: Honestly, it’s just dredge, dip, coat, and bake—no fancy skills required.
- Crispy Perfection: That panko-parmesan crust gives it a golden crunch with every bite.
- Meal Prep Hero: I make a double batch and it reheats like a dream for lunches all week.
- Budget Stretcher: A few chicken breasts turn into a meal that feeds my family for less than takeout.
Step-by-Step Instructions for Crispy Parmesan Chicken Breast
Master the technique that created the viral sensation with this foolproof method.
Step 1: Prep and Season the Chicken
Place the 1.5 lb boneless skinless chicken breasts between two sheets of plastic wrap and pound them to an even ½-inch thickness using a meat mallet. This ensures even cooking and prevents dry spots.
Season both sides generously with the 1 tsp salt, 0.5 tsp black pepper, 0.5 tsp paprika, 1 tsp garlic powder, 1 tsp onion powder, and 1 tsp dried Italian seasoning. The paprika adds color while the seasoning blend builds depth of flavor.
Step 2: Create the Breading Station
Set up three shallow bowls. Place the 0.5 cup all-purpose flour in the first bowl. In the second bowl, beat the 2 whole large eggs until uniform. In the third bowl, combine the 1 cup panko breadcrumbs and 1 cup parmesan cheese.
Dredge each chicken breast in the flour, shaking off the excess. Then dip it in the beaten eggs, allowing any excess to drip off. Finally, press the chicken firmly into the panko-parmesan mixture, ensuring complete coverage. The parmesan melts beautifully, creating that signature crispy crust.
Step 3: Sear for Maximum Crispiness
Heat the 0.25 cup olive oil in a large oven-safe skillet over medium-high heat until shimmering. Carefully place the breaded chicken breasts in the pan and cook for 3-4 minutes per side until golden brown and crispy.
Resist the urge to move the chicken—let it develop a deep golden crust. You’ll know it’s ready to flip when the edges appear crispy and the chicken releases easily from the pan. This searing step is crucial for that viral-level crunch.
Step 4: Finish in the Oven
Preheat your oven to 375°F. After searing both sides, transfer the skillet to the preheated oven and bake for 10-12 minutes until the chicken reaches an internal temperature of 165°F.
Drizzle the 2 tbsp melted butter over the chicken during the last 2 minutes of baking. This adds richness and enhances the golden color. The butter also helps the parmesan crust achieve that irresistible, viral-worthy crispiness everyone raves about.
Pro Tips For Making Tik Tok Chicken Breast
- Pound the Breasts: Use a rolling pin or meat mallet to pound the chicken to an even ½-inch thickness—I learned this the hard way after too many dry, overcooked edges and underdone centers.
- Dry the Chicken: Pat the breasts completely dry with paper towels before dredging, or the flour won’t stick and you’ll end up with sad, patchy breading.
- Rest Before Frying: Let the breaded chicken rest for 5-10 minutes before frying so the coating sets—skip this and half your crust will stay in the pan.
- Add Cheese to Panko: Mix the grated Parmesan directly into the Panko before breading; it melts into the crust and adds way more flavor than dusting it on after.
Common Mistakes When Making This Dish
Skipping the Pounding
Uneven chicken breasts cook at different rates. I always pound to ½-inch thickness to prevent dry edges while the center finishes. Without this step, you risk a tough exterior and undercooked middle. 💡
Rushing the Breading
Press the panko-parmesan mixture firmly onto each breast. A light dusting won’t create that viral crispy crust. I use my palm to ensure every spot is coated, which takes 10-15 seconds per piece.
Overcrowding the Pan
Searing too many pieces at once lowers the oil temperature, causing soggy breading instead of crispy. Use a large oven-safe skillet and cook in batches if needed. You’ll know the oil is ready when it shimmers.
Flipping Too Soon
Let the chicken develop a deep golden crust before flipping. If it sticks when you try to turn it, give it another 30-60 seconds. The coating will release naturally when properly crisped.
Skipping the Butter
That final 2 tbsp melted butter drizzle is non-negotiable for maximum crispiness and color. I add it during the last 2 minutes of baking when the crust is already set but needs that extra richness.
Not Using a Thermometer
Guessing doneness leads to dry chicken. Always use a meat thermometer to confirm 165°F internal temperature. The thickest part of the breast is the best spot to check. ✨
Nutrition Facts
Frequently Asked Questions
Can I use regular breadcrumbs instead of panko?
Panko is ideal for that extra-crispy texture, but you can use regular breadcrumbs in a pinch. The crust won’t be as shattery. For best results, pulse regular breadcrumbs in a food processor to make them finer before mixing with parmesan.
Why does the chicken need to be pounded evenly?
Pounding to ½-inch thickness ensures even cooking throughout. Without this, thicker parts cook slower, risking dry edges while the center finishes. It also helps the coating adhere uniformly.
Can I bake this without searing first?
Searing is key for that golden, crispy crust. Skipping it results in less color and texture. If you must bake only, use 400°F and add 1-2 tbsp oil to the breading for better browning.
How do I keep the crust crispy when serving?
Serve immediately after baking while the parmesan is still bubbling. If making ahead, reheat in a 400°F oven for 5-8 minutes to restore crispiness. Avoid microwaving—it makes the crust soggy.

- Jollof Rice Sauce Recipe: West African Tomato and Spice Infusion - September 25, 2026
- Japanese Rice Soup Recipe: Umami-Rich Comfort in a Bowl - September 25, 2026
- Homemade Cream Of Rice Recipe: Silk-Smooth Breakfast in Minutes - September 25, 2026