
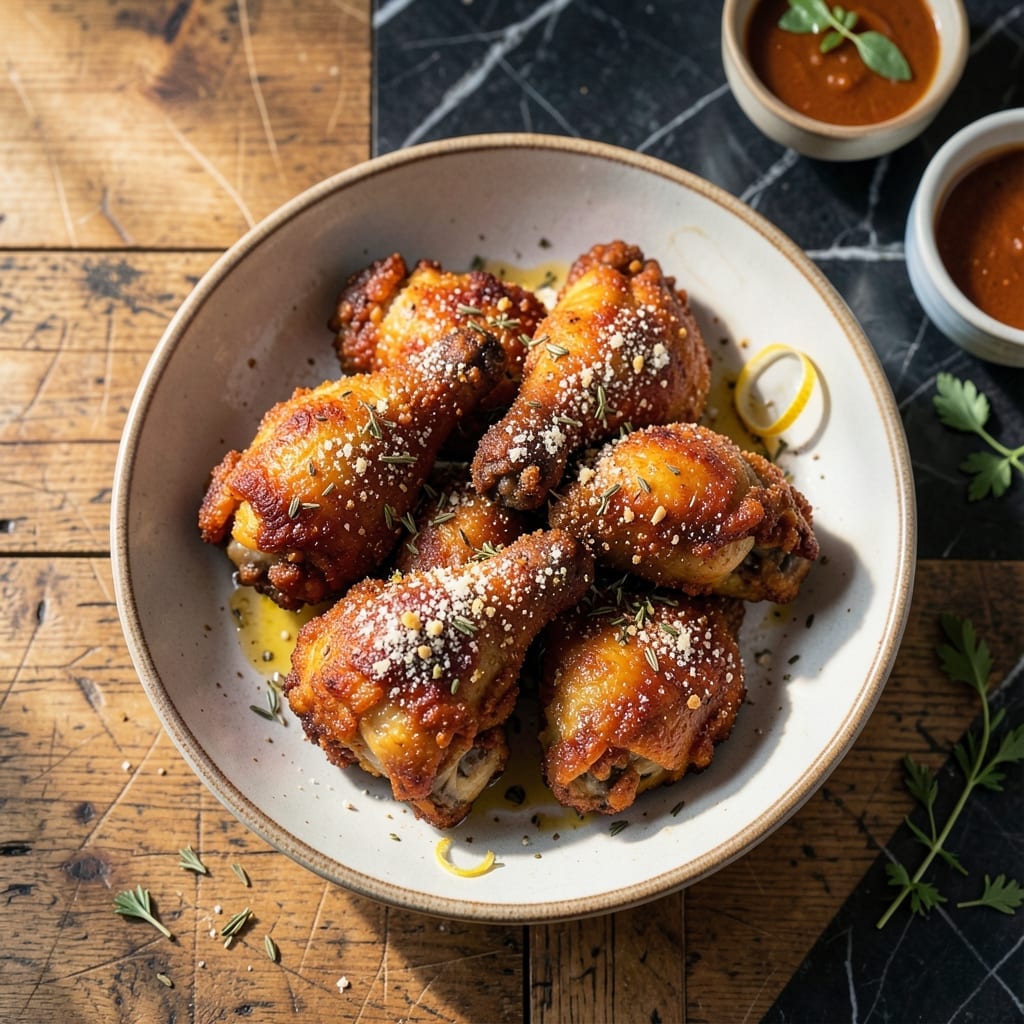
This recipe brings the authentic taste of Southern fried chicken to your kitchen with a perfectly spiced crust and juicy interior.
I’ve refined the technique over years of testing to ensure a crispy coating that stays golden even after resting. The key is a balanced spice blend and precise frying temperature.
The result is tender meat encased in a seasoned, shatteringly crispy shell that rivals any diner’s version. Each bite delivers that classic comfort food satisfaction.
Serve hot with your favorite sides for a meal that feels like home. Here’s how to achieve that classic Southern flavor.
Ingredients for Western Fried Chicken
Pantry staples meet a few fresh picks for that classic Southern taste.
| Ingredient | Amount | Notes |
|---|---|---|
| Chicken Thighs 🍗 | 2 lb | Bone-in, skin-on preferred |
| Buttermilk 🥛 | 2 cups | Full-fat for tenderness |
| All-Purpose Flour 🌾 | 2 cups | Plus extra for dredging |
| Cornstarch 🌽 | ½ cup | For extra crispiness |
| Paprika 🌶️ | 2 tbsp | Sweet or smoked variety |
| Garlic Powder 🧄 | 1 tbsp | Freshly ground preferred |
| Onion Powder 🧅 | 1 tbsp | Balances the spice blend |
| Salt 🧂 | 1 tbsp | Kosher or sea salt |
| Black Pepper 🌶️ | 1 tsp | Freshly ground for best flavor |
| Cayenne Pepper 🔥 | ½ tsp | Adjust for heat preference |
| Dried Thyme 🍃 | 1 tsp | Crushed between fingers |
| Dried Oregano 🍃 | 1 tsp | Mediterranean oregano preferred |
| Vegetable Oil 🫒 | 4 cups | For deep frying |
| Large Eggs 🥚 | 2 whole | For binding the coating |
The chicken thighs are non-negotiable here—bone-in, skin-on gives you the juiciest meat and crispiest crust. Costco has great packs, or hit your local butcher for pasture-raised. Buttermilk is the secret to tenderness; full-fat is worth the splurge (or make your own with milk and vinegar). The cornstarch in the dredge is what makes the coating shatteringly crispy.
No buttermilk? Milk with a tablespoon of vinegar works in a pinch. Swap paprika for smoked paprika if you want a deeper flavor. Short on spices? Cajun seasoning at half the amount covers most bases. The vegetable oil can be peanut or canola—just avoid olive oil (too low smoke point). Eggs help the coating stick, but a flax egg works if you’re out.
Fry up what you need and keep the rest in the fridge for 2-3 days. Leftovers reheat best in the oven—400°F for 10 minutes brings back the crisp. The spice mix keeps in a jar for 6 months (the good stuff, not the pre-shredded kind).
Why You’ll Love This Recipe
- One Bowl Wonder: I love that I can mix the flour, cornstarch, and paprika right in one bowl—no fancy prep, just dip and fry.
- Crispy Perfection: That buttermilk soak keeps the chicken thighs juicy while the cornstarch gives it an irresistible crunch.
- Crowd Pleaser: Honestly, it’s my go-to for potlucks, game nights, or just a weeknight dinner everyone devours.
- Budget Friendly: Chicken thighs are cheap, and a little flour goes a long way—leftovers taste just as good the next day.
Step-by-Step Instructions for Spice-Crusted Fried Chicken
Here’s the method I’ve perfected for achieving that iconic crispy, flavorful crust.
Step 1: Marinate the Chicken Thighs in Buttermilk
Place the 2 lb Chicken Thighs in a large bowl and pour the 2 cups Buttermilk over them. I crush the dried thyme between my fingers as I add it to release more flavor. Make sure each piece is fully submerged in the buttermilk.
Cover and refrigerate for at least 4 hours, or ideally overnight. This buttermilk soak does two things: it tenderizes the meat and helps the coating adhere. You’ll notice the chicken plumps up slightly as it absorbs the liquid.
Step 2: Prepare the Seasoned Dredging Mixture
In a large shallow dish, combine the 2 cups All-Purpose Flour, 0.5 cup Cornstarch, 2 tbsp Paprika, 1 tbsp Garlic Powder, 1 tbsp Onion Powder, 1 tbsp Salt, 1 tsp Black Pepper, 0.5 tsp Cayenne Pepper, and 1 tsp Dried Oregano. Whisk until thoroughly combined and no streaks remain.
The cornstarch is the secret to extra crispiness. I always use a shallow dish rather than a deep bowl—it makes dredging easier and more even. The mixture should smell fragrant and look evenly colored with no clumps.
Step 3: Create the Egg Wash and Dredge the Chicken
In a separate shallow dish, whisk the 2 whole Large Eggs until the yolks and whites are fully combined. Remove the chicken from the buttermilk, letting any excess drip off, then dip each piece in the egg wash. This creates a sticky surface for the flour mixture to cling to.
Press each piece firmly into the seasoned flour mixture, turning to coat completely. For extra crunch, I like to press the coating onto the chicken with my fingers. Place the dredged pieces on a wire rack set over a baking sheet.
Step 4: Fry to Golden Perfection
Heat the 4 cups Vegetable Oil in a deep, heavy pot to 350°F. Use a candy or deep-fry thermometer to monitor the temperature—it should stay between 340-360°F during frying. I always use a pot that’s at least 5 quarts to prevent overflow.
Working in batches to avoid crowding, carefully lower the chicken into the hot oil. Fry for 12-15 minutes, turning occasionally, until the coating is deep golden brown and the internal temperature reaches 165°F. The oil should be actively bubbling around each piece, but not smoking.
Step 5: Drain and Rest Before Serving
Transfer the fried chicken to a wire rack or paper towels to drain. Don’t stack the pieces—the steam will make the coating soggy. I like to sprinkle a little extra salt over the hot chicken right after frying to enhance the flavor.
Let the chicken rest for 5-10 minutes before serving. This allows the juices to redistribute and the coating to set. The result should be crispy on the outside, tender and juicy on the inside, with that perfect spice blend in every bite.
Pro Tips For Making Western Fried Chicken
- Double Fry for Crisp: Fry the chicken once at 325°F until cooked through, then rest it 5 minutes before frying again at 375°F for that shatteringly crisp crust—I learned this the hard way after too many soggy batches.
- Buttermilk Overnight: Soak the thighs in buttermilk for at least 12 hours, not just an hour. Sounds weird, but it works: the meat stays juicy and the coating sticks like it’s glued on.
- Skip Cold Chicken: Let the buttermilk-soaked thighs sit at room temp for 20 minutes before dredging. After burning three batches, I finally figured out cold chicken lowers the oil temp and makes greasy, sad crusts.
- Cornstarch Boost: Replace about 20% of the flour with cornstarch in your dredge. My grandmother swore by this, and she was right: it makes the coating lighter and crunchier without changing the flavor.
Make-Ahead Tips for western fried chicken
Overnight Marinating
For the juiciest results, I always marinate the chicken in buttermilk for at least 8 hours, or overnight. This extended soak ensures the meat stays tender and the coating adheres perfectly. Just cover the bowl tightly with plastic wrap before refrigerating. 💡
Prep the Dredge Ahead
Mix your seasoned flour and cornstarch the night before and store it in an airtight container. This saves time on frying day and lets the spices meld together. I use a mason jar for easy shaking and storage.
Breading Station Setup
Before frying, set up your breading station with 3 shallow dishes: one for buttermilk, one for egg wash, and one for the dredge. This keeps the process organized. I like to use pie plates for their wide surface area.
Preheat the Oil
Heat your vegetable oil to 350°F while you bread the chicken. Use a deep-fry thermometer to monitor the temperature—it should stay between 340-360°F. I recommend a heavy-bottomed pot for even heat distribution.
Keep Batches Warm
As you fry in batches, keep cooked pieces warm in a 200°F oven on a wire rack. This prevents sogginess while you finish the rest. Never stack the pieces—it traps steam and ruins the crispiness.
Rest Before Serving
Let your chicken rest for 5-10 minutes after frying. This allows the juices to redistribute and the coating to set. Serve immediately for the best texture. 🔥
Nutrition Facts
Frequently Asked Questions
What oil works best for frying?
Vegetable, peanut, or canola oil are ideal due to their high smoke points. Avoid olive oil as it burns at frying temperatures. Use enough to fully submerge the chicken for even cooking.
Can I bake instead of fry?
Yes, bake at 400°F for 25-30 minutes on a wire rack for crispiness. Flip halfway through. The texture won’t be identical but still delicious.
Why is my coating falling off?
This usually happens if the chicken wasn’t dry before dredging or the oil wasn’t hot enough. Pat pieces dry after marinating and ensure oil reaches 350°F before frying.
How do I keep it crispy after cooking?
Drain on a wire rack, not paper towels, to prevent steam buildup. Keep finished pieces warm in a 200°F oven until serving. Never cover or stack them.

- Jollof Rice Sauce Recipe: West African Tomato and Spice Infusion - September 25, 2026
- Japanese Rice Soup Recipe: Umami-Rich Comfort in a Bowl - September 25, 2026
- Homemade Cream Of Rice Recipe: Silk-Smooth Breakfast in Minutes - September 25, 2026