
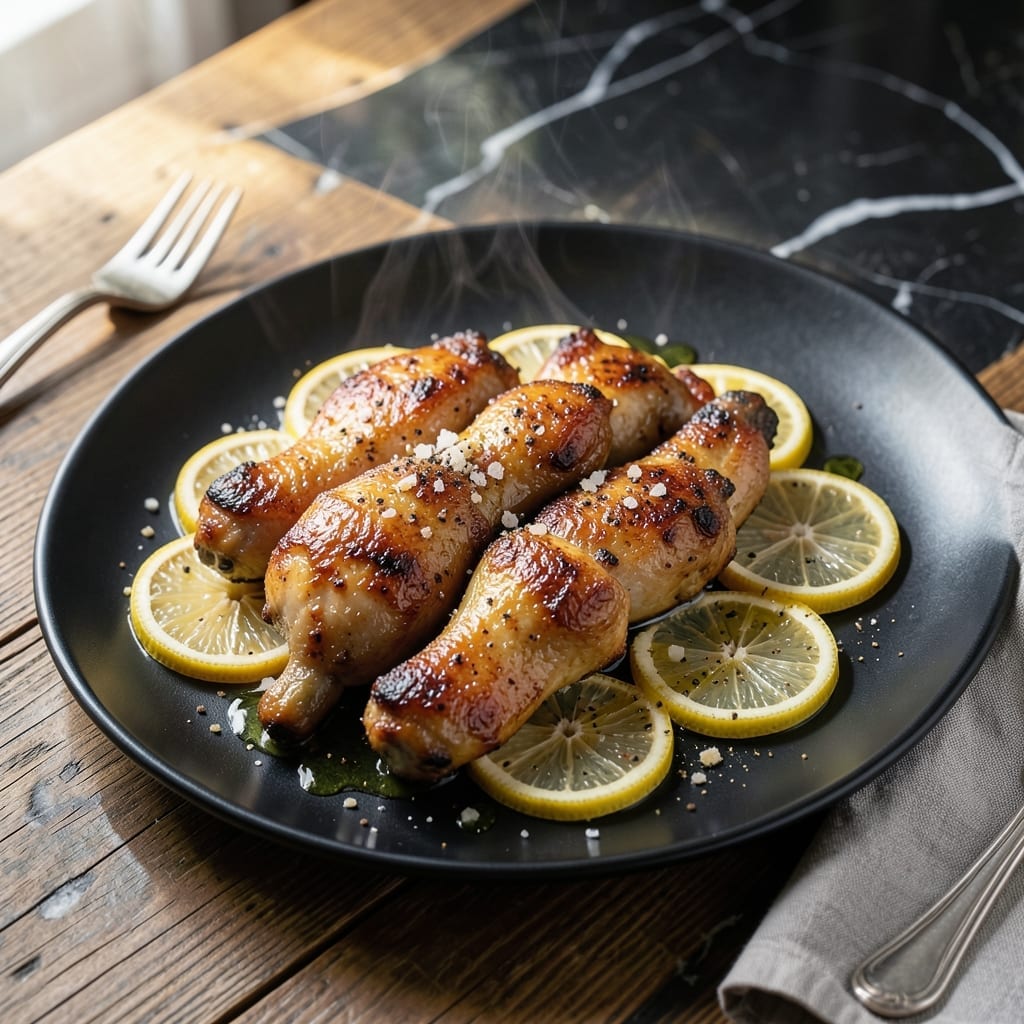
Achieving crispy skin on compliant chicken requires a precise method I’ve refined over years of professional cooking. The key is patience and proper heat management.
This approach uses simple ingredients and techniques that align with Whole30 guidelines while delivering restaurant-quality results. No special equipment is needed—just a reliable oven and a good cast iron skillet.
You’ll end up with chicken that’s golden and crispy on the outside, juicy and flavorful inside. The skin develops the perfect texture without any non-compliant additives.
Serve this as a main course with your favorite compliant sides. The method works with any cut of chicken you prefer.
Ingredients for Whole 30 Chicken
Simple, compliant ingredients deliver that perfect crispy skin and juicy flavor you crave.
| Ingredient | Amount | Notes |
|---|---|---|
| Chicken Thighs 🍗 | 2 lb | Bone-in, skin-on preferred |
| Olive Oil 🫒 | 2 tbsp | Extra-virgin, compliant brand |
| Sea Salt 🧂 | 1 ½ tsp | Coarse grain for texture |
| Black Pepper 🌶️ | 1 tsp | Freshly ground preferred |
| Garlic Powder 🧄 | 1 tsp | No additives or anti-caking agents |
| Onion Powder 🧅 | 1 tsp | Check for compliance label |
| Smoked Paprika 🌶️ | 1 tsp | Ensures depth of flavor |
| Dried Thyme 🍃 | ½ tsp | Rub between fingers to release aroma |
| Dried Rosemary 🌿 | ½ tsp | Crushed for better infusion |
| Lemon 🍋 | 1 whole | Zested and juiced |
| Fresh Parsley 🌿 | ¼ cup | Chopped, for garnish |
The chicken is everything here. Bone-in, skin-on thighs give you that crispy skin and stay juicy—avoid pre-brined or enhanced varieties (they often have additives). I grab mine from Whole Foods or Trader Joe’s for reliable quality. Look for organic or pasture-raised if your budget allows (the flavor difference is noticeable). For the olive oil, Primal Kitchen or Thrive Market brands are Whole30-approved and easy to find.
No chicken thighs? Drumsticks work too, but adjust cooking time since they’re leaner. Want more herb punch? Fresh rosemary and thyme at triple the dried amount. The lemon can be swapped for lime if that’s what you’ve got. For the spices, check labels for additives—many store brands add sugar or fillers. If you’re out of garlic powder, fresh minced garlic at half the amount works in a pinch (just sauté it first).
Store chicken in the fridge for up to 4 days or freeze for 3 months. The spices keep forever in a cool, dark place. Once cooked, leftovers stay fresh for 4-5 days—reheat in the oven to keep the skin crispy.
Why You’ll Love This Recipe
- One Pan Wonder: I toss the thighs with olive oil and spices, roast, and clean up is just a quick wipe of the sheet pan.
- Crave-Worthy Crisp: The garlic powder and sea salt make the skin so flavorful I sneak bites straight from the oven.
- Meal Prep MVP: I make a double batch on Sunday and we’ve got protein ready for salads and bowls all week.
- Budget Friendly: Chicken thighs stay cheap, and this recipe needs just pantry staples I always have on hand.
Step-by-Step Instructions for Crispy Whole 30 Chicken Thighs
Here’s how I get perfectly crispy skin and juicy meat with compliant ingredients.
Step 1: Season the Chicken Thighs Thoroughly
Pat the 2 lb Chicken Thighs completely dry with paper towels. I can’t stress this enough—moisture prevents crispiness. Pay special attention to the skin side; you want it bone-dry before seasoning.
In a small bowl, combine the 1.5 tsp Sea Salt, 1 tsp Black Pepper, 1 tsp Garlic Powder, 1 tsp Onion Powder, 1 tsp Smoked Paprika, 0.5 tsp Dried Thyme, and 0.5 tsp Dried Rosemary. I rub this blend between my fingers to release the aromatic oils before sprinkling it evenly over all sides of the chicken.
Step 2: Sear the Chicken for Maximum Crisp
Heat the 2 tbsp Olive Oil in a large cast iron skillet over medium-high heat until it shimmers. Place the chicken thighs skin-side down in the hot oil. Don’t crowd the pan—if your skillet isn’t large enough, cook in batches. Crowding steams the chicken instead of searing it.
Let the chicken cook undisturbed for 6-8 minutes until the skin turns deep golden brown and crispy. You’ll know it’s ready to flip when it releases easily from the pan. Resist the urge to peek or move the pieces around; this ensures even browning.
Step 3: Finish Cooking and Add Citrus
Flip the chicken thighs and cook for another 6-8 minutes on the other side. While they finish cooking, zest the 1 whole Lemon directly over the skillet, then cut it in half and squeeze the juice over the chicken. The acid brightens all the flavors and cuts through the richness.
The chicken is done when it reaches an internal temperature of 165°F and the juices run clear. I always check the thickest piece to be sure. Transfer the chicken to a plate and let it rest for 5 minutes—this allows the juices to redistribute.
Step 4: Garnish and Serve Immediately
Just before serving, sprinkle the chopped 0.25 cup Fresh Parsley over the chicken. The parsley adds a pop of color and freshness that complements the rich, smoky flavors. I like to serve this with the pan juices spooned over the top.
This dish is best served immediately while the skin is still crispy. The contrast between the crunchy exterior and tender interior is what makes it special. Each bite should deliver bold, well-balanced flavors with that satisfying crisp texture we promised.
Pro Tips For Making Whole 30 Chicken
- Pat Dry First: I learned this the hard way—skip this and your chicken will steam instead of sear. Press the thighs between paper towels until they’re bone-dry before they hit the pan.
- Hot Pan, No Crowd: Crank the heat to medium-high and give each thigh its own space in the pan. After burning three batches, I finally figured out that crowding drops the temp and makes soggy skin.
- Season Twice: Hit the thighs with salt, pepper, and garlic powder before cooking, then again right after flipping. Sounds weird, but it works—way more flavor than a single dusting.
- Rest Under Foil: Pull the chicken at 165°F and tent it loosely with foil for 5-10 minutes. My grandmother swore by this, and she was right: the juices redistribute and the meat stays moist.
Storing and Reheating This Dish
Refrigerator Storage
Let your chicken cool for no more than 2 hours before transferring to airtight containers. I use glass containers with snap-tight lids to keep the skin crisp. Store in the fridge at 40°F or below for up to 4 days. The flavors deepen overnight, making leftovers even more delicious. ❄️
Freezer Storage
For longer storage, wrap each piece tightly in parchment paper, then place in a freezer bag. Squeeze out all air to prevent freezer burn. This method keeps your chicken fresh for up to 3 months without losing texture or flavor.
Oven Reheating
To maintain that crispy skin, preheat your oven to 375°F. Place the chicken on a wire rack set over a baking sheet and reheat for 10-12 minutes. This allows air to circulate, keeping the skin from getting soggy. I always check the internal temp reaches 165°F before serving. 🔥
Stovetop Reheating
For quicker reheating, use a skillet over medium-low heat. Add the chicken skin-side down and cover for 5-6 minutes. Add a splash of water or compliant broth to create steam, which helps keep the meat moist while crisping the skin.
Microwave Option
In a pinch, microwave individual pieces on 70% power for 1-2 minutes, but place a paper towel under and over the chicken to absorb moisture. The skin won’t be as crispy, but it’s the fastest method when you’re short on time.
Nutrition Facts
Frequently Asked Questions
Can I use chicken breasts instead of thighs?
Yes, but they cook faster and can dry out. Reduce cooking time to 5-6 minutes per side and use a meat thermometer to avoid overcooking. Thighs are preferred for their juiciness and crispy skin.
Why do I need to pat the chicken dry?
Moisture prevents crispiness. Dry skin ensures even browning and that satisfying crunch. This step is non-negotiable for perfect results every time.
What if I don’t have cast iron?
Use a heavy-bottomed oven-safe skillet or stainless steel pan. Avoid non-stick as it doesn’t get hot enough for proper searing. The key is even heat distribution.
How can I make this spicier?
Add 1/2 tsp cayenne pepper or 1 tsp crushed red pepper flakes to the seasoning mix. For extra heat, serve with compliant hot sauce.

- Jollof Rice Sauce Recipe: West African Tomato and Spice Infusion - September 25, 2026
- Japanese Rice Soup Recipe: Umami-Rich Comfort in a Bowl - September 25, 2026
- Homemade Cream Of Rice Recipe: Silk-Smooth Breakfast in Minutes - September 25, 2026