
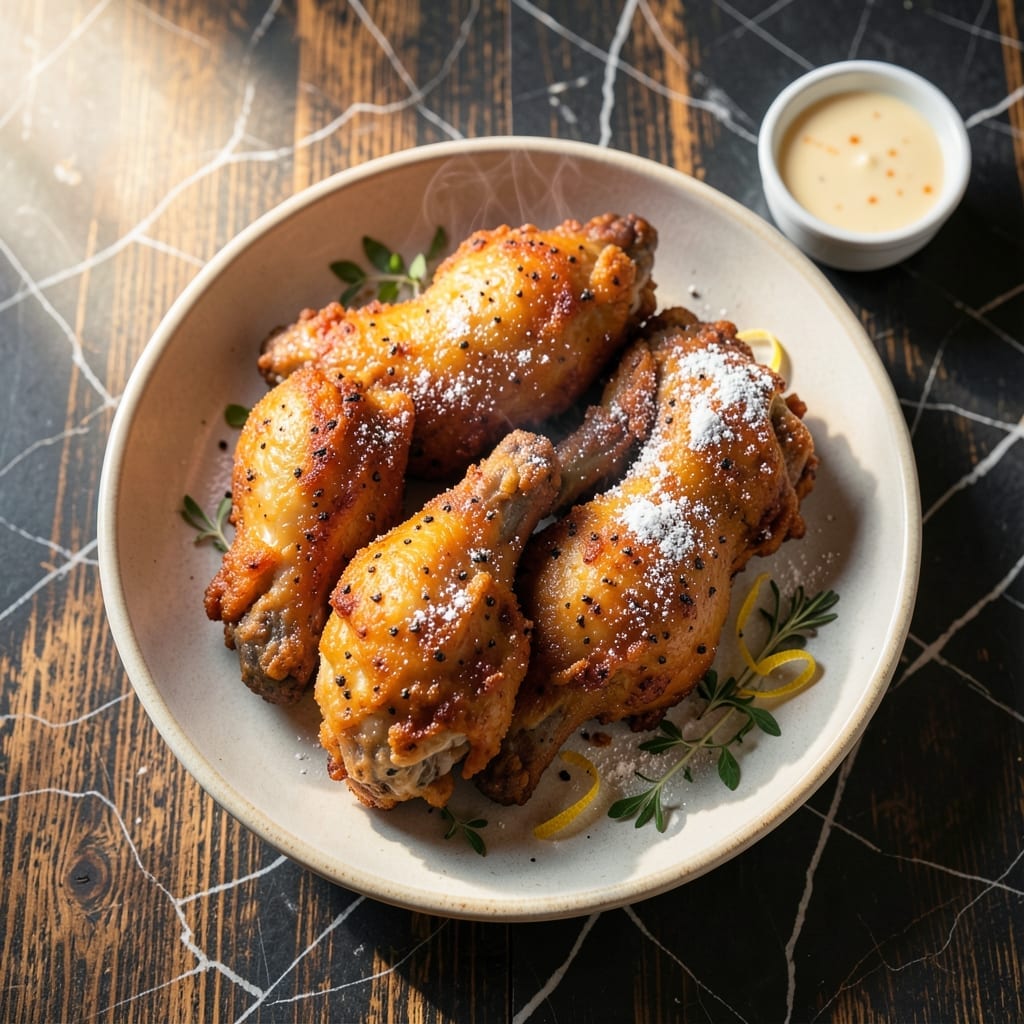
This recipe reveals the secret to achieving that signature crispy supermarket-style fried chicken at home. I developed this method after years of perfecting my fried chicken technique, drawing from my Georgia roots and professional kitchen experience.
The key is a buttermilk marinade that tenderizes the chicken while a double-dredge in seasoned flour creates an extra crispy coating. I use a precise temperature-controlled frying method to ensure even cooking without burning the delicate crust.
What emerges is golden, shatteringly crispy chicken with juicy meat inside. The coating stays intact even when stacked high, just like Winco’s famous version. The seasoning blend delivers that familiar savory kick with every bite.
Serve hot for maximum crunch. This method delivers consistent results every time.
Ingredients for Winco Fried Chicken
These quality ingredients deliver that signature crispy supermarket-style coating with juicy meat inside.
| Ingredient | Amount | Notes |
|---|---|---|
| Chicken Thighs 🍗 | 2 ½ lb | Boneless, skin-on for crispiness |
| Buttermilk 🥛 | 2 cups | Full-fat for tenderizing power |
| All-Purpose Flour 🌾 | 3 cups | Divided for double-dredging |
| Cornstarch 🌽 | ½ cup | For extra crisp coating |
| Kosher Salt 🧂 | 1 tbsp | Diamond Crystal preferred |
| Black Pepper 🌶️ | 1 tbsp | Freshly ground for best flavor |
| Paprika 🌶️ | 2 tsp | Sweet variety for color |
| Garlic Powder 🧄 | 2 tsp | Not garlic salt |
| Onion Powder 🧅 | 2 tsp | Fine grind preferred |
| Cayenne Pepper 🔥 | ½ tsp | Adjust for heat preference |
| Vegetable Oil 🫒 | 8 cups | For deep frying, neutral flavor |
| Large Eggs 🥚 | 2 whole | For binding dredge |
| Hot Sauce 🌶️ | 1 tbsp | Optional for marinade kick |
The chicken is everything here. Thighs stay juicier than breasts during frying—skin-on is non-negotiable for that shatteringly crisp texture. I source mine from local butchers or Whole Foods for consistent quality. Buttermilk should be full-fat; reduced-fat versions lack the acidity needed to properly tenderize the meat. For the flour, Softasilk or White Lily (Southern brands) give that authentic crumb.
No buttermilk? Whole milk with 1 tbsp vinegar per cup works in a pinch. Out of cornstarch? Instant flour like Wondra can substitute at a 1:1 ratio. The seasoning blend is flexible—swap smoked paprika for regular if you prefer depth. For oil, peanut or canola are excellent alternatives to vegetable. Skip the hot sauce if you prefer milder flavor, but it does add that signature tang.
Marinated chicken keeps 2 days in the fridge. Once fried, it stays crispy for 1 hour at room temperature—best served immediately. Leftovers? Reheat in a 400°F oven for 10-15 minutes to revive the crust. Never microwave fried chicken; it’ll lose all crispiness.
Why You’ll Love This Recipe
- One Bowl Magic: I just dump the buttermilk, flour, and cornstarch in one bowl—no fancy prep, no extra dishes.
- That Crispy Bite: The cornstarch makes the crust so crispy it cracks when you bite in, while the buttermilk keeps the thighs juicy inside.
- Feeds My Crew: I make a double batch on Sunday and we’re set for lunches all week—cold or reheated, it’s still good.
- Thrifty Comfort: Chicken thighs are cheap, and a little flour and cornstarch go a long way for a meal that feels indulgent.
Step-by-Step Instructions for Extra Crispy Fried Chicken
Master the technique for shatteringly crisp, golden-brown chicken with a juicy interior every time.
Step 1: Marinate the Chicken Thighs in Buttermilk
Combine the 2.5 lb chicken thighs with 2 cups buttermilk and 1 tbsp hot sauce in a large bowl. Ensure each piece is fully submerged in the marinade. The buttermilk’s acidity tenderizes the meat while the hot sauce adds a subtle kick.
Cover and refrigerate for at least 4 hours, or preferably overnight. This extended marination time allows the flavors to penetrate deeply and guarantees maximum tenderness. The longer the chicken soaks, the more flavorful and juicy your final product will be.
Step 2: Prepare the Double-Dredge Breading
In a large shallow dish, whisk together 3 cups all-purpose flour, 0.5 cup cornstarch, 1 tbsp kosher salt, 1 tbsp black pepper, 2 tsp paprika, 2 tsp garlic powder, 2 tsp onion powder, and 0.5 tsp cayenne pepper. The cornstarch is the secret to that extra-crispy coating.
In a separate bowl, beat the 2 whole large eggs with 1 tablespoon of the reserved buttermilk from the marinade. This egg wash will help the breading adhere to the chicken, creating that essential crunch.
Step 3: Bread the Chicken with Precision
Remove the chicken thighs from the marinade, allowing excess buttermilk to drip off. Dredge each piece in the flour mixture, pressing firmly to ensure an even, thick coating. Shake off any excess, then dip into the egg wash, letting it drip for a moment before returning to the flour mixture for a second coating.
Place the breaded chicken on a wire rack set over a baking sheet. Let it rest for 10-15 minutes while you heat the oil. This rest period helps the coating set, preventing it from falling off during frying and creating a sturdier crust.
Step 4: Fry to Golden Perfection
In a large, heavy-bottomed pot or Dutch oven, heat 8 cups vegetable oil to 350°F. Use a deep-fry thermometer for accuracy—maintaining the correct temperature is crucial for even cooking and that signature crispness.
Working in batches to avoid overcrowding, carefully lower the chicken into the hot oil. Fry for 12-15 minutes, turning occasionally, until the coating is deep golden brown and the internal temperature reaches 165°F. The chicken should sizzle steadily; if it’s too quiet, your oil isn’t hot enough.
Step 5: Drain and Rest Before Serving
Transfer the fried chicken to a wire rack set over a baking sheet or to paper towels to drain. Avoid stacking the pieces, as this can cause steam to build up and make the coating soggy. The wire rack allows air to circulate around each piece, preserving that coveted crispness.
Let the chicken rest for 5-10 minutes before serving. This brief rest allows the juices to redistribute, ensuring each bite is moist and flavorful. Serve immediately while still hot and crispy for the best possible experience.
Pro Tips For Making Winco Fried Chicken
- Double-Dredge the Thighs: Dip the chicken in buttermilk, then flour, then back in buttermilk and flour again—I learned this the hard way after my first batch had a sad, patchy crust.
- Heat the Oil Right: Use a thermometer and keep the oil at 350°F. After burning three batches, I finally figured out that guessing the temperature just doesn’t cut it.
- Rest Before Frying: Let the dredged chicken rest for 10 minutes before frying so the coating adheres better. My grandmother swore by this, and she was right.
- Add Cornstarch: Mix in ¼ cup cornstarch with the flour for an extra-crispy crust. Sounds weird, but it works.
Flavor Customization for This winco fried chicken
Spicy Nashville Hot
Add 1 tbsp cayenne pepper and 1 tsp brown sugar to your flour mix for a fiery kick. After frying, drizzle with 2 tbsp hot oil mixed with 1 tbsp cayenne and 1 tsp honey for that signature Nashville shine. I learned this trick from a pitmaster in Charleston. 🔥
Herb-Infused Crust
Stir 1 tbsp dried thyme and 1 tbsp dried rosemary into your dredge for an aromatic twist. The herbs crisp up beautifully in the oil. I crush them between my palms to release more flavor.
Sweet Heat Glaze
Mix ¼ cup honey with 1 tbsp sriracha and brush onto fried chicken. The sweet-spicy contrast is addictive. I use Savannah Bee Company honey for its bold floral notes.
Smoky BBQ Style
Replace 1 tsp paprika with smoked paprika in your dredge. After frying, toss with 2 tbsp BBQ dry rub. This gives that Georgia backyard cookout vibe.
Lemon Pepper Zing
Add zest of 1 lemon and 1 tbsp cracked black pepper to your flour. The citrus brightens the richness. I always use fresh lemon zest for maximum aroma.
Cajun Blackened
Swap your seasoning blend for 2 tbsp Cajun seasoning. Use Tony Chachere’s if you want authentic Louisiana flavor. The spice mix adds depth without overpowering.
Nutrition Facts
Frequently Asked Questions
Can I use chicken breasts instead of thighs?
Yes, but thighs stay juicier during frying. If using breasts, reduce cooking time to 10-12 minutes to prevent dryness. Brining for 1 hour beforehand helps maintain moisture.
Why does the coating sometimes fall off?
This usually happens from insufficient resting time after breading. Let the coated chicken rest for 10-15 minutes before frying to help the crust adhere properly. Also, avoid overcrowding the fryer.
How do I keep the chicken crispy after frying?
Place fried pieces on a wire rack, not paper towels. This allows air circulation to prevent steam buildup. Serve within 1 hour for maximum crispiness. Reheat in a 400°F oven if needed.

- Jollof Rice Sauce Recipe: West African Tomato and Spice Infusion - September 25, 2026
- Japanese Rice Soup Recipe: Umami-Rich Comfort in a Bowl - September 25, 2026
- Homemade Cream Of Rice Recipe: Silk-Smooth Breakfast in Minutes - September 25, 2026