
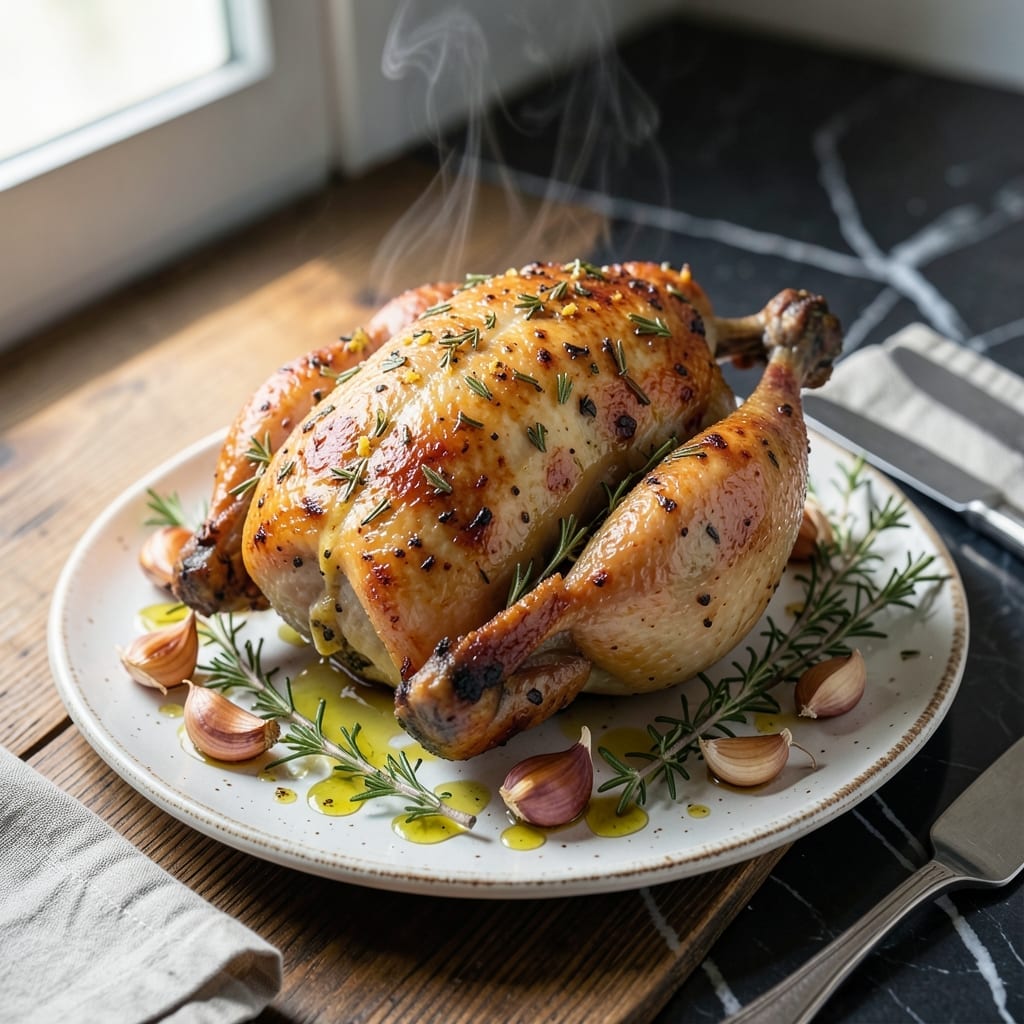
This recipe transforms young chicken into a succulent spring centerpiece worthy of any dinner table. The secret lies in a simple herb butter that infuses every bite with aromatic richness.
I developed this method to highlight the natural tenderness of young chicken, using a high-heat sear followed by gentle roasting. The herb butter bastes the bird as it cooks, creating golden skin and moist meat.
What emerges from the oven is perfectly cooked chicken with crispy skin and juicy flesh, all kissed with fragrant herbs. The pan juices become an instant sauce for serving.
Serve with seasonal vegetables for a complete meal that feels special but requires minimal effort. This is spring cooking at its finest.
Ingredients for Young Chicken
A whole bird plus simple herbs and butter create this elegant spring centerpiece.
| Ingredient | Amount | Notes |
|---|---|---|
| Young Chicken 🍗 | 4 lb | Whole, patted dry thoroughly |
| Unsalted Butter 🧈 | ½ cup | Softened at room temperature |
| Fresh Thyme 🌿 | 2 tbsp | Leaves stripped from stems |
| Fresh Rosemary 🌿 | 2 tbsp | Finely chopped for even distribution |
| Garlic Cloves 🧄 | 4 cloves | Minced for maximum flavor infusion |
| Lemon Zest 🍋 | 1 tbsp | From 1 medium lemon |
| Lemon Juice 🍋 | 2 tbsp | Freshly squeezed from same lemon |
| Olive Oil 🫒 | 2 tbsp | High smoke point variety for searing |
| Kosher Salt 🧂 | 1 ½ tsp | Diamond Crystal or Morton preferred |
| Black Pepper 🌶️ | 1 tsp | Freshly ground for best flavor |
| All-Purpose Flour 🌾 | ¼ cup | For dredging to create crispy skin |
| Chicken Stock 🍲 | ½ cup | Low-sodium preferred for control |
The chicken quality is non-negotiable here. Young chicken (4-5 lbs) gives you the tenderness this recipe demands—older birds get tough. Look for air-chilled birds at Whole Foods or local butchers; they’re more expensive but the skin crisps better. If your grocery store only has pre-packaged, check the date—fresher is always better. Pat it dry (the good stuff, not the pre-shredded kind).
No fresh herbs? Dried at one-third the amount works in a pinch, but fresh makes all the difference. Thyme and rosemary are the stars—don’t swap them. Out of lemon? White wine vinegar can sub for the juice, but you’ll miss that bright citrus note. The butter must be unsalted so you control the seasoning. For the olive oil, any neutral oil (like avocado) can replace it for searing.
Herb butter can be made 1 day ahead and refrigerated. The chicken itself? Cook and serve immediately for best texture. Leftovers keep 3-4 days in the fridge and reheat gently in chicken stock to prevent drying out.
Why You’ll Love This Recipe
- One Pan Wonder: I toss everything in a single dish—chicken, butter, garlic, and herbs—and let the oven do the work.
- Herb-Butter Magic: The thyme and rosemary melt into the butter, coating every bite with rich, fragrant flavor.
- Weeknight Hero: Honestly, it’s my go-to for busy evenings when I need something hearty without fuss.
- Leftovers King: The chicken tastes even better the next day, and it stretches for sandwiches or salads.
Step-by-Step Instructions for Young Chicken With Herb Butter
This method ensures perfectly crisp skin and moist meat with a fragrant herb crust.
Step 1: Prepare and Season the Chicken
Pat the 4 lb Young Chicken completely dry inside and out with paper towels. I can’t stress this enough—moisture prevents crispy skin. Season the cavity and exterior generously with 1.5 tsp Kosher Salt and 1 tsp Black Pepper.
In a small bowl, mix the 0.5 cup Unsalted Butter with 2 tbsp Fresh Thyme, 2 tbsp Fresh Rosemary, 4 cloves Garlic Cloves, 1 tbsp Lemon Zest, and 2 tbsp Lemon Juice. This herb butter will infuse the meat with vibrant spring flavors.
Step 2: Create a Crispy Skin Barrier
Dust the chicken lightly with 0.25 cup All-Purpose Flour, shaking off any excess. The flour creates a thin barrier that helps render fat and crisp the skin beautifully. This step might seem unusual, but it’s the secret to that perfect golden finish.
Gently loosen the skin over the breast and thighs, then spread about half the herb butter mixture underneath. This ensures the meat stays juicy while the skin crisps. Rub the remaining herb butter over the outside of the chicken, coating it evenly.
Step 3: Sear for Golden Color
Heat 2 tbsp Olive Oil in a large oven-safe skillet or Dutch oven over medium-high heat. When the oil shimmers, place the chicken breast-side down in the pan. Sear undisturbed for 5-7 minutes until the skin turns deep golden brown.
Flip the chicken and sear the other side for 3-4 minutes. The skin should release easily when it’s ready to turn—if it sticks, let it develop that perfect crust a bit longer.
Step 4: Roast to Perfection
Transfer the skillet to a preheated 375°F oven. Roast for 45-60 minutes, basting occasionally with the pan juices. You’ll know it’s done when the internal temperature reaches 165°F in the thickest part of the thigh.
If the skin begins to darken too quickly, tent loosely with foil. The juices should run clear when you pierce the thigh, and the skin should be crisp and mahogany-colored.
Step 5: Rest and Serve with Pan Sauce
Transfer the chicken to a cutting board and let it rest for 15 minutes. This allows the juices to redistribute for maximum tenderness. Meanwhile, place the skillet on the stovetop over medium heat.
Add 0.5 cup Chicken Stock to the skillet and simmer for 3-4 minutes, scraping up all the browned bits. Strain if desired, then serve this flavorful pan sauce alongside the carved chicken. Each bite will deliver crispy skin, tender meat, and the bright, herby notes of spring.
Pro Tips For Making Young Chicken
- Dry the Chicken: Pat the young chicken completely dry with paper towels before seasoning—this guarantees a golden, crispy skin instead of a steamed, soggy one. I learned this the hard way after serving pale, rubbery skin to dinner guests. —
- Brown the Butter: Melt the unsalted butter over medium heat until it turns nutty and golden, about 3-4 minutes. Sounds weird, but it works: this adds a deep, rich flavor that raw butter just can’t match. —
- Don’t Crowd the Pan: If searing, give each piece of chicken at least an inch of space in the pan. Steer clear of overcrowding—it drops the temperature and boils the chicken instead of browning it. —
- Crush the Garlic: Lightly crush the garlic cloves with the side of your knife before adding them—this releases more aroma without the bitterness of mincing. My grandmother swore by this, and she was right.
Essential Equipment for Great young chicken
Oven-Safe Skillet
An oven-safe skillet is non-negotiable for this recipe. I swear by my 12-inch Lodge cast iron—it sears beautifully on the stovetop and transitions seamlessly to the oven. A heavy stainless steel skillet works too, but avoid nonstick as it can’t handle the high heat needed for crispy skin.
Instant-Read Thermometer
Don’t guess when your chicken is done. A digital instant-read thermometer gives you precision—I use ThermoWorks ThermoPop. Insert it into the thickest part of the thigh (avoiding bone) and pull the bird at 165°F. This takes the stress out of cooking poultry perfectly every time. 🌡️
Quality Mixing Bowls
For the herb butter, a medium mixing bowl (about 2-3 cups capacity) gives you enough room to work. I prefer stainless steel for easy cleanup, but any bowl will do. The key is having enough space to thoroughly combine all ingredients without spilling.
Tongs and Wooden Spoon
12-inch locking tongs help you flip the chicken safely in the hot skillet. A wooden spoon is perfect for basting and scraping up those flavorful browned bits. These basic tools make handling the bird and creating the pan sauce much easier.
Basting Brush
A silicone basting brush stands up to high heat and won’t melt like plastic versions. Use it to spread the herb butter under the skin and baste during roasting. I keep mine dedicated to poultry to avoid flavor transfer between dishes.
Resting Surface
After cooking, transfer your bird to a large cutting board or platter. A grooved board catches juices, preventing them from pooling on your counter. Let the chicken rest 15 minutes before carving to retain all those precious juices. 💛
Nutrition Facts
Frequently Asked Questions
What’s the best way to ensure crispy skin?
Pat the bird completely dry before seasoning. The flour dredge and high-heat sear create the perfect crust. Baste with pan juices while roasting for extra crispiness.
Can I use dried herbs instead of fresh?
Yes, but use 1/3 the amount. Fresh herbs deliver brighter flavor, but dried work in a pinch. Rub them between your fingers to release more aroma.
How do I know when it’s fully cooked?
Use a thermometer—165°F in the thickest part of the thigh. Juices should run clear, and the skin should be deep golden-brown.
Can I make the herb butter ahead?
Prepare it 1 day ahead and refrigerate. Let it soften slightly before spreading under the skin for easier application.

- Jollof Rice Sauce Recipe: West African Tomato and Spice Infusion - September 25, 2026
- Japanese Rice Soup Recipe: Umami-Rich Comfort in a Bowl - September 25, 2026
- Homemade Cream Of Rice Recipe: Silk-Smooth Breakfast in Minutes - September 25, 2026