
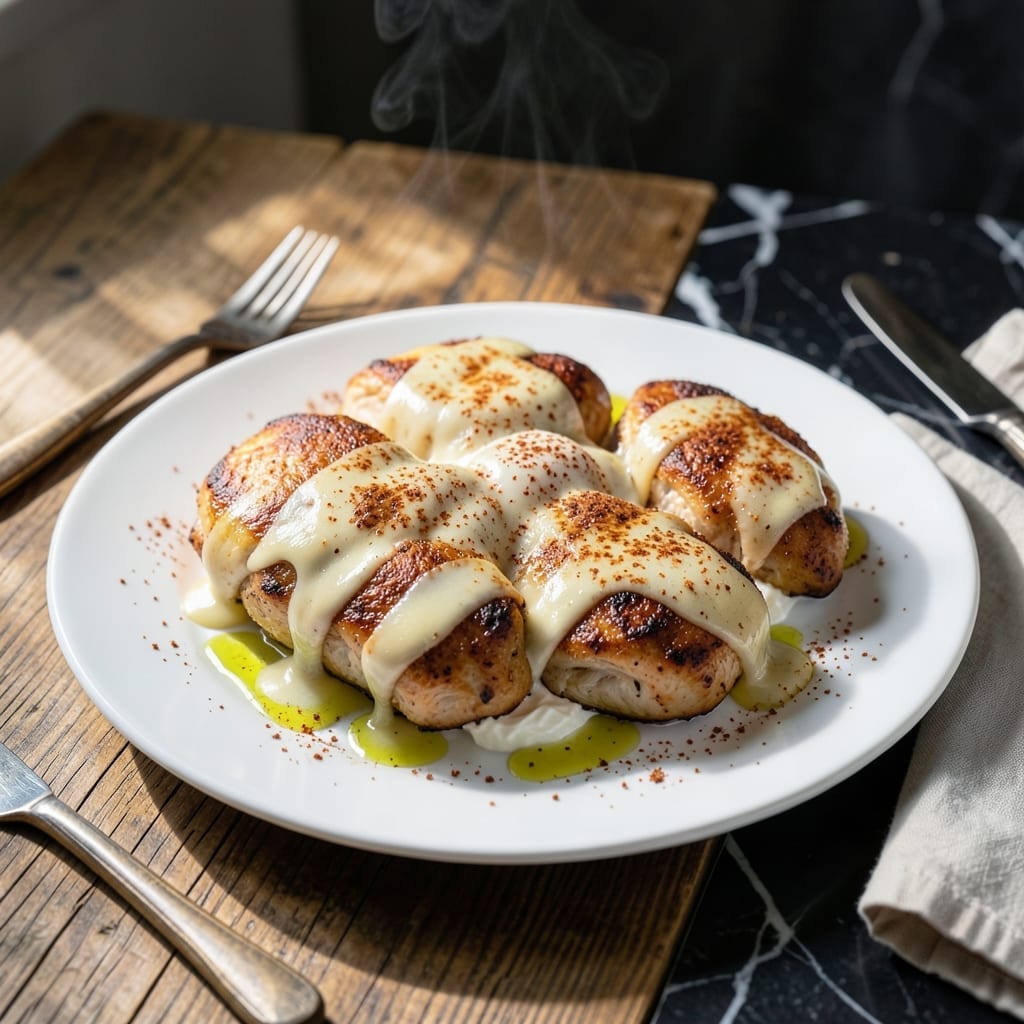
This firehouse favorite brings bold, smoky flavors to your dinner table without the fuss. A proven technique transforms simple chicken into a cheese-stuffed masterpiece that’s impossible to resist.
The secret lies in layering smoked cheese between tender chicken breasts, then searing until golden. The result is a dish with a crispy exterior and a gooey, melty center that’s both hearty and satisfying.
With just a handful of ingredients and straightforward steps, this recipe delivers restaurant-quality taste at home. The smoky undertones pair perfectly with the creamy cheese, creating a balance that’s hard to beat.
Serve it hot for a meal that’s sure to impress, whether it’s a weeknight dinner or a special occasion. Here’s how to make it right.
Ingredients for Fireman’s Chicken
Transform simple chicken breasts into this smoky, cheese-stuffed masterpiece with bold flavors.
| Ingredient | Amount | Notes |
|---|---|---|
| Boneless Skinless Chicken Breasts 🍗 | 4 whole | Pounded to even thickness |
| Smoked Gouda Cheese 🧀 | 8 oz | Sliced into thin strips |
| Cream Cheese 🧀 | 4 oz | Softened to room temperature |
| All-Purpose Flour 🌾 | ½ cup | For dredging chicken |
| Smoked Paprika 🌶️ | 1 tbsp | For smoky depth |
| Garlic Powder 🧄 | 1 tsp | Evenly distributed |
| Onion Powder 🧅 | 1 tsp | For balanced seasoning |
| Salt 🧂 | 1 tsp | Kosher or sea salt |
| Black Pepper 🌶️ | ½ tsp | Freshly ground preferred |
| Olive Oil 🫒 | 2 tbsp | For searing chicken |
| Butter 🧈 | 2 tbsp | Unsalted for controlled seasoning |
| Chicken Broth 🍲 | ½ cup | Low-sodium preferred |
| Fresh Parsley 🌿 | 2 tbsp | Chopped, for garnish |
The smoked Gouda is non-negotiable here—it delivers that signature firehouse depth. Boar’s Head or Applegate brands offer consistent quality, and most Whole Foods locations carry excellent pre-sliced options. The chicken breasts must be pounded to an even ½-inch thickness; otherwise, they won’t cook uniformly. Always opt for air-chilled chicken when available for superior texture and moisture retention.
No smoked Gouda? Pepper Jack with a pinch of liquid smoke (¼ tsp per breast) approximates the flavor. Cream cheese can be swapped for goat cheese if you prefer a tangier profile. The smoked paprika is irreplaceable for that authentic smokiness, but regular paprika plus ½ tsp chipotle powder works in a pinch. Fresh parsley can be omitted, though it adds a bright contrast to the rich filling.
Assemble the dish just before cooking to prevent sogginess. Leftovers keep in the fridge for 3 days—reheat gently in a skillet to maintain crispness. The filling mixture (cheeses + seasonings) can be prepped 1 day ahead and refrigerated, but the chicken should be stuffed and cooked immediately for optimal texture.
Why You’ll Love This Recipe
- I’ll be real: the flavors taste even better the next day, if they last that long.
- One Pan Dinner: I love that everything cooks together in one skillet—chicken, cheese, and all.
- Smoky Goodness: The smoked gouda and paprika give it this deep, rich flavor that’s honestly hard to beat.
- Feeds the Crew: Between us, this is my go-to when I need to feed a hungry group without fuss.
Step-by-Step Instructions for Fireman’s Chicken
This method ensures perfectly cooked, smoky, cheese-filled chicken with a golden crust.
Step 1: Prepare and Stuff the Chicken Breasts
Begin by pounding the 4 whole boneless skinless chicken breasts to an even ½-inch thickness using a meat mallet. This ensures uniform cooking and prevents dryness. Season both sides with 1 tsp salt, 0.5 tsp black pepper, 1 tsp garlic powder, and 1 tsp onion powder.
In a small bowl, combine the 8 oz smoked gouda cheese (sliced into thin strips) with the 4 oz cream cheese. Cut a pocket into the thickest part of each breast and stuff generously with the cheese mixture. Secure the opening with toothpicks if necessary.
Step 2: Dredge and Sear the Chicken
Mix the 0.5 cup all-purpose flour with 1 tbsp smoked paprika on a shallow plate. Lightly dredge each stuffed chicken breast, shaking off any excess. This creates a flavorful crust and helps the chicken brown evenly.
Heat 2 tbsp olive oil and 2 tbsp butter in a large oven-safe skillet over medium-high heat. Once the butter stops foaming, add the chicken and sear for 4-5 minutes per side until the coating is golden brown and the chicken releases easily from the pan.
Step 3: Finish Cooking with Broth
Pour 0.5 cup chicken broth into the skillet, scraping up any browned bits from the bottom. Reduce the heat to medium, cover the skillet, and let the chicken cook for an additional 8-10 minutes. This allows the cheese to melt completely and infuses the dish with extra flavor.
Check that the chicken has reached an internal temperature of 165°F and that the juices run clear. The sauce should be slightly thickened from the flour dredge and simmering broth.
Step 4: Rest and Garnish
Transfer the chicken to a serving platter and let it rest for 5 minutes. This allows the juices to redistribute and the cheese to set slightly. Remove any toothpicks before serving.
Spoon the pan sauce over the chicken and garnish with 2 tbsp fresh parsley. The parsley adds a bright, fresh contrast to the rich, smoky flavors of the dish. Serve immediately while hot.
Pro Tips For Making Fireman’S Chicken
- Pound the Chicken: Even thickness—about ½ inch—guarantees the chicken cooks through without drying out before the cheese melts. I learned this the hard way after pulling dry, rubbery pieces out of the pan.
- Shred Your Gouda: Grate the smoked Gouda fresh instead of buying pre-shredded—it melts smoother and avoids that weird anti-caking powder aftertaste that can mess with the creamy texture.
- Skip Cold Cream Cheese: Let the cream cheese sit out for at least 30 minutes so it blends effortlessly with the Gouda. After burning one batch trying to melt cold blocks, I finally figured out patience pays off here.
- Toast the Flour: Lightly brown the flour in the pan for 1-2 minutes before adding liquids—sounds weird, but it works to deepen the smoky flavor and thicken the sauce without that raw flour taste.
Essential Equipment for firemans chicken
Meat Mallet
A quality meat mallet with a flat and tenderizing side is essential for pounding the chicken to an even ½-inch thickness. I recommend the OXO Good Grips Meat Tenderizer—its comfortable grip and durable stainless steel construction make quick work of even the thickest breasts. 💪
Oven-Safe Skillet
An oven-safe skillet is non-negotiable for achieving that perfect sear and finish. My go-to is the Lodge 12-inch Cast Iron Skillet, which distributes heat evenly and transitions seamlessly from stovetop to oven if needed. It also develops a natural non-stick surface over time.
Toothpicks
Simple but crucial—use wooden or metal toothpicks to secure the cheese-stuffed pockets in the chicken. Soak wooden ones in water for 10 minutes beforehand to prevent burning. I prefer stainless steel toothpicks for durability and reusability.
Instant-Read Thermometer
Precision matters when cooking poultry. A reliable instant-read thermometer like the ThermoWorks ThermoPop ensures your chicken reaches a safe 165°F without overcooking. It gives accurate readings in 2-3 seconds and is dishwasher-safe for easy cleanup. 🌡️
Mixing Bowls
Have a few nested mixing bowls on hand for prepping your ingredients. I use Pyrex glass bowls because they’re microwave-safe, easy to clean, and let me see the contents clearly. A medium bowl works perfectly for combining the cheeses.
Tongs
Long-handled tongs are ideal for flipping the chicken without piercing it. The OXO Good Grips 12-inch Locking Tongs provide excellent control and have a comfortable grip. They’re also heat-resistant, so you can safely handle the skillet’s contents.
Nutrition Facts
Frequently Asked Questions
Can I use a different type of cheese?
Yes! Try pepper jack with a pinch of liquid smoke for similar flavor. Goat cheese works for a tangier twist.
What if my chicken breasts are very thick?
Pound them to an even ½-inch thickness first. This ensures even cooking and prevents dryness.
How do I prevent the cheese from leaking out?
Secure the pocket opening with toothpicks and avoid overstuffing. Soak wooden picks for 10 minutes first.
Can I make this ahead of time?
Prepare the cheese mixture 1 day ahead, but stuff and cook just before serving for best texture.

- Jollof Rice Sauce Recipe: West African Tomato and Spice Infusion - September 25, 2026
- Japanese Rice Soup Recipe: Umami-Rich Comfort in a Bowl - September 25, 2026
- Homemade Cream Of Rice Recipe: Silk-Smooth Breakfast in Minutes - September 25, 2026