
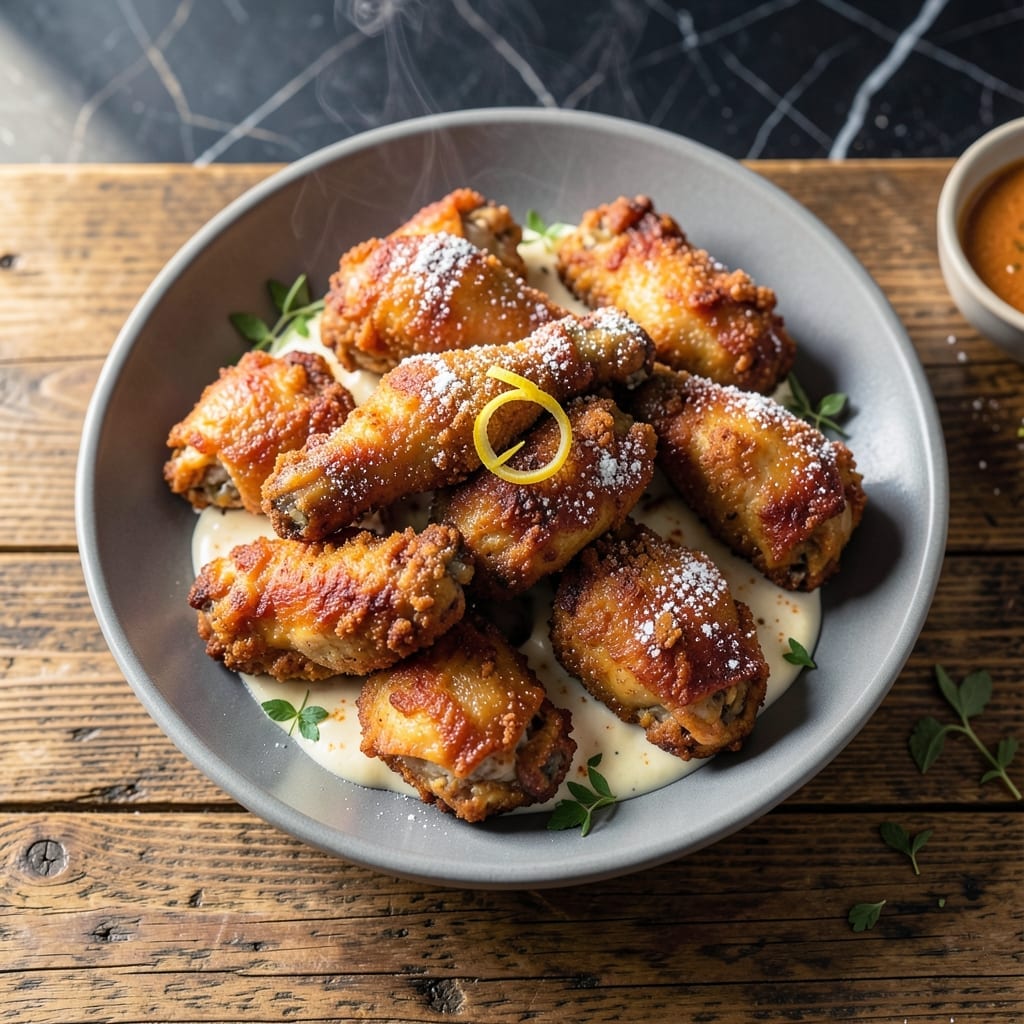
This method revolutionizes home fried chicken with a double-dipping technique that ensures every bite stays crispy from first to last. The process begins with a buttermilk brine, which tenderizes the meat and infuses it with flavor before the coating even touches the bird.
What sets this apart is the dual coating of seasoned flour and egg wash, creating a thick, craggy crust that shatters at the slightest pressure. The chicken fries to a deep golden brown, with the interior remaining juicy and perfectly cooked through.
The result is a piece of fried chicken with a coating so sturdy it doesn’t soften, even after sitting. Each bite delivers that ideal contrast of crispy exterior and tender meat, proving that great fried chicken isn’t just for restaurants.
Serve hot with your favorite sides, and watch it disappear. This is the recipe that turns fried chicken skeptics into believers.
Ingredients for Alton Brown Fried Chicken
Pantry staples and fresh chicken create that signature crispy, craggy coating everyone loves.
| Ingredient | Amount | Notes |
|---|---|---|
| Chicken Thighs and Drumsticks 🍗 | 3 ½ lb | Bone-in, skin-on preferred |
| Buttermilk 🥛 | 2 cups | Full-fat for best results |
| All-Purpose Flour 🌾 | 3 cups | Plus extra for dredging |
| Kosher Salt 🧂 | 1 tbsp | Diamond Crystal preferred |
| Black Pepper 🌶️ | 1 tbsp | Freshly ground preferred |
| Paprika 🌶️ | 1 tbsp | Sweet or smoked variety |
| Garlic Powder 🧄 | 1 tbsp | Not garlic salt |
| Onion Powder 🧅 | 1 tbsp | Fresh ground preferred |
| Cayenne Pepper 🔥 | 1 tsp | Adjust for heat preference |
| Large Eggs 🥚 | 2 whole | Beaten for egg wash |
| Peanut Oil 🫒 | 4 cups | For deep frying |
| Baking Powder 🧂 | ½ tsp | For extra crispiness |
The chicken is everything here. Bone-in, skin-on thighs and drumsticks give you that juicy interior and crispy exterior. Look for pieces that are similar in size so they cook evenly. I grab mine from Whole Foods or a trusted local butcher—the quality difference shows in the final dish. Buttermilk is non-negotiable for the brine; full-fat works best for flavor and tenderizing.
No buttermilk? Mix 2 cups milk with 2 tbsp vinegar or lemon juice and let it sit for 5 minutes. Swap the peanut oil for vegetable or canola oil if that’s what you’ve got. The flour coating can handle a few tweaks—add a bit of cornstarch for extra crunch or a pinch of MSG for depth. Freshly ground pepper is worth the effort, but pre-ground works in a pinch.
Fry in small batches so the oil temp stays consistent. Leftovers keep in the fridge for 3-4 days—reheat in the oven to revive the crispiness. The brine can be prepped a day ahead, but don’t let the chicken sit in it longer than overnight or it’ll get mushy.
Why You’ll Love This Recipe
- No-Fuss Prep: I soak the chicken in buttermilk overnight, then it’s just dredge and fry—no complicated steps.
- Crispy Perfection: That buttermilk brine makes the crust shatteringly crisp while keeping the meat juicy.
- Feeds a Crowd: I serve this at picnics and potlucks, and it’s always the first thing to disappear.
- Budget Friendly: Chicken thighs and drumsticks are cheap, and this recipe stretches them into a meal that feels special.
Step-by-Step Instructions for Alton Brown Fried Chicken
This double-dipping method guarantees an ultra-crispy coating that stays put through frying.
Step 1: Brine the Chicken in Buttermilk
Place the 3.5 lb chicken thighs and drumsticks in a large bowl and pour over the 2 cups buttermilk. Ensure all pieces are fully submerged. I press down on the chicken to remove any air bubbles trapped between pieces and liquid.
Cover the bowl and refrigerate for at least 8 hours, or up to 24 hours. The buttermilk not only tenderizes the meat but also helps the coating adhere better. You’ll notice the chicken plumps slightly as it absorbs the liquid.
Step 2: Prepare the Seasoned Flour Mixture
In a large shallow dish, whisk together the 3 cups all-purpose flour, 1 tbsp kosher salt, 1 tbsp black pepper, 1 tbsp paprika, 1 tbsp garlic powder, 1 tbsp onion powder, 1 tsp cayenne pepper, and 0.5 tsp baking powder.
The baking powder creates tiny air pockets in the coating, contributing to that signature crunch. Whisk thoroughly to break up any lumps and ensure even distribution of seasoning. This mixture should look uniformly speckled with spices.
Step 3: Execute the Double-Dipping Process
Remove the chicken from the buttermilk, letting excess drip off for 10 seconds per piece. Dredge each piece in the flour mixture, pressing firmly to adhere. Shake off excess, then dip back in the buttermilk, and dredge in flour a second time.
Place the double-dipped pieces on a wire rack set over a baking sheet. This elevation allows air to circulate underneath, preventing the coating from becoming soggy. Let the coated chicken rest for 10 minutes while you heat the oil.
Step 4: Fry to Golden Perfection
In a deep, heavy pot, heat the 4 cups peanut oil to 350°F. Use a candy or deep-fry thermometer for accuracy. The oil should shimmer but not smoke. Carefully lower 3-4 pieces of chicken into the hot oil, ensuring not to crowd the pot.
Fry the chicken for 12-15 minutes, turning occasionally, until the coating is deep golden brown and the internal temperature reaches 165°F. The coating should be crisp enough to resist light pressure with tongs. Transfer to a wire rack to drain.
Step 5: Rest and Serve Immediately
Let the fried chicken rest for 5-10 minutes before serving. This brief rest allows the juices to settle and the coating to reach its maximum crispness. The chicken should be too hot to hold comfortably in your bare hands when served.
Serve immediately while the coating maintains its crunch. Each piece should have an audibly crisp exterior that gives way to juicy, tender meat. The double-dipped coating will stay intact even when bitten into, rather than separating from the chicken.
Pro Tips For Making Alton Brown Fried Chicken
- Brining Overnight: Soak the chicken in buttermilk for at least 12 hours—this isn’t just for flavor, it tenderizes the meat so it stays juicy even if you overcook it a little.
- Double Dredge: Dip the chicken back in the buttermilk after the first flour coating, then dredge again in flour. This builds a thicker, crunchier crust that Alton’s recipe is known for.
- Hold the Oil Temp: Keep your oil between 325°F and 350°F. I learned this the hard way—too hot and the outside burns before the inside cooks, too cool and you get greasy, soggy chicken.
- Rest Before Frying: Let the dredged chicken rest on a rack for 10-15 minutes before frying. This helps the coating adhere and prevents it from sliding off in the oil, which is a mess you don’t want to clean up.
Common Mistakes When Making This Recipe
Skipping the Brine
I see too many cooks rush straight to coating without brining first. That buttermilk soak isn’t optional—it tenderizes the meat and helps the flour stick. Skip it, and you’ll get tough chicken with coating that falls off. Give it at least 8 hours in the fridge.
Overcrowding the Pot
Frying too many pieces at once drops the oil temperature fast. The result? Greasy, soggy chicken. I fry 3-4 pieces at a time in my Dutch oven, leaving space between each. Use a thermometer to maintain 350°F oil temperature. 🌡️
Inconsistent Coating
Press the flour mixture firmly into every crevice of the chicken. I use my fingers to pack it in, especially around joints. The double-dip method works best when each layer is thorough. Shake off excess, but don’t be shy with the initial application.
Using Wrong Oil Temp
Too cool, and the chicken absorbs oil. Too hot, and the outside burns before the inside cooks. I test the oil with a wooden chopstick—if bubbles form around it, it’s ready. Aim for 350°F and adjust your burner as needed throughout frying.
Not Letting Oil Drain
Transfer fried chicken to a wire rack, not paper towels. The rack lets air circulate, keeping the coating crisp. Paper towels trap steam, which makes the底部 soggy. I let mine drain for 5 minutes before serving.
Ignoring Rest Time
That final rest isn’t just for show. It lets juices redistribute and the coating set. I rest mine for 5-10 minutes—just enough time to set the table. Serving too soon means the coating might crack when cut. 💪
Nutrition Facts
Frequently Asked Questions
Why use buttermilk for brining?
Buttermilk tenderizes the meat and helps the coating adhere better. Its acidity breaks down proteins, resulting in juicier chicken with a crispier crust.
Can I use a different oil?
Yes, vegetable or canola oil works as a substitute for peanut oil. Just ensure it has a high smoke point to maintain 350°F for frying.
How do I keep the coating crispy?
Drain on a wire rack, not paper towels, to allow air circulation. Serve immediately after resting for 5-10 minutes to maintain crunch.
What if my oil temperature drops?
Adjust the burner to restore 350°F before adding more chicken. Frying in small batches prevents temperature fluctuations.

- Jollof Rice Sauce Recipe: West African Tomato and Spice Infusion - September 25, 2026
- Japanese Rice Soup Recipe: Umami-Rich Comfort in a Bowl - September 25, 2026
- Homemade Cream Of Rice Recipe: Silk-Smooth Breakfast in Minutes - September 25, 2026