
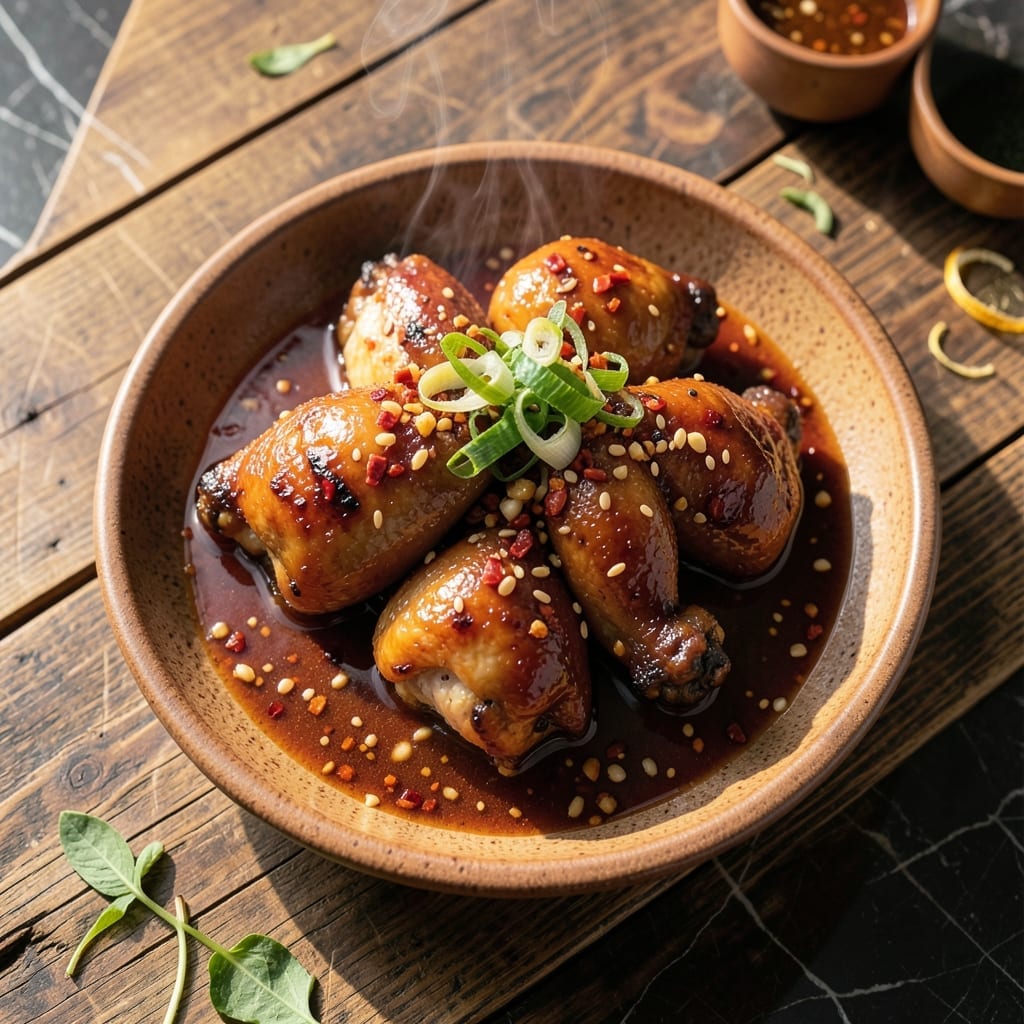
This Korean fried chicken delivers crispy perfection with a spiced kick that sets it apart from ordinary versions. The double-frying method ensures an ultra-crunchy exterior while keeping the meat juicy and tender inside.
The marinade combines soy sauce, garlic, and ginger for deep umami flavor, while the spice blend adds just the right amount of heat. Each piece is coated in a thin, golden batter that fries up light and airy, never greasy.
What makes this dish special is the balance of textures and flavors—crunchy outside, succulent inside, with a lingering warmth from the spices. It’s a dish that demands to be shared, with every bite offering complex layers of taste.
Serve it hot with cold beer or pickled radish for the full experience.
Ingredients for Andong Chicken
Crispy, spicy, and irresistibly juicy—these ingredients bring authentic Korean flavors to your kitchen.
| Ingredient | Amount | Notes |
|---|---|---|
| Chicken Thighs 🍗 | 2 lb | Boneless, skin-on preferred |
| Soy Sauce 🥄 | ½ cup | Low-sodium for balance |
| Garlic Cloves 🧄 | 6 cloves | Minced for marinade |
| Fresh Ginger 🌿 | 1 tbsp | Grated, peeled |
| Gochugaru 🌶️ | 2 tbsp | Korean red pepper flakes |
| Gochujang 🔥 | 2 tbsp | Korean fermented chili paste |
| Brown Sugar 🧈 | 2 tbsp | Light or dark works |
| Rice Vinegar 🍯 | 2 tbsp | For tangy brightness |
| Sesame Oil 🫒 | 1 tbsp | Toasted, for aroma |
| All-Purpose Flour 🌾 | 1 cup | For light batter coating |
| Cornstarch 🌽 | ½ cup | For extra crispiness |
| Baking Powder ⚗️ | 1 tsp | Makes batter airy |
| Vegetable Oil 🛢️ | 4 cups | For deep frying |
| Sesame Seeds 🌰 | 2 tbsp | Toasted, for garnish |
| Green Onions 🧅 | 4 whole | Thinly sliced for garnish |
The chicken is everything here. Thighs stay juicier than breasts during double-frying—look for skin-on at Korean markets or well-stocked supermarkets. Skin-on gives that extra crunch. For the gochugaru and gochujang, H Mart or Asian grocery stores carry authentic brands like Sempio or CJ. Fresh ginger and garlic are non-negotiable; powders won’t deliver the same depth of flavor in the marinade.
No gochugaru? Substitute with cayenne plus a pinch of smoked paprika for heat and color. Gochujang can be swapped with miso paste plus sriracha in a pinch, though the flavor won’t be identical. For a gluten-free version, tamari instead of soy sauce and rice flour for the batter work well. The cornstarch is key for that signature crispiness—don’t skip it, even if you’re tempted.
Marinate the chicken overnight for maximum flavor. The battered pieces can sit 10-15 minutes before frying to help the coating adhere. Leftovers? They’ll lose some crispness but reheat decently in a 375°F oven for 10 minutes.
Why You’ll Love This Recipe
- One Pan Wonder: I toss everything—chicken, soy sauce, garlic, ginger, and gochugaru—into one pan and let it work its magic. Honestly, cleanup is as easy as the cooking.
- Flavor Bomb: The gochugaru gives it a smoky heat while the garlic and ginger mellow into this deep, savory sauce that clings to every bite of juicy thigh.
- Meal Prep MVP: It reheats like a dream, so I make a big batch for lunches all week. Between us, it tastes even better the next day.
- Budget Friendly: Chicken thighs stay cheap, and a little gochugaru goes a long way. I feed my whole family for less than takeout, and no one complains.
Step-by-Step Instructions for Andong Chicken
Follow this method precisely for perfectly crispy, flavorful Korean-style fried chicken every time.
Step 1: Marinate the Chicken Thighs
In a large bowl, combine the 2 lb Chicken Thighs with 0.5 cup Soy Sauce, 6 cloves minced Garlic Cloves, 1 tbsp Fresh Ginger, 2 tbsp Gochugaru, 2 tbsp Gochujang, 2 tbsp Brown Sugar, 2 tbsp Rice Vinegar, and 1 tbsp Sesame Oil.
Mix thoroughly to ensure each piece is evenly coated. Cover with plastic wrap and refrigerate for at least 2 hours, or overnight for maximum flavor penetration. The marinade should turn the chicken a rich reddish color.
Step 2: Prepare the Battering Station
In a separate large bowl, whisk together 1 cup All-Purpose Flour, 0.5 cup Cornstarch, and 1 tsp Baking Powder until fully combined. This creates a light, airy batter that will crisp up beautifully when fried.
Set this next to your marinated chicken and a deep frying setup. The baking powder is key—it creates tiny air pockets in the batter for extra crunch. Keep the frying oil nearby but don’t heat it yet.
Step 3: Heat the Oil and Fry
Pour 4 cups Vegetable Oil into a heavy-bottomed pot or deep fryer. Heat to 350°F over medium-high heat. Use a deep-fry thermometer for accuracy—oil that’s too cool will make the chicken greasy, while oil that’s too hot will burn the outside before the inside cooks.
While the oil heats, remove the chicken from the marinade (let excess drip off) and dredge each piece in the flour mixture, pressing gently to adhere. The batter should look shaggy and uneven—this creates the characteristic crispy texture.
Step 4: Fry to Golden Perfection
Carefully lower the battered chicken into the hot oil in batches, avoiding overcrowding. Fry for 6-8 minutes, turning occasionally, until the coating is deep golden brown and crispy. The internal temperature should reach 165°F.
Use a slotted spoon to transfer the fried chicken to a wire rack or paper towels to drain. The rack prevents the bottoms from getting soggy. Repeat with the remaining batches, allowing the oil to return to 350°F between each.
Sprinkle immediately with 2 tbsp Sesame Seeds while still hot so they stick to the coating.
Step 5: Garnish and Serve
Slice the 4 whole Green Onions thinly and scatter them over the fried chicken. The contrast of the crispy coating, tender meat, and fresh green onions makes this dish irresistible.
Serve immediately while hot and crispy. The chicken should have a shatteringly crisp exterior giving way to juicy, flavorful meat with a perfect balance of spicy, sweet, and savory notes from the marinade.
Pro Tips For Making Andong Chicken
- Marinate Longer: Give the chicken thighs at least 2 hours in the soy sauce, garlic, and ginger mix—I learned this the hard way when my first batch tasted bland after just 30 minutes.
- Toast the Gochugaru: Heat the gochugaru in a dry pan for 30 seconds before adding it to the marinade. It deepens the flavor and removes any raw bitterness.
- Skip the Skin Trimming: Leave the skin on the thighs—it renders down during cooking and carries all that spicy, garlicky flavor into the meat.
- Simmer Then Reduce: After browning the chicken, let the sauce simmer for 5-7 minutes until it thickens enough to coat the back of a spoon. This is what gives andong chicken its signature glossy finish.
Best Sauces and Condiments for This Recipe
Spicy Gochujang Glaze
Whisk 3 tbsp gochujang with 1 tbsp honey, 1 tbsp rice vinegar, and 1 tsp sesame oil for a glossy, spicy-sweet coating. Brush it on the chicken right after frying while it’s still hot. The heat from the chicken helps the glaze caramelize slightly. 🔥
Garlic Soy Dip
Combine ¼ cup soy sauce, 1 tbsp rice vinegar, 1 minced garlic clove, 1 tsp brown sugar, and ½ tsp toasted sesame oil. This tangy, umami-packed dip balances the richness of the fried chicken beautifully.
Creamy Sesame Sauce
Mix ½ cup mayonnaise with 1 tbsp gochujang, 1 tbsp honey, and 1 tsp toasted sesame seeds. The creaminess cools the heat while adding a nutty depth. I love this for dipping or drizzling over the top.
Quick Pickled Radish
Thinly slice radishes and toss with ¼ cup rice vinegar, 1 tbsp sugar, and ½ tsp salt. Let sit for 30 minutes before serving. The sharp crunch and acidity cut through the fried coating perfectly. 🥗
Honey Butter Drizzle
Melt 4 tbsp butter with 2 tbsp honey and 1 tsp gochugaru for a sweet-spicy finish. Drizzle lightly over the chicken just before serving. It adds a luxurious touch that’s hard to resist.
Nutrition Facts
Frequently Asked Questions
Can I use chicken breast instead of thighs?
Thighs stay juicier, but breast works if you marinate for 4+ hours and fry for 5-6 minutes. Watch the internal temp—it should hit 165°F quickly to avoid dryness.
What’s the best oil for frying?
Use neutral oils with a high smoke point like vegetable, canola, or peanut oil. Avoid olive oil—it burns at frying temps. Maintain 350°F for crispy, non-greasy results.
How do I keep the coating crispy longer?
Place fried pieces on a wire rack, not paper towels, to prevent steam buildup. Reheat in a 375°F oven for 5-10 minutes if needed. Never microwave—it’ll turn soggy.
Can I make this gluten-free?
Swap soy sauce for tamari and use rice flour plus cornstarch for the batter. Check all sauces for hidden gluten. The texture will be slightly different but still crispy!

- Jollof Rice Sauce Recipe: West African Tomato and Spice Infusion - September 25, 2026
- Japanese Rice Soup Recipe: Umami-Rich Comfort in a Bowl - September 25, 2026
- Homemade Cream Of Rice Recipe: Silk-Smooth Breakfast in Minutes - September 25, 2026