
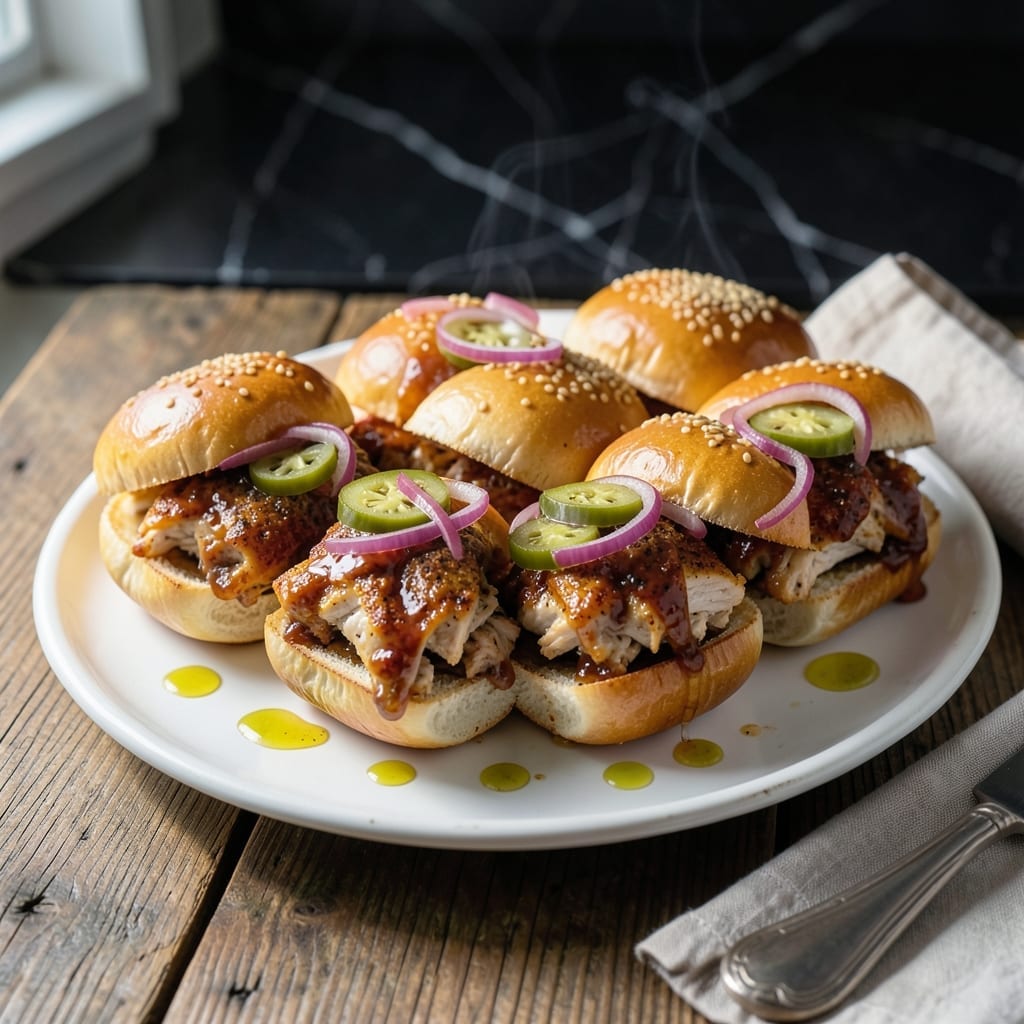
These sliders deliver bold, smoky barbecue flavor in every bite, perfect for feeding a hungry crowd without the fuss of a full meal.
I’ve streamlined the process to ensure the chicken stays juicy while the sauce caramelizes just enough to cling to the meat. The mini buns add a soft, buttery contrast that ties everything together.
With a cooking time of under 30 minutes, this recipe is as practical as it is delicious. The key is balancing the tangy sauce with the right amount of sweetness.
Serve these at your next gathering, and watch them disappear faster than you can refill the tray.
Ingredients for Barbecue Chicken Sliders
Pantry staples plus chicken and buns—everything you need for these mini sandwiches.
| Ingredient | Amount | Notes |
|---|---|---|
| Boneless Chicken Breasts 🍗 | 1 ½ lb | Pounded to even thickness |
| Barbecue Sauce 🥫 | 1 ½ cups | Smoky, tangy variety preferred |
| Slider Buns 🍞 | 12 pieces | Soft potato buns recommended |
| Olive Oil 🫒 | 2 tbsp | For cooking chicken |
| Garlic Powder 🧄 | 1 tsp | For seasoning chicken |
| Onion Powder 🧅 | 1 tsp | For seasoning chicken |
| Smoked Paprika 🌶️ | 1 tsp | Adds depth to sauce |
| Brown Sugar 🍚 | 2 tbsp | Balances tanginess in sauce |
| Apple Cider Vinegar 🍏 | 1 tbsp | For acidity in sauce |
| Salt 🧂 | ½ tsp | Kosher or sea salt |
| Black Pepper 🌶️ | ½ tsp | Freshly ground preferred |
| Butter 🧈 | 2 tbsp | For brushing buns |
| Pickles 🥒 | ½ cup | Sliced, for topping |
The chicken is the foundation, so buy fresh, boneless breasts—they stay juicier than pre-frozen. I grab mine from Whole Foods or Costco for consistent quality. Pounding them to an even thickness (about ½-inch) means they cook fast and stay tender. The buns matter too—soft potato sliders from the bakery section are ideal (skip the hard dinner rolls).
No barbecue sauce on hand? Ketchup plus a dash of liquid smoke gets you close in a pinch. Want more heat? Add half a teaspoon of cayenne to the sauce. If you’re out of brown sugar, maple syrup at the same amount works. The apple cider vinegar can be subbed with white vinegar, but the flavor won’t be as deep. Pickles can be swapped for sliced red onions (quick-pickle them in vinegar for 10 minutes).
Chicken cooks best fresh—use within 2 days of buying. The sauce keeps for 1 week in the fridge, and the buns? Freeze extras and toast them straight from the freezer. Leftovers (if there are any) reheat well—30 seconds in the microwave.
Why You’ll Love This Recipe
- Minimal Chopping Required: I just slice the chicken breasts into strips—no fancy prep, and the garlic powder does all the flavor work.
- Smoky-Sweet Bite: The barbecue sauce caramelizes on the chicken, and that garlic powder? It adds the perfect kick.
- Feeds a Crowd Fast: I’ve served these at parties and weeknight dinners—20 minutes and everyone’s happy.
- Leftovers Disappear: Honestly, they taste even better the next day, and the buns stay soft if I wrap them right.
Step-by-Step Instructions for Barbecue Chicken Sliders
Here’s the method I use to create these crowd-pleasing sliders with perfect flavor balance.
Step 1: Season and Cook the Chicken
Pound the 1.5 lb Boneless Chicken Breasts to an even ½-inch thickness so they cook uniformly. Pat them dry with paper towels, then rub both sides with 2 tbsp Olive Oil.
In a small bowl, mix 1 tsp Garlic Powder, 1 tsp Onion Powder, 0.5 tsp Salt, and 0.5 tsp Black Pepper. Sprinkle this seasoning blend evenly over both sides of the chicken, pressing gently so it adheres. This creates a flavorful base that pairs perfectly with the barbecue sauce.
Step 2: Create the Signature Barbecue Sauce
While the chicken cooks, enhance the 1.5 cups Barbecue Sauce by stirring in 1 tsp Smoked Paprika, 2 tbsp Brown Sugar, and 1 tbsp Apple Cider Vinegar. Heat this mixture in a small saucepan over medium-low heat for 5 minutes, stirring occasionally.
The brown sugar balances the tanginess of the vinegar, while the smoked paprika adds depth. You’ll know it’s ready when the sauce thickens slightly and becomes glossy. Keep it warm on the stove until you’re ready to use it.
Step 3: Grill the Chicken and Shred
Heat a grill pan or large skillet over medium-high heat. Add the seasoned chicken and cook for 5-6 minutes per side until the internal temperature reaches 165°F and the chicken is no longer pink in the middle.
Transfer the cooked chicken to a cutting board and let it rest for 5 minutes. Then, using two forks, shred the chicken into bite-sized pieces. This creates the perfect texture for sliders—tender and easy to eat.
Step 4: Toast the Buns and Assemble
Lightly toast the 12 pieces Slider Buns by brushing the cut sides with 2 tbsp Butter. Place them buttered-side down in a skillet over medium heat for 1-2 minutes until golden brown.
Spoon the shredded chicken onto the bottom half of each bun, then drizzle generously with the warm barbecue sauce. Top with sliced 0.5 cup Pickles for a tangy crunch, then place the top bun on each slider. Serve immediately while warm.
Pro Tips For Making Barbecue Chicken Sliders
- Pound the Chicken: Use a rolling pin or meat mallet to flatten the boneless chicken breasts to an even ½-inch thickness—this guarantees they cook through at the same rate and stay juicy.
- Toast the Buns: Lightly brush the slider buns with olive oil and toast them in the same pan after pulling the chicken; it soaks up the garlicky drippings and keeps them from getting soggy.
- Skip the Dry Rub: I learned this the hard way—garlic powder alone isn’t enough. Mix it into the olive oil before coating the chicken so it sticks and actually flavors the meat.
- Sauce at the End: Brush on the barbecue sauce only in the last 2 minutes of cooking; adding it earlier burns the sugars and turns your sliders bitter instead of smoky-sweet.
Essential Equipment for barbecue chicken sliders
Grill and Skillet
A cast iron grill pan gives those beautiful char marks without firing up an outdoor grill. I use my Lodge 10.5-inch for even heating. For stovetop cooking, a 12-inch stainless steel skillet works just as well for searing the chicken.
Mixing Bowls
You’ll need at least two bowls: one for the chicken seasoning and another for mixing the barbecue sauce. I prefer stainless steel mixing bowls from Winco—they’re durable and nest together for easy storage. A 1-quart bowl is perfect for the sauce.
Measuring Tools
Accurate measurements make a big difference. I keep a set of stainless steel measuring spoons and a 1-cup liquid measure on hand. For the brown sugar, a tablespoon measure packed tightly ensures the right sweetness. 💡
Shredding Tools
Two forks work in a pinch, but I love my OXO Good Grips shredding claws for pulling chicken apart quickly. They’re heat-resistant and give you better control than forks. If you prefer, a stand mixer with paddle attachment shreds chicken in seconds on low speed.
Bun Toasting
A large nonstick skillet is ideal for toasting all the buns at once. Brush them with melted butter using a pastry brush—I like the silicone ones from Wilton because they don’t melt. Toast in batches if needed to avoid crowding. 🔥
Serving Tray
For serving a crowd, a half-sheet pan lined with parchment paper keeps the sliders organized and makes cleanup easy. I arrange them in a single layer so guests can grab them without making a mess. A wooden serving board adds a rustic touch for presentations.
Nutrition Facts
Frequently Asked Questions
Can I use chicken thighs instead of breasts?
Thighs stay juicier and have more flavor. Use 1.5 lb boneless thighs and cook to 165°F. They may need 1-2 minutes less per side.
How do I keep the buns from getting soggy?
Toast the buns just before assembling. Also, spread a thin layer of sauce on the chicken only, not the bun. This creates a barrier.
Can I make these ahead of time?
Cook the chicken and sauce up to 2 days ahead. Store separately and assemble just before serving. Reheat chicken in sauce to maintain moisture.
What can I use if I don’t have apple cider vinegar?
White vinegar or lemon juice work in a pinch. Use the same 1 tbsp amount. The flavor will be slightly different but still balanced.

- Jollof Rice Sauce Recipe: West African Tomato and Spice Infusion - September 25, 2026
- Japanese Rice Soup Recipe: Umami-Rich Comfort in a Bowl - September 25, 2026
- Homemade Cream Of Rice Recipe: Silk-Smooth Breakfast in Minutes - September 25, 2026