
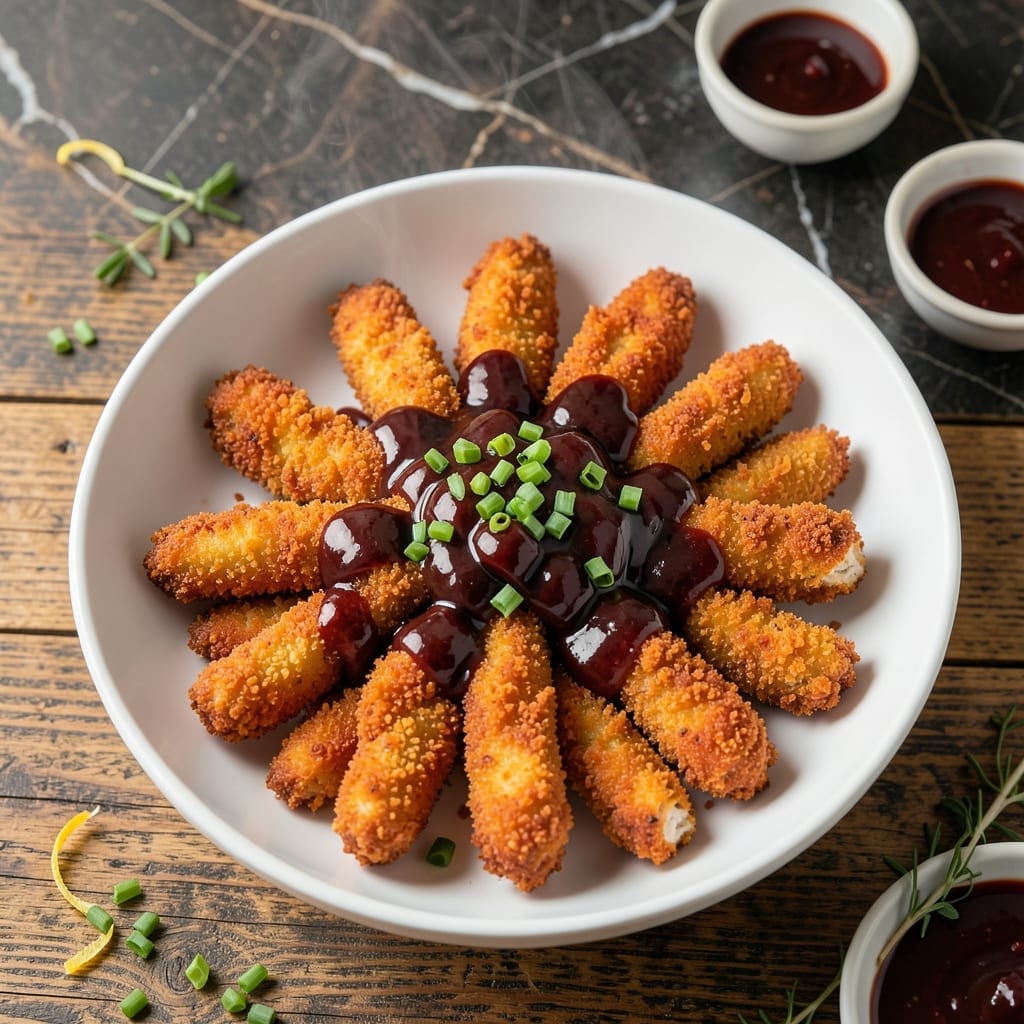
This recipe delivers tender chicken strips with a smoky, crispy coating that satisfies every time. The secret lies in a two-step breading process that locks in moisture while creating an irresistible crunch.
I’ve refined this method to ensure the chicken stays juicy inside, even as the exterior achieves that perfect golden-brown finish. A quick bake at high heat guarantees even cooking without the mess of deep frying.
The BBQ sauce ties it all together, adding a tangy-sweet contrast to the crispy coating. Whether served as an appetizer or a main course, these fingers disappear fast.
Simple ingredients, straightforward steps, and a result that’s worth every minute. Ready to make the best chicken fingers you’ve ever tasted?
Ingredients for Bbq Chicken Fingers
Simple staples create those crispy, smoky chicken fingers everyone loves to devour right away.
| Ingredient | Amount | Notes |
|---|---|---|
| Chicken Breast 🍗 | 1 ½ lb | Boneless, skinless, cut into strips |
| All-Purpose Flour 🌾 | 1 cup | For initial dredging |
| Large Eggs 🥚 | 2 whole | Beaten for egg wash |
| Panko Breadcrumbs 🍞 | 2 cups | For crispy outer coating |
| Smoked Paprika 🌶️ | 1 tbsp | For smoky depth |
| Garlic Powder 🧄 | 1 tsp | Adds savory note |
| Onion Powder 🧅 | 1 tsp | Balances seasoning blend |
| Salt 🧂 | 1 tsp | Kosher or sea salt preferred |
| Black Pepper 🌶️ | ½ tsp | Freshly ground preferred |
| BBQ Sauce 🍯 | 1 cup | For dipping and coating |
| Olive Oil 🫒 | 2 tbsp | For light brushing before baking |
| Buttermilk 🥛 | ½ cup | For tenderizing chicken |
The chicken is key here. Boneless, skinless breasts cut into even strips ensure uniform cooking. Most supermarkets sell pre-trimmed breasts, but Costco offers bulk options perfect for feeding a crowd. For the smoky flavor, smoked paprika is non-negotiable—regular just won’t deliver that depth (the good stuff, not the dusty old jar). Panko breadcrumbs give you that restaurant-quality crunch that regular breadcrumbs can’t match.
No buttermilk? Milk with a tablespoon of vinegar works in a pinch. Short on BBQ sauce? Ketchup with a dash of liquid smoke gets you close. The panko can be swapped for crushed cornflakes (trust me on this one) if you’re out. For extra crispiness, add a handful of crushed pork rinds to the breading—1 cup panko plus 0.5 cup crushed rinds does the trick perfectly.
Prep the chicken strips ahead and keep them covered in the fridge for up to 24 hours. Leftovers reheat well in a 350°F oven for about 10 minutes—microwaving makes them soggy. Best eaten fresh, but they’ll keep in the fridge for 3-4 days.
Why You’ll Love This Recipe
- Under 30 Minutes: I can coat, bake, and serve these faster than takeout arrives.
- Smoky Crunch: The panko and smoked paprika give that perfect crispy bite with a hint of BBQ depth.
- Kid-Approved Dinner: Even my picky nephew clears his plate when these show up.
- Next-Day Lunch: They reheat beautifully in the toaster oven – crispy again, no sogginess.
Step-by-Step Instructions for BBQ Chicken Fingers
Here is the proven method for achieving a crispy coating with juicy, tender chicken inside.
Step 1: Prepare and Season the Chicken
Cut the 1.5 lb chicken breast into 1-inch wide strips. This uniform size ensures even cooking. Place the strips in a bowl and pour the 0.5 cup buttermilk over them, turning to coat completely.
The buttermilk not only tenderizes the meat but also helps the flour adhere better. Let the chicken marinate for 15-20 minutes while you prepare the breading stations. This step is crucial for achieving that promised tender texture.
Step 2: Set Up and Apply the Breading
In a shallow dish, combine the 1 cup all-purpose flour, 1 tbsp smoked paprika, 1 tsp garlic powder, 1 tsp onion powder, 1 tsp salt, and 0.5 tsp black pepper. Mix thoroughly to distribute the spices evenly.
Beat the 2 whole large eggs in a second shallow dish. Place the 2 cups panko breadcrumbs in a third dish. Working with one piece at a time, remove the chicken from the buttermilk, dredge it in the flour mixture, dip it in the beaten eggs, then coat it completely in the panko. Press gently to ensure the crumbs adhere well.
Step 3: Bake Until Golden and Crispy
Preheat your oven to 400°F and line a baking sheet with parchment paper. Arrange the breaded chicken strips on the prepared sheet, leaving space between each piece to ensure even browning. Lightly brush the tops with the 2 tbsp olive oil—this promotes extra crispiness.
Bake for 15-18 minutes, flipping halfway through, until the coating is golden brown and the chicken reaches an internal temperature of 165°F. Don’t skip the flip; it guarantees both sides crisp evenly. The panko should look toasted and feel firm to the touch.
Step 4: Coat with BBQ Sauce and Serve
Once the chicken fingers are fully cooked, remove them from the oven. While still hot, brush or toss them with the 1 cup BBQ sauce until evenly coated. The residual heat helps the sauce cling better and caramelize slightly.
Serve immediately while the coating is at its crispiest. The contrast of the smoky, crispy exterior with the tender chicken inside delivers on the recipe’s promise. For best results, don’t let them sit too long—the texture is ideal straight from the oven.
Pro Tips For Making Bbq Chicken Fingers
- Cut Chicken Evenly: Slice the chicken breast into uniform 1-inch strips—about the width of your thumb—so they cook at the same rate. I learned this the hard way after pulling out half raw, half dry pieces from the oil.
- Double Dredge: Dip each strip in flour, then egg, then panko, and repeat the egg and panko step. Sounds tedious, but it actually changes the outcome, giving you that extra-crispy coating that holds up to BBQ sauce.
- Skip Cold Oil: Make sure your oil is hot—about 350°F—before adding the chicken. After burning three batches, I finally figured out that cold oil just soaks in and makes the breading greasy.
- Boost Smoked Paprika: Add an extra ½ teaspoon of smoked paprika to the flour mix. My grandmother swore by this, and she was right—it gives the chicken a deeper, smokier flavor that pairs perfectly with the BBQ sauce.
Serving Suggestions for This Recipe
Dipping Sauce Pairings
While the BBQ sauce is a must, I love offering ranch dressing on the side for a creamy contrast. The cool tang balances the smoky heat perfectly. For a spicy kick, mix 2 tbsp sriracha into ½ cup mayo for a quick come-back sauce. 🌶️
Fresh Side Additions
A crisp coleslaw with apple cider vinegar dressing cuts through the richness beautifully. I toss 3 cups shredded cabbage with ¼ cup dressing and let it sit for 15 minutes before serving. Alternatively, pickle spears add a refreshing crunch.
Plating for Impact
Arrange the fingers on a platter with sauces in small bowls at the center. I drizzle extra BBQ sauce in a zigzag pattern for visual appeal. Garnish with chopped green onions or sesame seeds for a pop of color.
Game Day Presentation
For parties, serve on a wooden board with parchment paper for easy cleanup. I keep warm in a 200°F oven until guests arrive. Add a sprinkle of smoked paprika on top right before serving to reinforce that signature smoky flavor.
Kid-Friendly Serving
Cut into smaller pieces for little hands and serve with ketchup or honey mustard. I’ve found kids love dipping these into yogurt-based ranch too. Always let cool for 5 minutes before serving to young ones.
Meal Prep Option
Pack in bento boxes with carrot sticks and celery for a balanced lunch. The fingers stay crispier when stored separately from sauces. Reheat in a toaster oven at 375°F for 8-10 minutes to revive the crunch. 💡
Nutrition Facts
Frequently Asked Questions
Can I use chicken tenders instead of breasts?
Chicken tenders work perfectly and cook even faster. Just reduce baking time by 2-3 minutes since they’re thinner. They’ll still reach 165°F safely.
Why do I need to flip them halfway through?
Flipping ensures both sides crisp evenly and prevents soggy bottoms. The 400°F oven heats from all angles, but turning guarantees golden, crunchy results on every piece.
How do I keep them crispy for a crowd?
Bake in batches and hold finished ones on a wire rack in a 200°F oven. Avoid stacking—they’ll steam and lose that perfect crunch. Serve within 30 minutes for best texture.
Can I air fry instead of baking?
Yes! Cook at 375°F for 10-12 minutes, shaking the basket halfway. The air fryer’s circulation gives extra crispiness with less oil. Check temp to ensure 165°F.

- Jollof Rice Sauce Recipe: West African Tomato and Spice Infusion - September 25, 2026
- Japanese Rice Soup Recipe: Umami-Rich Comfort in a Bowl - September 25, 2026
- Homemade Cream Of Rice Recipe: Silk-Smooth Breakfast in Minutes - September 25, 2026