
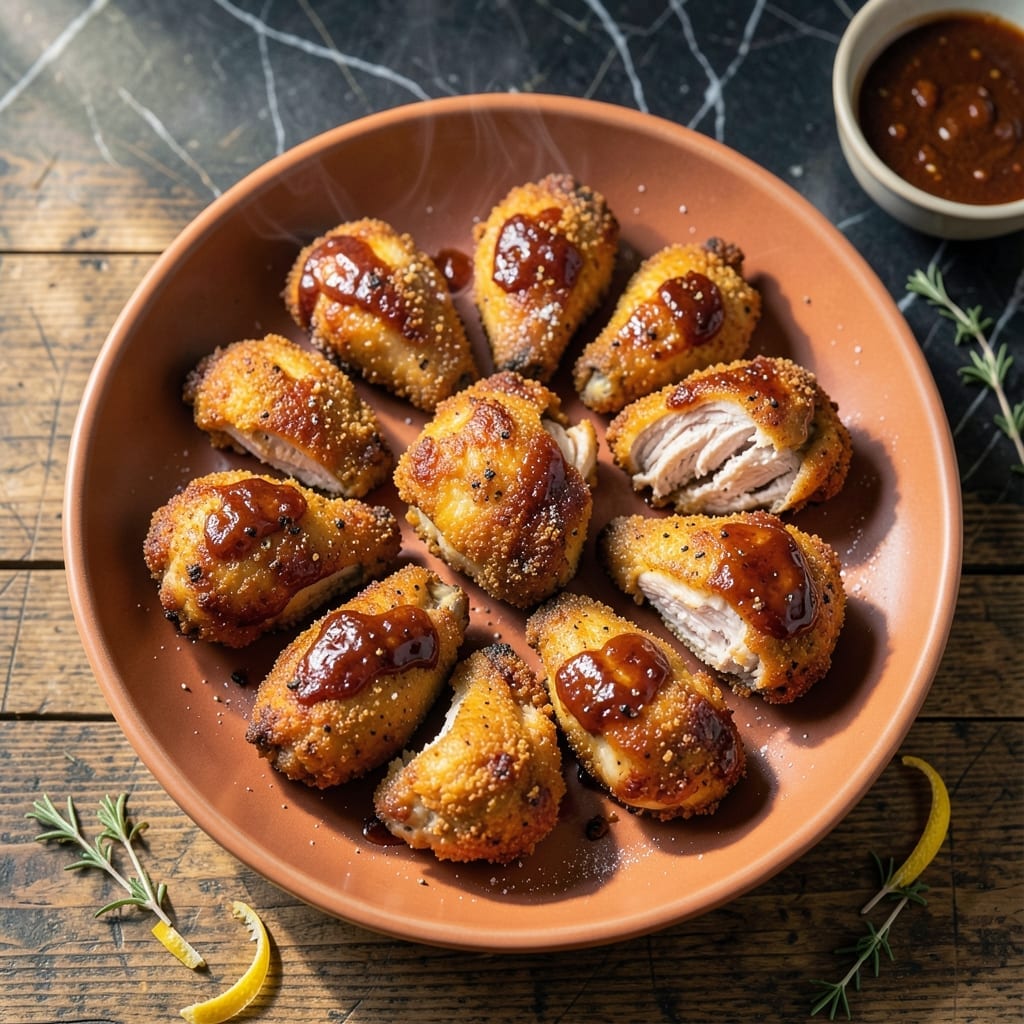
This recipe delivers the ultimate combination of crispy fried chicken and tangy BBQ sauce in every bite. The double-frying method ensures an extra crunchy coating that holds up to the saucy glaze.
I developed this technique to solve the problem of soggy fried chicken when coated in sauce. The secret is frying twice—once for cooking, once for maximum crispness—before tossing in homemade BBQ sauce.
What results is chicken with a shatteringly crisp exterior and juicy interior, all coated in a sticky, sweet-spicy sauce. The contrast of textures makes this dish irresistible.
Serve hot with extra sauce for dipping. This method guarantees professional results every time.
Ingredients for Bbq Fried Chicken
Professional-quality crispy chicken meets bold BBQ flavor with these carefully selected ingredients.
| Ingredient | Amount | Notes |
|---|---|---|
| Chicken Thighs 🍗 | 2 lb | Boneless, skin-on preferred |
| Buttermilk 🥛 | 2 cups | Full-fat for best results |
| All-Purpose Flour 🌾 | 2 cups | Plus extra for dredging |
| Cornstarch 🌾 | ½ cup | For extra crispiness |
| Baking Powder 🧂 | 1 tbsp | Helps coating adhere |
| Garlic Powder 🧄 | 1 tbsp | Freshly ground preferred |
| Onion Powder 🧅 | 1 tbsp | Balances flavor profile |
| Paprika 🌶️ | 1 tbsp | Smoked or sweet variety |
| Salt 🧂 | 2 tsp | Diamond Crystal kosher recommended |
| Black Pepper 🌶️ | 1 tsp | Freshly ground preferred |
| Cayenne Pepper 🔥 | ½ tsp | Adjust for heat preference |
| Vegetable Oil 🫒 | 4 cups | For frying, high smoke point |
| BBQ Sauce 🍯 | 1 ½ cups | Homemade or high-quality bottled |
| Honey 🍯 | 2 tbsp | For sauce glaze |
| Apple Cider Vinegar 🍏 | 1 tbsp | Adds tang to sauce |
The chicken thighs are non-negotiable for juiciness—skin-on, bone-in if you can get them, though boneless works too. Costco or Sam’s Club have great bulk options. Buttermilk is the secret to tenderness; full-fat makes a noticeable difference in both texture and flavor. For the flour, King Arthur is the gold standard, but any all-purpose will do (just avoid self-rising). The cornstarch is what gives that shatteringly crisp coating.
No buttermilk? Whole milk plus 1 tbsp vinegar per cup works in a pinch. For a gluten-free version, swap the all-purpose flour for rice flour and add 1 extra tbsp cornstarch. If you’re avoiding deep frying, an air fryer at 400°F gets you 80% there—just spray with oil between crisping stages. The BBQ sauce can be store-bought (Stubb’s or Sweet Baby Ray’s are solid), but homemade lets you control the sweet-spicy balance.
Fry in batches to avoid crowding—this keeps the oil temp stable. Leftovers (if there are any) reheat best in a 375°F oven for 10-12 minutes. The chicken stays crispy for 2-3 days in the fridge, but the sauce is best fresh. For meal prep, store chicken and sauce separately and combine just before serving.
Why You’ll Love This Recipe
- Minimal Fuss: I just coat the thighs in buttermilk, dredge in flour, and fry—no complicated steps.
- That BBQ Crunch: The cornstarch and baking powder make it shatteringly crisp with a smoky-sweet glaze.
- Feeds the Crew: One batch satisfies a hungry family, and leftovers (if any) taste great cold the next day.
- Budget Winner: Chicken thighs are cheap, and the flour-cornstarch combo stretches further than you’d think.
Step-by-Step Instructions for BBQ Fried Chicken
Achieve maximum crunch and smoky-sweet flavor with this double-crisped technique for irresistible results.
Step 1: Marinate Chicken Thighs in Buttermilk
Place the 2 lb Chicken Thighs in a large bowl and pour over all 2 cups Buttermilk. Ensure each piece is fully submerged. I press down gently to displace any air bubbles, guaranteeing complete coverage for even marinating.
Cover and refrigerate for at least 4 hours or overnight. This step tenderizes the meat while the buttermilk’s acidity helps the coating adhere later. The longer it marinates, the more flavor it absorbs and the juicier the final product will be.
Step 2: Prepare the Double-Crisp Coating
In a large bowl, whisk together all 2 cups All-Purpose Flour, 0.5 cup Cornstarch, 1 tbsp Baking Powder, 1 tbsp Garlic Powder, 1 tbsp Onion Powder, 1 tbsp Paprika, 2 tsp Salt, 1 tsp Black Pepper, and 0.5 tsp Cayenne Pepper until thoroughly combined. The cornstarch is your secret to extra crispiness.
The baking powder creates tiny air pockets in the coating, enhancing that signature crunch. This blend should look uniform with no visible streaks of spice. Set this aside while you heat the oil—it’s crucial the coating stays dry until frying.
Step 3: Fry Chicken to Golden Perfection
In a heavy pot or deep fryer, heat all 4 cups Vegetable Oil to 350°F. Use a thermometer for accuracy—too low and the chicken will be greasy; too high and it’ll burn before cooking through. I maintain the temperature between 340-350°F throughout frying.
Remove chicken from the buttermilk, letting excess drip off, then dredge in the flour mixture. Press firmly to ensure the coating clings. Fry in batches for 12-15 minutes, turning occasionally, until the coating is deep golden brown and the internal temperature reaches 165°F. Drain on a wire rack to preserve crispiness.
Step 4: Glaze with BBQ Honey Sauce
In a saucepan, combine all 1.5 cups BBQ Sauce, 2 tbsp Honey, and 1 tbsp Apple Cider Vinegar. Simmer over low heat for 3-4 minutes, stirring until the honey dissolves and the sauce thickens slightly. The vinegar cuts through the sweetness, balancing the glaze perfectly.
While the sauce is still warm, brush it generously over the fried chicken. I coat each piece completely, allowing the sauce to cling to every crispy ridge. For extra shine and stickiness, you can return the glazed chicken to the 350°F oil for 1-2 minutes to set the glaze.
Pro Tips For Making Bbq Fried Chicken
- Double-Dredge for Crunch: I learned this the hard way—after dipping in buttermilk, coat the thighs in flour mix, dip again in buttermilk, then back in the flour for that extra-thick, shatteringly crisp crust.
- Rest the Chicken: Give the dredged thighs 10 minutes on a wire rack before frying—this helps the coating adhere better and prevents it from sliding off in the oil.
- Skip the Overcrowding: Fry in batches with at least an inch of space between pieces, or the oil temp drops and you’ll end up with soggy, greasy chicken instead of that perfect crunch.
- Use Baking Powder: Sounds weird, but it works: a teaspoon of baking powder in your flour mix makes the crust lighter and extra crispy, almost like it’s been fried twice.
Make-Ahead Tips for This Dish
Prep the Chicken
Marinate the 2 lb Chicken Thighs in 2 cups Buttermilk up to 24 hours ahead. I do this first thing in the morning for dinner service. The buttermilk’s acidity starts tenderizing immediately, so the longer it sits, the better. 💡
Make the Coating
Mix the dry coating ingredients the night before and store in an airtight container. This saves time and keeps the spices fresh. King Arthur flour works best, but any all-purpose will do in a pinch.
Fry in Batches
Fry the chicken in batches and keep warm in a 200°F oven on a wire rack. This prevents sogginess while you finish frying. I use my Lodge cast iron for even heat distribution.
Sauce Ahead
Prepare the BBQ sauce mixture up to 3 days in advance. Combine 1.5 cups BBQ Sauce, 2 tbsp Honey, and 1 tbsp Apple Cider Vinegar in a jar. Store in the fridge until ready to use.
Reheat Properly
For leftovers, reheat in a 375°F oven for 10-12 minutes to maintain crispiness. Avoid microwaving—it turns the coating gummy. I always make extra for easy lunches. 🔥
Store Separately
Keep fried chicken and sauce separate until serving. The chicken stays crisp for 2-3 days in the fridge. Combine just before eating for optimal texture.
Nutrition Facts
Frequently Asked Questions
Can I use chicken breasts instead of thighs?
Thighs stay juicier, but boneless breasts work if pounded to 1/2-inch thickness. Reduce frying time to 10-12 minutes to prevent dryness. The buttermilk marinade helps, but thighs are still recommended for best results.
What’s the best oil for frying?
Use oils with a high smoke point like peanut, canola, or vegetable. Peanut oil adds subtle flavor and can handle 350°F without breaking down. Avoid olive oil—it burns at frying temperatures.
How do I keep the coating crispy after saucing?
Fry twice: once to cook through, then again after saucing for 1-2 minutes. This sets the glaze while preserving crunch. Always drain on a wire rack, never paper towels.
Can I bake instead of frying?
For a lighter version, bake at 400°F for 25-30 minutes on a wire rack. Spray with oil before baking and halfway through. The texture won’t be as crispy, but it’s a good alternative.

- Jollof Rice Sauce Recipe: West African Tomato and Spice Infusion - September 25, 2026
- Japanese Rice Soup Recipe: Umami-Rich Comfort in a Bowl - September 25, 2026
- Homemade Cream Of Rice Recipe: Silk-Smooth Breakfast in Minutes - September 25, 2026