
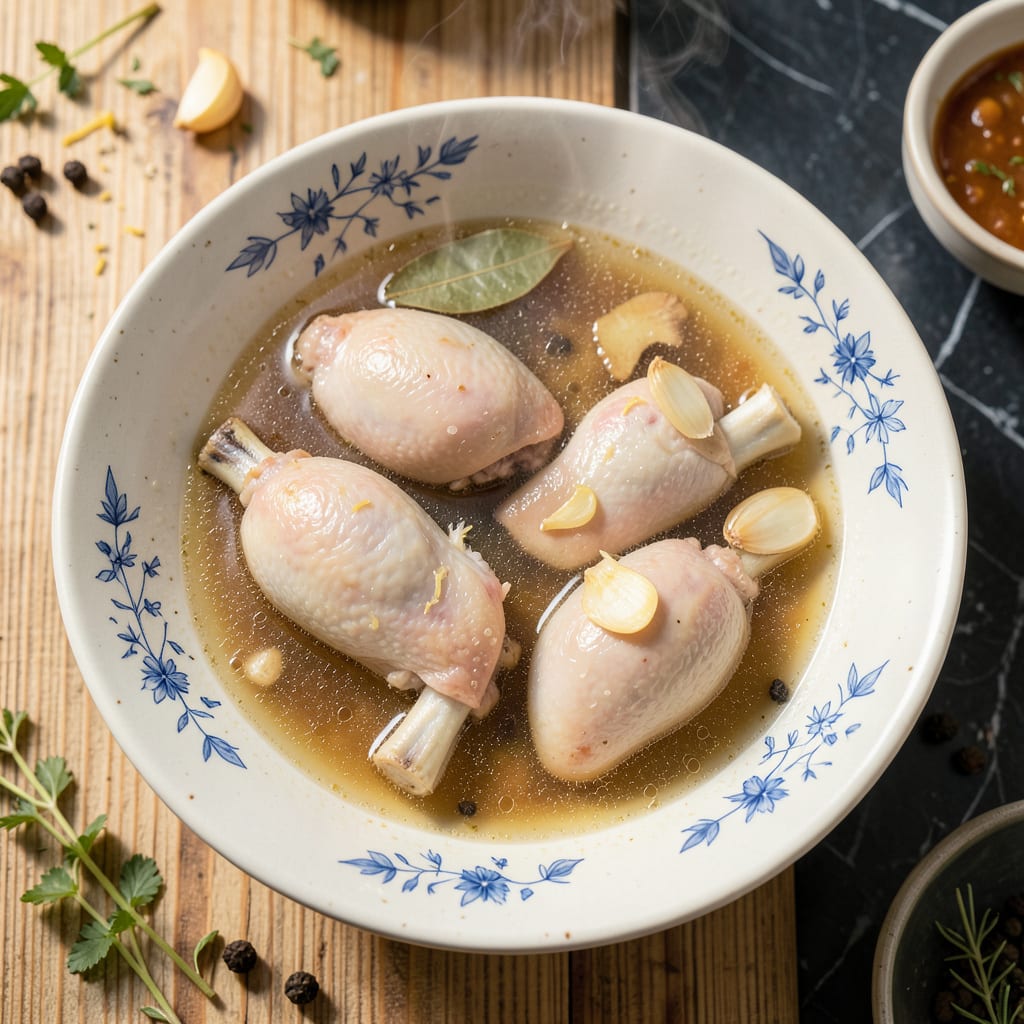
There’s nothing quite like homemade chicken soup, and it all starts with perfectly boiled chicken thighs. I’ve been making broth this way for years, and it’s the secret to rich, flavorful soup that beats anything from a can. The key is using bone-in, skin-on thighs—they add depth and body that breast meat just can’t match.
What makes this method special is how simple it is. Just 45 minutes with chicken, water, and a few aromatics creates a golden broth that’s packed with flavor. I always add onions, garlic, and bay leaves to the pot—they infuse the broth while the chicken cooks to tender perfection. No fancy techniques, just straightforward cooking that delivers amazing results.
You’ll end up with fall-off-the-bone chicken and a broth that’s rich enough to stand on its own. The meat shreds easily for adding back to soup, and the strained broth becomes the perfect base for noodles, vegetables, or whatever you’re craving. It’s the kind of homemade comfort that makes soup night feel extra special.
This method works for any chicken soup recipe, from classic noodle soup to creamy chicken and wild rice. The broth freezes beautifully too, so you can make a big batch and have soup ready whenever you need it. Let’s get that pot on the stove!
📚 In This Guide
- What You’ll Need
- Instructions
- Tips and Common Mistakes
What Youll Need
- ● Chicken thighs: 4–6 bone-in, skin-on (about 1.5 lbs) for maximum flavor or 1.5 lbs boneless for convenience. 🍖
- ● Water or broth: 8–10 cups (cold, filtered water for a clean broth or low-sodium chicken broth for depth).
- ● Aromatics: 1 medium yellow onion (quartered, skin on for color).
- ● 2 carrots (roughly chopped).
- ● 2 celery stalks (halved).
- ● 4 garlic cloves (smashed).
- ● 1 bay leaf.
- ● Seasonings: 1 tsp salt (adjust to taste), ½ tsp black peppercorns, 1 tsp dried thyme (or 2 sprigs fresh).
- ● Stockpot or Dutch oven: 5–6 quart capacity (with lid).
- ● Tongs or slotted spoon (for removing chicken/foam).
- ● Fine-mesh strainer or cheesecloth (for clear broth).
- ○ Skimmer (optional, to remove impurities).
- ○ Instant-read thermometer (optional, to check doneness: 165°F).
- ● 1 tbsp apple cider vinegar (brightens flavor + helps extract collagen).
- ● 1-inch ginger knob (sliced, for warmth).
- ● Parchment paper lid (traps steam for a gentler simmer).
Instructions
Here’s how to transform simple chicken thighs into a flavorful soup base—easy, foolproof, and packed with rich taste.
Prepare the Chicken Thighs
Start by rinsing your chicken thighs under cold water and patting them completely dry with paper towels. This step removes any bone fragments or residue while ensuring better browning later. I like to trim off any excess fat or skin if I’m going for a leaner broth, but you can leave it on for extra richness.
Place the thighs in a large pot or Dutch oven that can comfortably hold them in a single layer. The right pot size matters—too small and the broth won’t develop properly, too large and the flavors will be diluted. You want just enough space for the chicken to be mostly submerged when covered with water.
Cover with Water and Bring to a Boil
Add enough cold water to cover the chicken by about 2 inches. I always use cold water because it allows the flavors to develop gradually as the temperature rises. If you start with hot water, the meat can seize up and become tough before the collagen has time to break down properly.
Place the pot over medium-high heat and bring it to a gentle boil. Watch for small bubbles breaking the surface—this is your cue to reduce the heat immediately. A rolling boil will make your broth cloudy and can break the chicken apart too much, so we want to maintain a steady but gentle simmer throughout the cooking process.
Skim and Simmer for Rich Flavor
As the broth heats up, you’ll notice foam and impurities rising to the surface. Use a fine-mesh skimmer or large spoon to remove this foam—it’s mostly coagulated proteins that would make your broth cloudy. I like to skim every 5 minutes for the first 15 minutes of cooking, then as needed.
Once skimmed, reduce the heat to low and maintain a gentle simmer. Partially cover the pot with a lid to allow some steam to escape—this helps concentrate the flavors while preventing too much liquid from evaporating. Let the chicken simmer undisturbed for 30-40 minutes, until the meat is fully cooked and begins to pull away from the bones.
Remove Chicken and Strain the Broth
Carefully remove the chicken thighs from the broth using tongs and transfer them to a plate. They should be tender enough to fall apart with gentle pressure. Let them cool slightly before handling—this is when I usually shred the meat for my soup, but you can also chop it or leave it in larger pieces depending on your preference.
Pour the broth through a fine-mesh strainer into a clean pot or large bowl to remove any small bones or particles. I like to line my strainer with cheesecloth for an extra-clear broth, but this is optional. At this point, your broth should be golden and fragrant, with a rich chicken flavor that will form the perfect base for your soup.
Degrease and Use Immediately or Store
Let the broth sit for 5-10 minutes so the fat can rise to the surface. You can skim this fat off with a spoon if you prefer a leaner broth, or leave some for extra richness. I often remove about half the fat for a balanced flavor—enough richness without being greasy.
Your broth is now ready to use immediately in soup, or you can let it cool completely and store it. It will keep in the refrigerator for up to 4 days or can be frozen for 3 months. When reheating, bring it to a gentle simmer—never boil vigorously, as this can make the broth cloudy and affect the texture of your finished soup.
Tips and Common Mistakes
Here’s what I’ve learned from making this broth countless times—small details that make a big difference in flavor and clarity.
Heat Control: In Step 2, when you bring the broth to a boil over medium-high heat, watch for those first small bubbles. The moment you see them, reduce the heat immediately. I learned the hard way that even 30 seconds of a rolling boil can make your broth cloudy and break the chicken into tiny pieces. A gentle simmer is what develops that clean, rich flavor we’re after.
Skimming Technique: During the first 15 minutes mentioned in Step 3, don’t just skim once and forget it. I set a timer for every 5 minutes as suggested, and I’m always amazed at how much foam keeps rising. Use a wide, shallow spoon rather than a deep ladle—it lets you remove more surface area with each pass. This extra effort gives you that crystal-clear broth that makes restaurant-quality soup.
Simmering Wisdom: The 30-40 minute simmer in Step 3 is perfect for chicken thighs—they cook through completely without becoming stringy. Here’s what nobody tells you: if your broth isn’t as rich as you’d like after 30 minutes, let it go the full 40. That extra time extracts more collagen from the bones, giving your broth that luxurious mouthfeel that coats the back of a spoon.
Fat Management: When degreasing in Step 5, don’t rush the 5-10 minute resting time. I used to skim immediately, but now I wait the full 10 minutes—you’ll get a much cleaner separation between fat and broth. For an extra-clear result, chill the broth completely in the fridge. The fat will solidify into a hard layer you can lift right off in one piece.
Pro Tips for Boil Chicken Thighs For Soup
- Here’s what I’ve learned from making this broth countless times—small details that make a big difference in flavor an…
- Heat Control: In Step 2, when you bring the broth to a boil over medium-high heat, watch for those first small bubble…
- Skimming Technique: During the first 15 minutes mentioned in Step 3, don’t just skim once and forget it. I set a time…
Frequently Asked Questions
How long should I boil chicken thighs for soup to get the best flavor?
Boil bone-in chicken thighs for 30–45 minutes on medium-low heat for rich, flavorful broth. Boneless thighs need just 20–25 minutes to avoid drying out. Skimming foam in the first 10 minutes keeps the broth clear. For deeper flavor, simmer (don’t boil vigorously) and add aromatics like onion, garlic, or bay leaves early!
Can I use frozen chicken thighs without thawing first?
Yes! Add frozen thighs to cold water (never hot) and bring to a boil slowly. This prevents uneven cooking. Expect 10–15 extra minutes of simmering time. For safety, ensure the internal temp reaches 165°F (74°C) before using. Pro tip: Pat dry post-boiling for crispier skin if browning later!
What’s the best alternative if I don’t have chicken thighs?
Chicken drumsticks or wings (bone-in) work great—they’re budget-friendly and add collagen for a silky broth. For leaner options, use breasts but reduce simmering to 15–20 minutes to avoid toughness. Turkey thighs or pork shoulder (for non-chicken soup) also yield rich, hearty flavors.
Why is my boiled chicken broth cloudy or greasy?
Cloudiness comes from over-boiling (agitation emulsifies fat) or not skimming foam. Start in cold water, simmer gently, and skim every 5 minutes. For grease, chill the broth—fat solidifies on top for easy removal. A splash of vinegar (1 tbsp) while cooking can clarify too!
Can I reuse the boiled chicken thighs in another dish?
Shred or chop the cooked meat for tacos, salads, or fried rice. For crispy skin, pat dry and pan-sear or broil for 3–5 minutes. Store shredded chicken in broth (up to 3 days in the fridge) to keep it moist. Freeze for up to 3 months in airtight containers.
Boiling chicken thighs is your secret weapon for deep, flavorful soup bases—no fancy techniques required! 🍲 In just 45 minutes, you’ve unlocked a rich, protein-packed broth that’ll elevate any recipe, from classic chicken noodle to hearty stews. The best part? Those tender thighs can shred right into your dish for extra texture and taste.
Ready to put your homemade broth to work? Try simmering it with veggies and herbs for a quick soup tonight, or freeze it in batches for future meals. Your soups will never taste bland again—happy cooking! 😊

- Rice Cake Cereal Recipe: Crunchy Homemade Breakfast Delight - September 25, 2026
- Pancake Recipe Using Rice Flour: Light and Airy Gluten-Free Stacks - September 25, 2026
- Japanese Rice Porridge Recipe: Silky Congee With Umami Depth - September 25, 2026