
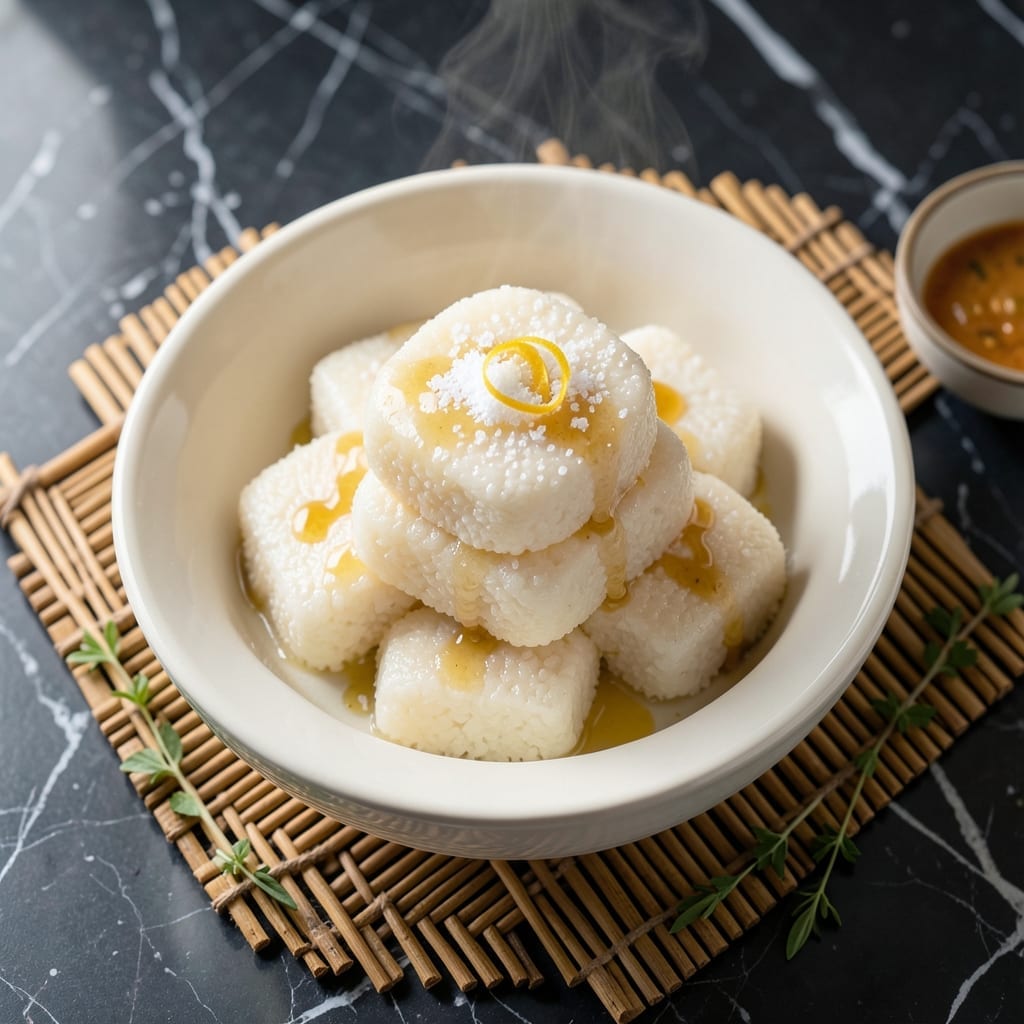
This recipe delivers the perfectly chewy texture that makes rice cakes so irresistible. The secret lies in the right rice flour blend and precise steaming time.
You’ll create soft, slightly sticky squares with just the right amount of sweetness in every bite. The technique ensures consistent results every time.
Ingredients for Chewy Rice Cake
Simple plant-based ingredients create those irresistible chewy rice cakes everyone loves.
| Ingredient | Amount | Notes |
|---|---|---|
| Sweet Rice Flour 🌾 | 2 cups | Also called glutinous rice flour |
| White Granulated Sugar 🍚 | ¾ cup | For balanced sweetness |
| Water 💧 | 1 ¼ cups | Warm for better dissolution |
| Coconut Milk 🥥 | ½ cup | Full-fat for richness |
| Vegetable Oil 🫒 | 2 tbsp | Neutral flavor preferred |
| Salt 🧂 | ½ tsp | Fine sea salt recommended |
| Vanilla Extract 🌿 | 1 tsp | Pure extract for best flavor |
| Cornstarch 🌽 | 2 tbsp | For additional chewiness |
| Baking Powder 🧂 | 1 tsp | Ensures light texture |
| Toasted Sesame Seeds 🌰 | 2 tbsp | Optional for garnish |
The sweet rice flour is non-negotiable here—look for glutinous rice flour in the Asian foods aisle or at H Mart. Bob’s Red Mill makes a reliable version if your local store carries it. The coconut milk adds richness without dairy; use full-fat for best results. Don’t substitute regular rice flour, as the texture won’t be the same (trust me on this).
No coconut milk? Oat or almond milk works in a pinch, but add an extra tablespoon of oil to compensate. For sweetness, maple syrup or agave can replace sugar at three-quarters the amount. Skip the sesame seeds if you prefer plain cakes, but they add a nice nutty crunch. The vanilla is subtle but worth it—use pure extract, not imitation.
Store cooled rice cakes in an airtight container at room temperature for 2-3 days. For longer storage, freeze for up to 1 month. Reheat briefly in a steamer or microwave to restore that fresh, sticky texture (don’t overdo it).
Why You’ll Love This Recipe
- Five Ingredient Magic: I love that this only needs sweet rice flour, sugar, water, coconut milk, and oil—no fancy shopping trips.
- Coconut Cloud Nine: The coconut milk gives it this rich, creamy sweetness that’s ridiculously good.
- Weeknight Rescue: Honestly, I can mix the batter in 5 minutes flat and steam while I tidy the kitchen.
- Stays Soft: Leftovers? No problem. They stay chewy for days, so I can snack or serve later.
Step-by-Step Instructions for Chewy Rice Cake
Follow this proven method to achieve the ideal balance of softness and elasticity in your creation.
Step 1: Prepare the Dry Ingredient Base
In a large mixing bowl, whisk together the 2 cups Sweet Rice Flour, 2 tbsp Cornstarch, and 1 tsp Baking Powder. I use a fine-mesh sieve for the sweet rice flour to eliminate any lumps, ensuring a smooth batter.
Add the 0.75 cup White Granulated Sugar and 0.5 tsp Salt to the dry mixture and whisk again until fully incorporated. The cornstarch enhances the chewy texture while the baking powder provides subtle lift, preventing a dense final product.
Step 2: Combine Wet Ingredients
In a separate bowl, measure out the 1.25 cups Water and 0.5 cup Coconut Milk. I use warm water to help dissolve the sugar more efficiently and full-fat coconut milk for its rich, velvety consistency.
Add the 2 tbsp Vegetable Oil and 1 tsp Vanilla Extract to the liquid mixture. Whisk vigorously for 30 seconds until the coconut milk is fully emulsified with the water and the mixture appears slightly frothy. This step ensures uniform distribution of fat throughout the batter.
Step 3: Create and Rest the Batter
Gradually pour the wet ingredients into the dry mixture while whisking continuously. The batter should be smooth and slightly thick, similar to pancake batter. If you notice any lumps, continue whisking until they disappear—this prevents uneven texture in the finished cake.
Let the batter rest at room temperature for 10 minutes. This allows the sweet rice flour to fully hydrate and the baking powder to begin activating, resulting in a more consistent texture. During this time, you’ll notice the batter thickens slightly as the flours absorb the liquids.
Step 4: Steam to Perfection
Pour the batter into a greased 8-inch round cake pan lined with parchment paper. Smooth the top with a spatula. Place the pan in a steamer that has been preheated with 2 inches of boiling water.
Cover the steamer and steam for 45-50 minutes over medium-high heat. Check for doneness by inserting a toothpick into the center—it should come out clean with just a few moist crumbs. The surface should appear set with a slight gloss, indicating the sugars have caramelized slightly.
Step 5: Cool and Garnish
Remove the pan from the steamer and let it cool on a wire rack for 10 minutes. Then invert the cake onto the rack and remove the parchment paper. The cake should have a slightly sticky surface with a golden hue at the edges.
Allow the cake to cool completely to room temperature, about 1 hour, before slicing. Sprinkle with 2 tbsp Toasted Sesame Seeds just before serving for added texture and visual appeal. The cake will firm up as it cools, achieving that signature chewy consistency.
Pro Tips For Making Chewy Rice Cake
- Steam Long Enough: I learned this the hard way—give it a full 20-25 minutes in the steamer after the water boils, no peeking. Under-steaming leaves a gummy center instead of that perfect chew.
- Use Warm Coconut Milk: Cold coconut milk can make the batter clump. Warm it slightly (about 100°F) before mixing—sounds fussy but it blends smooth every time.
- Skip the Overmixing: Stir the batter just until the sweet rice flour disappears. Overworking it develops too much starch and turns your cakes dense instead of springy.
- Oil the Steamer Cloth: Brush your steamer cloth or perforated liner with vegetable oil before adding the batter. This prevents sticking and saves you from scraping half the cake off the fabric.
Health Benefits of chewy rice cake
Gluten-Free Goodness
This creation is naturally gluten-free, making it perfect for anyone with celiac disease or gluten sensitivity. The sweet rice flour base provides all the chewiness without any wheat proteins that could trigger reactions. I love sharing this with friends who usually miss out on soft, sticky treats.
Energy Boost
The combination of complex carbohydrates from rice flour and natural sugars provides a steady energy release. A single serving offers about 200 calories of sustained fuel, ideal for a mid-afternoon pick-me-up or pre-workout snack. The coconut milk adds healthy fats for extra staying power. 💪
Easy Digestion
Rice-based treats like this are often easier to digest than wheat-based desserts. The low fiber content in sweet rice flour makes it gentle on sensitive stomachs. I’ve found this particularly helpful when serving guests with digestive sensitivities.
Dairy-Free Delight
This recipe uses coconut milk instead of dairy, making it suitable for lactose-intolerant individuals. The full-fat version provides richness without any cow’s milk proteins. It’s a great way to enjoy a sweet treat without the discomfort that often follows dairy consumption.
Nutrient Dense
While not a superfood, this dish offers small amounts of iron and B vitamins from the rice flour. The sesame seed garnish adds a boost of calcium and zinc. Every bite contributes to your daily nutrient intake while satisfying your sweet tooth. ✨
Allergen Friendly
With no nuts, eggs, or dairy in the base recipe, this is among the most allergen-friendly treats you can make. The simple ingredient list means fewer opportunities for allergen cross-contamination. Always double-check your brands, especially for the coconut milk and oil. 🌱
Nutrition Facts
Frequently Asked Questions
Why does my rice cake turn out dense?
Overmixing the batter or using the wrong flour causes density. Always use sweet rice flour and whisk just until combined. The 10 minute rest period also helps achieve a lighter texture.
Can I bake instead of steam?
Steaming is essential for the signature chewy texture. Baking would make it dry and crumbly. If you lack a steamer, use a colander over a pot of boiling water as an alternative.
How do I store leftovers?
Keep in an airtight container at room temperature for 2-3 days. For longer storage, freeze up to 1 month. Reheat briefly in a steamer to restore stickiness.
Can I make savory versions?
Reduce sugar to 2 tbsp and add 1 tsp soy sauce or miso paste to the batter. Top with furikake or sesame seeds after cooking for extra flavor.

- Jollof Rice Sauce Recipe: West African Tomato and Spice Infusion - September 25, 2026
- Japanese Rice Soup Recipe: Umami-Rich Comfort in a Bowl - September 25, 2026
- Homemade Cream Of Rice Recipe: Silk-Smooth Breakfast in Minutes - September 25, 2026