
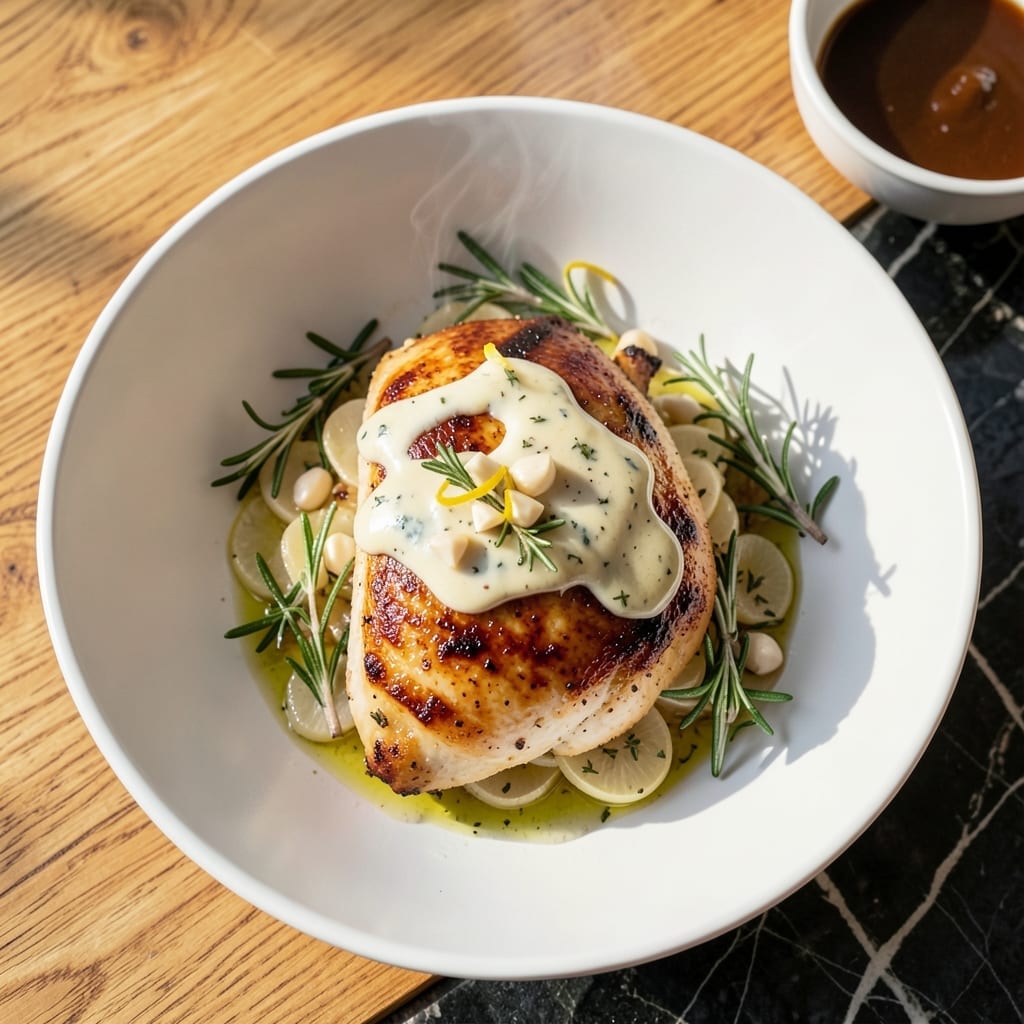
Achieving moist chicken breast at home is simpler than you think with this proven technique. The secret lies in a quick sear followed by gentle oven finishing, which locks in natural juices while ensuring even cooking throughout.
I developed this method after years of dry, overcooked chicken. A simple herbed butter baste adds layers of flavor and creates a golden crust without drying out the meat. The result is tender, juicy chicken every time.
This approach works with boneless or bone-in breasts and requires just 20 minutes of active cooking. The herbed butter melts into the meat, infusing it with aromatic richness that complements the natural chicken flavor.
Serve sliced over vegetables or with a simple starch. The technique is foolproof and delivers consistent, restaurant-quality results with minimal effort.
Ingredients for Chicken Breast
Simple ingredients deliver restaurant-quality results with this proven method for perfectly moist chicken.
| Ingredient | Amount | Notes |
|---|---|---|
| Boneless Chicken Breast 🍗 | 1 ½ lb | Pounded to even thickness |
| Unsalted Butter 🧈 | ½ cup | Softened for herbed butter |
| Fresh Rosemary 🌿 | 2 tbsp | Finely chopped, stems removed |
| Fresh Thyme 🍃 | 2 tbsp | Finely chopped, stems removed |
| Garlic Cloves 🧄 | 3 cloves | Minced for herbed butter |
| Olive Oil 🫒 | 2 tbsp | For searing chicken |
| Kosher Salt 🧂 | 1 tsp | Plus more to taste |
| Black Pepper 🌶️ | ½ tsp | Freshly ground preferred |
| Lemon Juice 🍋 | 1 tbsp | Freshly squeezed |
| Dijon Mustard 🟡 | 1 tsp | Optional for extra depth |
| Chicken Broth 🥣 | ¼ cup | Low-sodium preferred |
| All-Purpose Flour 🌾 | 2 tbsp | For dredging (optional) |
The chicken breast quality is non-negotiable here. Air-chilled, organic breasts from Whole Foods or Costco have better texture and moisture retention. Look for even thickness or pound them yourself—this ensures even cooking. The herbed butter benefits from European-style butter (higher fat content) like Plugrá or Kerrygold, which browns beautifully without burning.
No fresh herbs? Dried at one-third the amount works in a pinch, though the flavor won’t be as bright. Short on time? Pre-minced garlic from a jar is acceptable (drain the liquid first). For the broth, Better Than Bouillon makes a great low-sodium option. The Dijon mustard adds a subtle tang—skip it if you prefer milder flavors. Olive oil can be any neutral oil if that’s what you have.
The herbed butter can be made 2 days ahead and stored in the fridge. Cooked chicken keeps 3-4 days refrigerated or freezes beautifully for 3 months. Always bring refrigerated chicken to room temperature before cooking for even results.
Why You’ll Love This Recipe
- One Pan Wonder: I toss everything—chicken, butter, garlic, and herbs—into a single pan and let the oven do the work.
- Buttery Herb Magic: The rosemary and thyme infuse into the butter, making every bite of the chicken ridiculously rich and aromatic.
- Meal Prep Hero: It reheats beautifully, so I make a big batch for lunches all week. (Yes, even on a Tuesday night)
- Budget Stretcher: Boneless chicken breast is affordable, and this recipe turns it into something that feels fancy without the price tag.
Step-by-Step Instructions for Chicken Breast With Herbed Butter
This method guarantees juicy, flavorful chicken with minimal effort and maximum results.
Step 1: Prepare the Herbed Butter Compound
In a small bowl, combine the 0.5 cup unsalted butter (softened to room temperature), 2 tbsp fresh rosemary, 2 tbsp fresh thyme, and 3 cloves garlic cloves (minced). Mix thoroughly until all herbs and garlic are evenly distributed throughout the butter.
The butter should be soft enough to mix easily but not melted. I press the mixture against the bowl sides to ensure full incorporation. This compound butter will infuse the chicken with aromatic flavors as it cooks and rests.
Step 2: Pound and Season the Chicken
Place the 1.5 lb boneless chicken breast between two sheets of plastic wrap and pound to an even ½-inch thickness using a meat mallet. This ensures even cooking and prevents dry spots in thicker areas.
Pat the chicken dry with paper towels, then season both sides with 1 tsp kosher salt and 0.5 tsp black pepper. The dry surface helps achieve a better sear. For extra flavor, I sometimes add a light dusting of the 2 tbsp all-purpose flour to create a subtle crust.
Step 3: Sear the Chicken to Golden Perfection
Heat 2 tbsp olive oil in a large oven-safe skillet over medium-high heat until shimmering. Add the chicken and cook undisturbed for 5-6 minutes per side until golden brown and the internal temperature reaches 160°F.
The chicken should release easily from the pan when it’s ready to flip. Avoid moving it too soon, or it won’t develop that beautiful crust. During the last minute of cooking, I add a dollop of the herbed butter to the pan to begin the basting process.
Step 4: Finish with Pan Sauce and Rest
Remove the chicken from the pan and set aside. Deglaze the skillet with 0.25 cup chicken broth, scraping up any browned bits. Add the remaining herbed butter, 1 tbsp lemon juice, and 1 tsp dijon mustard, stirring until the butter melts and the sauce thickens slightly.
Return the chicken to the pan, spooning the sauce over the top. Let it rest in the warm sauce for 3-5 minutes before serving. This final step ensures the chicken stays moist while absorbing all the herbed butter flavors.
Pro Tips For Making Chicken Breast
- Pound Even Thickness: Chicken breasts cook unevenly if left whole—I learned this the hard way after too many dry, overcooked edges. Pound them to ¾-inch thickness for consistent doneness.
- Room Temp Start: Pull the chicken out 20-30 minutes before cooking—cold meat seizes up and cooks unevenly, no matter how hot your pan is.
- Butter Last: Add the unsalted butter and herbs only in the last 2-3 minutes of cooking to prevent burning and keep the rosemary and thyme fragrant, not bitter.
- Rest Under Foil: Let it rest 5-10 minutes covered loosely with foil after cooking—it keeps the juices inside where they belong, not on your cutting board.
Essential Equipment for This Dish
Oven-Safe Skillet
An oven-safe skillet is non-negotiable for this recipe. I swear by my Lodge cast iron for its even heat distribution and ability to go from stovetop to oven seamlessly. A 12-inch skillet gives you enough room to cook both breasts without crowding. 🔥
Meat Mallet
Pounding the chicken to an even ½-inch thickness ensures even cooking. A flat-sided meat mallet works best—I use the OXO Good Grips model. If you don’t have one, a rolling pin in a pinch works too. Just cover the chicken with plastic wrap first.
Instant-Read Thermometer
Precision is key for perfect chicken. My ThermoWorks Thermapen gives accurate readings in 2-3 seconds. Pull the chicken at 160°F—it’ll coast to 165°F while resting. Avoid guessing; this tool guarantees juicy results every time.
Mixing Bowls
A small stainless steel mixing bowl is perfect for combining your herbed butter. I prefer Cuisinox for durability. Ensure it’s large enough to mix comfortably but small enough to keep ingredients from spreading. The butter should be soft but not melted.
Tongs
Use 12-inch locking tongs for flipping the chicken—I recommend OXO or Tovolo. They give you control without piercing the meat, which keeps those precious juices inside. Avoid forks; they’ll release all the moisture you worked hard to retain.
Resting Surface
Let your chicken rest on a warm plate or wire rack before serving. This prevents soggy bottoms while allowing juices to redistribute. I place mine near the stove to keep it warm during the 3-5 minute rest. Patience here makes all the difference.
Nutrition Facts
Frequently Asked Questions
Why pound the chicken to ½-inch thickness?
Pounding creates even thickness so the meat cooks uniformly. This prevents dry spots in thicker areas while ensuring the thinner parts don’t overcook. It also helps the herbed butter penetrate more evenly.
Can I use dried herbs instead of fresh?
Yes, but use 1/3 the amount since dried herbs are more concentrated. The flavor won’t be as bright, but it’ll still work. Fresh herbs are ideal for this method.
How do I know when it’s done?
Use an instant-read thermometer and pull at 160°F. The temperature will rise to 165°F while resting. Never cut into the meat to check—this releases precious juices.
Can I make this ahead?
The herbed butter can be made 2 days ahead. Cooked chicken keeps 3-4 days in the fridge or freezes for 3 months. Always bring to room temperature before reheating.

- Jollof Rice Sauce Recipe: West African Tomato and Spice Infusion - September 25, 2026
- Japanese Rice Soup Recipe: Umami-Rich Comfort in a Bowl - September 25, 2026
- Homemade Cream Of Rice Recipe: Silk-Smooth Breakfast in Minutes - September 25, 2026