
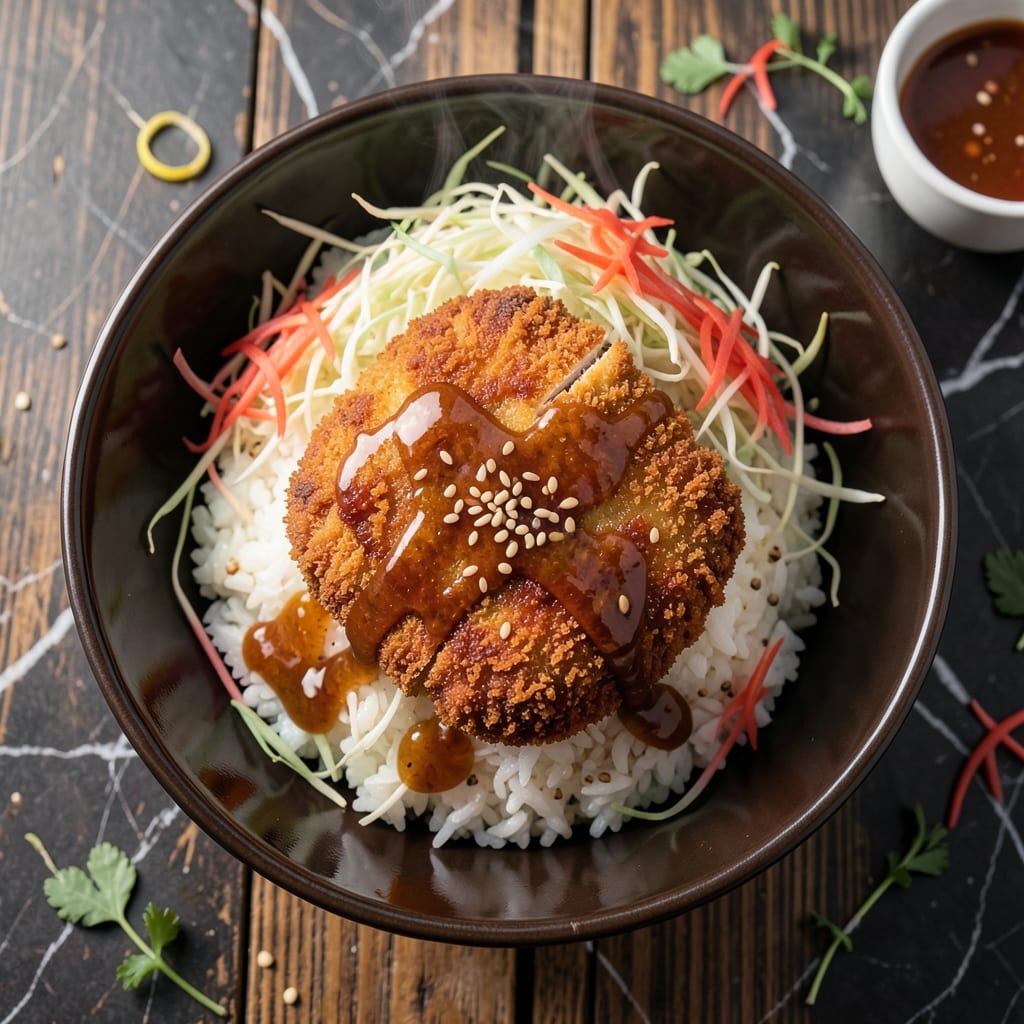
This dish brings Japanese comfort food to your kitchen with crispy panko-crusted chicken over fluffy rice. I perfected this method during my Charleston days, learning that proper oil temperature is everything for achieving that golden, shatteringly crispy coating.
The key is double-dredging the chicken in flour and egg before pressing it into seasoned panko. This creates layers that ensure maximum crunch in every bite. The rice serves as the perfect neutral base to soak up any extra sauce.
You’ll end up with tender chicken encased in a crispy shell, served over steamed rice with tonkatsu or your favorite dipping sauce. It’s the kind of meal that satisfies both the texture and flavor cravings simultaneously.
Ready in under an hour with basic pantry staples. Here’s how to build this bowl.
Ingredients for Chicken Katsu Rice Bowl
Simple ingredients for that perfect crispy, saucy, and satisfying bowl everyone craves.
| Ingredient | Amount | Notes |
|---|---|---|
| Boneless Chicken Breasts 🍗 | 1 ½ lb | Pounded to 1/2-inch thickness |
| All-Purpose Flour 🌾 | ½ cup | For initial dredging |
| Large Eggs 🥚 | 2 whole | Beaten for egg wash |
| Panko Breadcrumbs 🍞 | 2 cups | Japanese-style for maximum crunch |
| Neutral Oil 🫒 | 2 cups | For frying, like vegetable or canola |
| Long-Grain White Rice 🍚 | 2 cups | Uncooked, rinsed before cooking |
| Tonkatsu Sauce 🍯 | ½ cup | Store-bought or homemade |
| Salt 🧂 | 1 tsp | Divided for seasoning |
| Black Pepper 🌶️ | ½ tsp | Freshly ground preferred |
| Garlic Powder 🧄 | 1 tsp | For panko seasoning |
| Onion Powder 🧅 | 1 tsp | For panko seasoning |
| Green Onions 🧅 | ¼ cup | Thinly sliced for garnish |
| Shredded Cabbage 🥬 | 2 cups | For serving, optional |
The chicken is the star here. Boneless breasts work best—pound them evenly so they cook at the same rate. Panko is non-negotiable for that shatteringly crispy coating (regular breadcrumbs won’t cut it). I grab mine from the Asian aisle at Kroger or H-Mart for the freshest stock. The oil needs to hit 350°F—a thermometer is worth the investment.
No tonkatsu sauce? Ketchup mixed with Worcestershire and soy sauce gets you surprisingly close. Panko shortage? Crush cornflakes or saltines in a pinch (not ideal, but works). For extra flavor in the coating, add a pinch of paprika or cayenne. The rice can be jasmine or short-grain if you prefer stickier texture.
Leftovers keep in the fridge for 3-4 days, though the coating loses crispness. Reheat in the oven at 375°F to revive it. Cabbage and green onions can be prepped a day ahead—store them in damp paper towels to stay fresh.
Why You’ll Love This Recipe
- Minimal Effort: I love that it’s just dredge, dip, and fry—no fancy techniques, just crispy panko perfection.
- Crispy Comfort: That golden crunch from the panko with the tender chicken inside? It’s the kind of bite I crave all week.
- Weeknight Hero: Honestly, it’s my go-to for busy evenings—fills the table fast and satisfies everyone.
- Leftovers Win: The chicken stays crispy when reheated in the air fryer, so I get two solid meals out of one cook.
Step-by-Step Instructions for Chicken Katsu Rice Bowl
Follow my tested method and you’ll get perfectly crispy cutlets every single time.
Step 1: Prep and Season the Chicken Breasts
Start by pounding the 1.5 lb boneless chicken breasts between plastic wrap to an even ½-inch thickness. This ensures even cooking and prevents dry spots. I use the flat side of a meat mallet for this.
Season both sides of the cutlets with ½ tsp salt and ½ tsp black pepper. The seasoning should be visible but not overpowering. Let them sit at room temperature for 10 minutes while you prepare the breading station—this helps the coating adhere better.
Step 2: Set Up the Breading Station
In a shallow dish, combine the 2 cups panko breadcrumbs with 1 tsp garlic powder and 1 tsp onion powder. I like to press the seasoning into the breadcrumbs with my fingers to distribute it evenly.
Place the 0.5 cup all-purpose flour in a second dish and beat the 2 whole large eggs in a third. This three-step process creates that signature crispy, golden crust. Line up the dishes in this order: flour, egg, then panko.
Step 3: Bread and Fry the Chicken
Dredge each chicken cutlet in the flour, shaking off any excess. Then dip it in the beaten eggs, letting any extra drip off. Finally, press the cutlet firmly into the seasoned panko, making sure it’s completely coated on both sides. Press hard—this helps the coating stick during frying.
Heat 2 cups neutral oil in a deep skillet to 350°F. Fry the breaded chicken for 4-5 minutes per side until golden brown and the internal temperature reaches 165°F. Don’t crowd the pan—fry in batches if needed to maintain oil temperature. Transfer to a wire rack to drain excess oil.
Step 4: Cook the Rice and Assemble the Bowl
While the chicken fries, cook the 2 cups long-grain white rice according to package instructions. I like to fluff it with a fork when it’s done to separate the grains. Keep it warm until ready to serve.
Slice the fried chicken into ½-inch strips. Arrange a generous portion of rice in each bowl, then top with the sliced chicken. Drizzle with 0.5 cup tonkatsu sauce—I like to do this in a zigzag pattern for even coverage.
Step 5: Garnish and Serve
Top each bowl with 0.25 cup green onions and, if using, 2 cups shredded cabbage. The green onions add a fresh bite that cuts through the richness, while the cabbage provides a nice crunch.
Serve immediately while the chicken is still crispy. That first bite through the crunchy panko into the tender chicken, all over the warm rice with that sweet-savory sauce, is what this dish is all about. The contrast of textures makes it irresistible.
Pro Tips For Making Chicken Katsu Rice Bowl
- Pound the Chicken: Flatten the boneless chicken breasts to an even 1/2-inch thickness with a rolling pin or meat mallet—this guarantees they cook through in the same time and stay juicy instead of drying out.
- Double Bread for Crunch: Dip the chicken in flour, then egg, then panko, and repeat the egg and panko once more. I learned this the hard way—single-coating falls off and leaves sad, bare spots.
- Hot Oil Only: Don’t add the chicken until the oil hits 350°F and shimmers. After burning three batches, I finally figured out that lukewarm oil just soaks in and makes greasy, soggy katsu.
- Rest Before Slicing: Give the fried cutlets a solid 5 minutes on a wire rack before slicing for the bowl—it keeps the crust crisp and the juices from flooding the rice. Yes, even if you’re starving.
Make-Ahead Tips for Leftovers
Prep Ahead Steps
You can pound and season the 1.5 lb boneless chicken breasts up to 24 hours in advance. Store them in an airtight container in the fridge with parchment between layers to prevent sticking. This saves time on busy weeknights. 💡
Breading Station Prep
Combine the 2 cups panko with 1 tsp garlic powder and 1 tsp onion powder the night before. Store in a sealed container. The flour and beaten eggs should be prepped fresh the day of cooking for best results.
Rice Cooking Timing
Cook the 2 cups long-grain white rice up to 2 hours ahead and keep it warm in a rice cooker or insulated pot. Add a splash of water and fluff with a fork before serving to restore moisture.
Garnish Prep
Slice the 0.25 cup green onions and shred the 2 cups cabbage a day in advance. Store them separately in damp paper towels in the fridge to maintain freshness and crispness.
Sauce Storage
Make or portion the 0.5 cup tonkatsu sauce up to 3 days ahead. Store in an airtight container in the fridge. Warm slightly before serving for easier drizzling. 🍯
Reheating Chicken
To revive leftovers, place the chicken on a wire rack in a 375°F oven for 10-12 minutes. This restores crispness better than a microwave. Assemble bowls fresh with warm rice and garnishes.
Nutrition Facts
Frequently Asked Questions
What’s the best oil for frying?
Use a neutral oil with a high smoke point like vegetable, canola, or peanut. 350°F is ideal for crispy results without burning. Avoid olive oil—it can impart unwanted flavor.
Can I bake the chicken instead of frying?
Yes, but the texture won’t be as crispy. Bake at 400°F for 20-25 minutes, flipping halfway. For extra crunch, spritz with oil before baking.
Why is my coating falling off?
This usually happens if the chicken isn’t dry before breading or the oil isn’t hot enough. Pat the chicken dry and ensure oil reaches 350°F before frying. Press the panko firmly onto the chicken.
Can I use chicken thighs?
Thighs stay juicier. Pound them to ½-inch thickness and follow the same method. Adjust frying time to 5-6 minutes per side for darker meat.

- Jollof Rice Sauce Recipe: West African Tomato and Spice Infusion - September 25, 2026
- Japanese Rice Soup Recipe: Umami-Rich Comfort in a Bowl - September 25, 2026
- Homemade Cream Of Rice Recipe: Silk-Smooth Breakfast in Minutes - September 25, 2026