
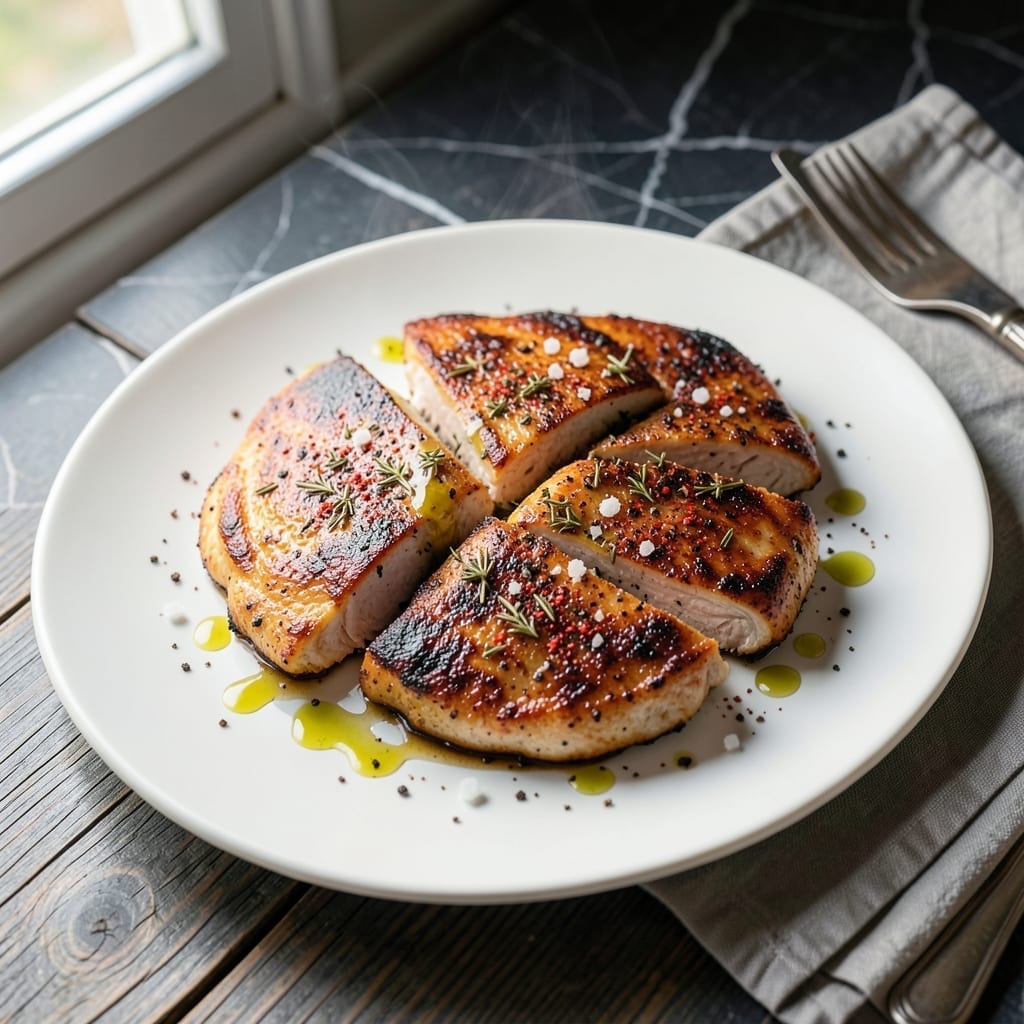
Achieving moist chicken with a golden crust on the stovetop is simpler than you think. My method relies on precise heat control and patience—two lessons I learned early in my Charleston kitchen.
The key is starting with room-temperature chicken and using a heavy skillet. This ensures even cooking and a perfect sear without drying out the meat. A simple seasoning blend enhances the natural flavors.
In 25 minutes, you’ll have juicy, tender chicken with a crisp, golden exterior. The technique works for both bone-in and boneless cuts, making it versatile for any weeknight meal.
Serve with roasted vegetables or a fresh salad for a complete, satisfying dinner. This approach delivers professional results every time.
Ingredients for Chicken on Stovetop
Simple ingredients, room-temperature chicken, and a heavy skillet are all you need.
| Ingredient | Amount | Notes |
|---|---|---|
| Chicken Breast Cutlets 🍗 | 1 ½ lb | Boneless, skinless, pounded to even thickness |
| Kosher Salt 🧂 | 1 ½ tsp | Diamond Crystal preferred for texture |
| Freshly Ground Black Pepper 🌶️ | 1 tsp | Coarse grind for best flavor |
| Garlic Powder 🧄 | 1 tsp | Not garlic salt substitute |
| Smoked Paprika 🌶️ | ½ tsp | Adds depth and color |
| Dried Thyme 🍃 | ½ tsp | Rubbed between fingers to release oils |
| Extra-Virgin Olive Oil 🫒 | 3 tbsp | Divided for cooking and finishing |
| Unsalted Butter 🧈 | 2 tbsp | For basting during cooking |
| Fresh Rosemary Sprigs 🌿 | 2 sprigs | Optional, for aromatic basting |
| Fresh Thyme Sprigs 🌿 | 2 sprigs | Optional, for aromatic basting |
| Lemon 🍋 | ½ whole | For bright finishing touch |
The chicken itself is the star—boneless, skinless cutlets cook fastest and most evenly. I get mine from Whole Foods or Harris Teeter (they have great butcher counters). Look for pieces that are uniform in thickness, or pound them yourself to about 1/2-inch. The Diamond Crystal kosher salt is worth hunting down—its coarse texture and clean flavor make a difference you can taste.
No smoked paprika? Regular paprika plus a pinch of cayenne gets you close. Fresh herbs not on hand? Dried at one-third the amount works fine. The butter is non-negotiable for that golden crust though—don’t sub oil here. And if you’re skipping the fresh herbs for basting, add an extra shake of dried thyme to the seasoning mix. The lemon at the end? Absolutely essential—brightens everything up.
Seasoned chicken keeps 2-3 days in the fridge (raw) or 3 months frozen. Cooked leftovers? 4 days max—reheat gently so it doesn’t dry out. I always make extra for salads or sandwiches the next day (it slices beautifully cold too).
Why You’ll Love This Recipe
- One Pan Wonder: Honestly, it’s just chicken, spices, and a skillet—no extra bowls, no fuss.
- Smoky Depth: The smoked paprika and garlic powder give it that rich, restaurant-quality flavor without the bill.
- Weeknight Hero: I throw this together after work and it’s ready before the pasta boils.
- Budget Stretcher: A few chicken cutlets and pantry staples feed my family for two meals, easy.
Step-by-Step Instructions for Chicken on Stovetop
Here’s the method. Straightforward, tested, works every time.
Step 1: Season and Prep the Chicken
Pat the 1.5 lb chicken breast cutlets completely dry with paper towels—this is non-negotiable for achieving that perfect crust. I always pound them to an even thickness first, which ensures they cook uniformly without drying out.
In a small bowl, combine the 1.5 tsp kosher salt, 1 tsp freshly ground black pepper, 1 tsp garlic powder, 0.5 tsp smoked paprika, and 0.5 tsp dried thyme. Rub this mixture all over the cutlets, pressing it in gently so it adheres. Let them sit at room temperature for 10 minutes while you prep the pan.
Step 2: Sear the Cutlets to Golden Perfection
Heat 2 tbsp of the extra-virgin olive oil in a large skillet over medium-high heat until it shimmers but doesn’t smoke. Add the cutlets in a single layer—don’t crowd the pan or they’ll steam instead of sear. Cook undisturbed for 4-5 minutes until the edges are golden brown and they release easily from the pan.
Flip once and cook for another 4-5 minutes until the second side is equally browned. This is where the magic happens: the Maillard reaction creates that deep, caramelized flavor we’re after. If your cutlets are browning too quickly, lower the heat slightly—you want even cooking, not burnt outsides with raw centers.
Step 3: Baste with Butter and Herbs
Reduce the heat to medium and add the remaining 1 tbsp extra-virgin olive oil and 2 tbsp unsalted butter to the pan. Tilt the skillet slightly so the butter pools on one side. Add the 2 sprigs fresh rosemary and 2 sprigs fresh thyme to the butter and let them infuse for 30 seconds.
Spoon the foaming butter over the cutlets repeatedly, basting them for 2-3 minutes until the internal temperature reaches 160°F. The herbs will release their aromatic oils into the butter, adding another layer of flavor. Watch for the butter to turn a light hazelnut brown—this is your cue that it’s time to finish.
Step 4: Rest and Finish with Lemon
Transfer the cutlets to a warm plate and let them rest for 5 minutes. This step ensures the juices redistribute, giving you that promised moist center. Tent them loosely with foil to keep them warm.
Squeeze 0.5 lemon over the cutlets just before serving. The bright acidity cuts through the richness and elevates all the flavors. I like to garnish with a few fresh herb leaves for color, but that’s entirely optional. Serve immediately while the crust is still crisp.
Pro Tips For Making Chicken On Stovetop
- Preheat the Pan: I learned this the hard way—get your pan screaming hot before adding the chicken, or you’ll end up with sad, pale cutlets instead of that golden crust we’re all after.
- Pat It Dry: Sounds weird, but it works: blot the chicken cutlets with a paper towel before seasoning to make sure they sear properly instead of steaming in their own juices.
- Skip the Overcrowding: Resist the urge to cram all the cutlets in at once—give them space in the pan, or they’ll steam and turn rubbery instead of crispy.
- Rest Before Slicing: After burning three batches, I finally figured out that letting the chicken rest 5 minutes under foil keeps all the juices locked in where they belong.
Troubleshooting This Dish
Uneven Cooking
If your chicken is cooked on the outside but raw inside, it’s likely too thick. Always pound cutlets to ½-inch thickness for even cooking. Also, avoid crowding the pan—give each piece 2 inches of space so it sears, not steams. 💡
Dry Chicken
Overcooking is the main culprit. Pull cutlets at 160°F internal—they’ll rise to 165°F while resting. Another trick: baste with butter during cooking to add moisture and flavor. I learned this the hard way during my first championship cook-off.
Poor Crust
For a golden crust, pat the chicken completely dry before seasoning. Water prevents proper browning. Also, use medium-high heat and don’t move the chicken for 4-5 minutes—let the Maillard reaction work its magic.
Sticking to Pan
This usually means your pan wasn’t hot enough or you moved the chicken too soon. Heat the oil until it shimmers, then wait 30 seconds more before adding chicken. If using stainless steel, let a water droplet dance on the surface to test readiness.
Butter Burning
Butter burns at high heat. Reduce to medium before adding it, and keep the pan moving. If it starts browning too fast, take the pan off heat for 10-15 seconds to cool slightly. The butter should foam, not smoke.
Seasoning Not Sticking
Rub the seasoning in firmly and let the chicken rest for 10 minutes at room temperature. This gives the salt time to penetrate and helps the spices adhere. I always use Diamond Crystal kosher salt—its coarse texture grips better. 🌟
Nutrition Facts
Frequently Asked Questions
What’s the best pan to use?
Use a heavy skillet like cast iron or stainless steel. These distribute heat evenly and develop a better sear. Avoid nonstick as it won’t get hot enough for proper browning.
Can I use bone-in chicken?
Yes, but it’ll take longer to cook. Bone-in pieces need 6-8 minutes per side at medium-high heat. Use a meat thermometer to check for 165°F at the thickest part.
How do I keep it from drying out?
Don’t overcook—pull it at 160°F internal temperature. Basting with butter adds moisture and flavor. Letting it rest 5 minutes before serving keeps it juicy.
Can I make this ahead?
Cooked chicken keeps 4 days refrigerated. Reheat gently in a pan with a splash of water or broth to prevent drying. For best results, serve immediately after cooking.

- Jollof Rice Sauce Recipe: West African Tomato and Spice Infusion - September 25, 2026
- Japanese Rice Soup Recipe: Umami-Rich Comfort in a Bowl - September 25, 2026
- Homemade Cream Of Rice Recipe: Silk-Smooth Breakfast in Minutes - September 25, 2026