
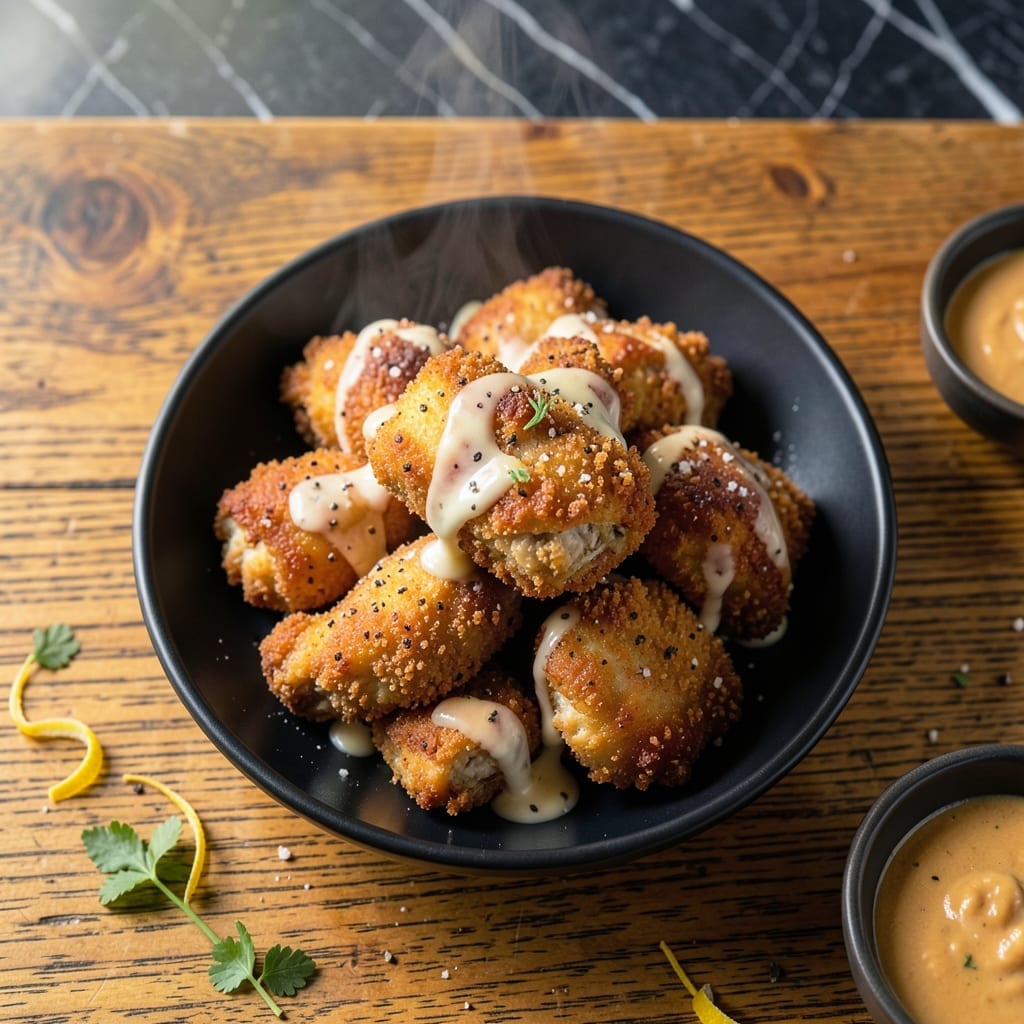
This recipe delivers crispy, golden chicken pieces that outshine any takeout version. After years of testing, I’ve perfected a method that guarantees a shatteringly crisp exterior while keeping the meat juicy inside.
The secret is a double-dredge technique with buttermilk and seasoned flour, followed by a hot oil fry. This creates layers of texture that stay crispy even after resting. No special equipment is required—just a heavy skillet and patience.
These versatile bites work for lunch, dinner, or appetizers. Serve them with honey mustard, hot sauce, or as a main course with sides. The technique works for any cut of chicken, making it a go-to recipe.
Ready in under an hour, this dish proves that homemade can rival restaurant quality. Here’s how to make it right every time.
Ingredients for Chicken Pieces
Crispy golden bites start with these simple, flavorful ingredients for any meal.
| Ingredient | Amount | Notes |
|---|---|---|
| Chicken Thighs 🍗 | 2 lb | Boneless, skinless, cut into 1-inch pieces |
| Buttermilk 🥛 | 1 ½ cups | Full-fat for best texture |
| All-Purpose Flour 🌾 | 2 cups | Divided for dredging and coating |
| Cornstarch 🌽 | ¼ cup | For extra crispiness |
| Salt 🧂 | 2 tsp | Divided for seasoning flour and chicken |
| Black Pepper 🌶️ | 1 tsp | Freshly ground preferred |
| Paprika 🌶️ | 1 ½ tsp | Sweet or smoked for color |
| Garlic Powder 🧄 | 1 tsp | Not garlic salt |
| Onion Powder 🧅 | 1 tsp | Balances the spice blend |
| Cayenne Pepper 🔥 | ½ tsp | Adjust to heat preference |
| Vegetable Oil 🫒 | 3 cups | For frying, high smoke point |
| Large Egg 🥚 | 1 whole | Helps coating adhere |
The chicken matters most here. Thighs stay juicier than breasts—Costco or Sam’s Club sell boneless, skinless in bulk. Look for vibrant pink color (not gray) and avoid added solutions. For the buttermilk, full-fat gives the best coating adhesion. Don’t have buttermilk? Mix 1.5 cups milk with 1.5 tbsp vinegar and let sit 5 minutes.
No cornstarch? Double the flour but expect slightly less crunch. Swap paprika for Cajun seasoning for a spicier kick. Vegetable oil can be peanut or canola oil—avoid olive oil (too low smoke point). For gluten-free, use rice flour and cornstarch blend. The egg helps binding, but a flax egg (1 tbsp ground flax + 3 tbsp water) works in a pinch.
Fry in batches to avoid crowding—the oil temp drops too much otherwise. Leftovers keep 3-4 days in the fridge, but they’re best fresh. Reheat in a 350°F oven for 10-15 minutes to revive crispiness. Never microwave (soggy disaster).
Why You’ll Love This Recipe
- One Pan Magic: I mix everything in a bowl, coat the thighs, and bake—no fancy steps or extra dishes to wash.
- Crispy Perfection: The buttermilk soak keeps the meat juicy while the cornstarch gives it that irresistible crunch.
- Feeds Everyone: I’ve served this at picnics, packed it for lunches, and even snacked on leftovers straight from the fridge.
- Budget Winner: Chicken thighs are cheap, and a little flour and cornstarch stretch to feed a crowd without breaking the bank.
Step-by-Step Instructions for Chicken Pieces
Here’s the method for achieving perfectly crispy, golden-brown chicken pieces with every batch.
Step 1: Marinate the Chicken Thighs in Buttermilk
In a large bowl, whisk together the 1.5 cups buttermilk and 1 whole large egg until fully combined. This creates a rich, tangy base that tenderizes the meat and helps the coating adhere.
Add the 2 lb chicken thighs (cut into 1-inch pieces) to the buttermilk mixture, ensuring all pieces are fully submerged. Cover and refrigerate for at least 1 hour or up to 12 hours. The longer marinade time results in more tender, flavorful chicken.
Step 2: Prepare the Seasoned Flour Coating
In a separate large bowl, combine the 2 cups all-purpose flour, 0.25 cup cornstarch, 2 tsp salt, 1 tsp black pepper, 1.5 tsp paprika, 1 tsp garlic powder, 1 tsp onion powder, and 0.5 tsp cayenne pepper. Whisk thoroughly to distribute the spices evenly.
The cornstarch adds extra crispiness, while the blend of paprika, garlic, and onion powders creates a well-balanced, flavorful crust. The cayenne adds a subtle kick that complements the richness of the chicken.
Step 3: Coat and Rest the Chicken
Remove the chicken pieces from the buttermilk marinade, allowing excess liquid to drip off. Dredge each piece in the seasoned flour mixture, pressing firmly to ensure an even, thick coating on all sides.
Place the coated chicken on a wire rack set over a baking sheet. Let it rest for 10-15 minutes—this crucial step helps the coating adhere better during frying and prevents it from sliding off. You’ll notice the flour mixture starts to look slightly tacky, which is exactly what you want.
Step 4: Fry to Golden Perfection
In a large, heavy-bottomed pot or Dutch oven, heat the 3 cups vegetable oil to 350°F. Use a deep-fry thermometer to monitor the temperature, as maintaining consistent heat is key to even cooking.
Working in batches to avoid crowding the pot, carefully lower the coated chicken pieces into the hot oil. Fry for 8-10 minutes, turning occasionally, until the coating is deep golden brown and the internal temperature reaches 165°F. The oil should bubble steadily but not violently around the chicken.
Transfer the fried chicken to a wire rack or paper towel-lined plate to drain. The coating should be crisp and audibly crunchy when bitten into, with no greasy residue.
Pro Tips For Making Chicken Pieces
- Soak Overnight: I learned this the hard way—give the chicken thighs at least 8 hours in the buttermilk, or the coating won’t cling as well and the meat stays dry.
- Double Dredge: After the first flour dip, let the pieces rest 5 minutes before dredging again—this builds a thicker, crunchier crust that actually stays put.
- Hot Oil Test: Drop a pinch of flour into the oil first; if it sizzles immediately, it’s ready for the chicken, otherwise wait—no one likes greasy, soggy pieces.
- Mix in Cornstarch: Add 2 tablespoons of cornstarch to the flour for extra crispiness—sounds weird, but it works and keeps the coating light, not heavy.
Essential Equipment for Great chicken pieces
Deep-Fry Thermometer
A deep-fry thermometer is non-negotiable for maintaining 350°F oil temperature. I use the Taylor Precision 594J—it clips to the pot and has a 5-inch probe for accuracy. Guessing leads to inconsistent results.
Heavy-Bottomed Pot
My go-to is a 5.5-quart Le Creuset Dutch oven—its enamel coating prevents sticking and distributes heat evenly. For budget options, a Lodge cast iron Dutch oven works just as well. Avoid thin pots; they can’t maintain steady heat. 🔥
Wire Rack Setup
Place a wire cooling rack over a baking sheet to rest coated chicken before frying. This allows air circulation so the coating doesn’t get soggy. I use the OXO Good Grips rack—it’s sturdy and fits half-sheet pans perfectly.
Long Tongs
Use 12-inch stainless steel tongs for safe frying. The length keeps your hands away from hot oil, and the locking mechanism is essential for storage. OXO or Cuisinox make reliable options that last for years.
Paper Towel Station
Keep a roll of heavy-duty paper towels nearby to drain fried chicken. The Brawny brand holds up best to grease. Place a few layers on a plate for draining—never use a paper towel-lined rack, as it defeats the purpose.
Buttermilk Bowl
A 4-quart glass mixing bowl with a lid is perfect for marinating. I prefer Pyrex because it’s durable and won’t absorb odors. The lid prevents spills in the fridge. Honestly, this changed my prep game.
Nutrition Facts
Frequently Asked Questions
Can I use chicken breasts instead of thighs?
Yes, but thighs stay juicier. If using breasts, reduce cooking time to 6-8 minutes to prevent dryness. Brining the chicken first can help maintain moisture.
How do I keep the coating from falling off?
Pat the chicken dry before marinating, and let the coated pieces rest for 10-15 minutes before frying. This helps the flour adhere properly. Avoid overcrowding the pot.
Can I bake these instead of frying?
Yes! Place on a wire rack over a baking sheet and bake at 400°F for 20-25 minutes, flipping halfway. Spray with oil for extra crispiness.
How do I store leftovers?
Store in an airtight container in the fridge for up to 3-4 days. Reheat in a 350°F oven for 10-15 minutes to restore crispiness. Never microwave.

- Jollof Rice Sauce Recipe: West African Tomato and Spice Infusion - September 25, 2026
- Japanese Rice Soup Recipe: Umami-Rich Comfort in a Bowl - September 25, 2026
- Homemade Cream Of Rice Recipe: Silk-Smooth Breakfast in Minutes - September 25, 2026