
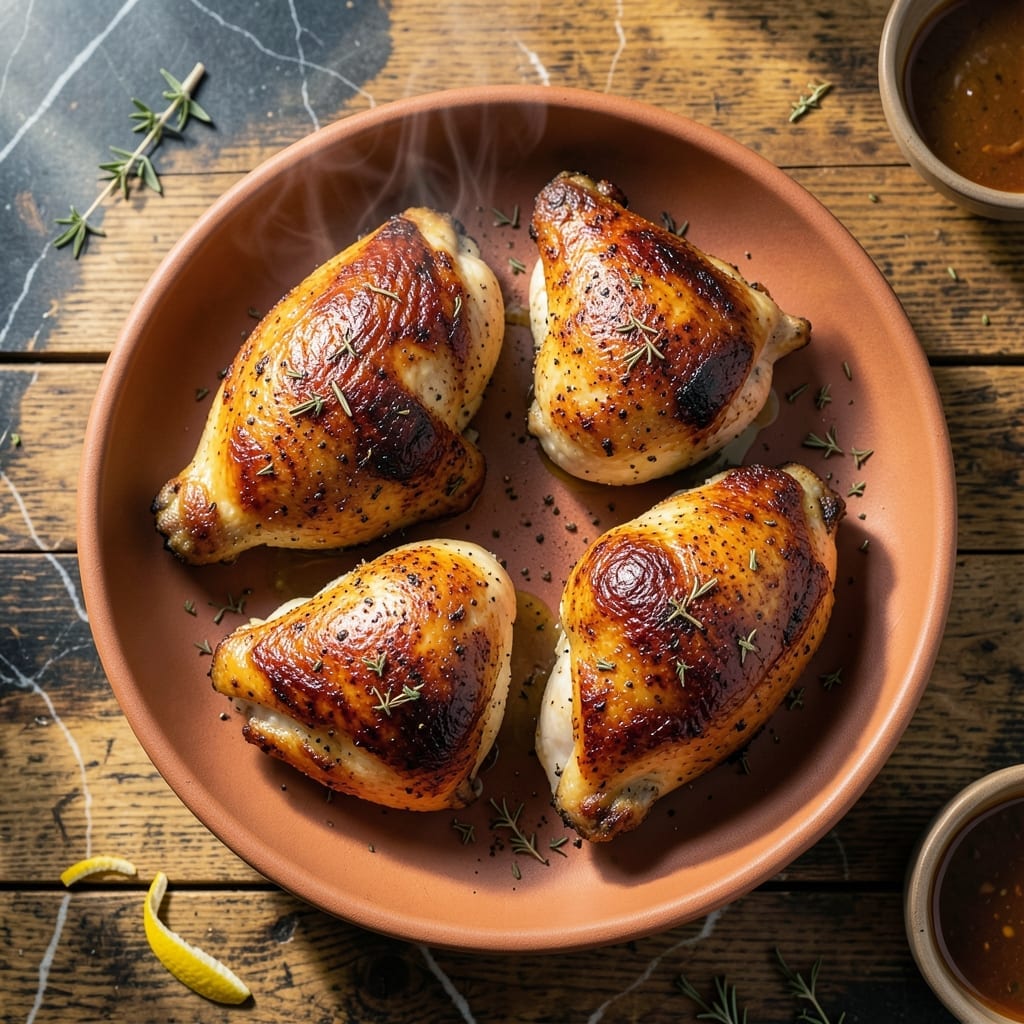
This oven-roasted method transforms humble chicken quarters into a meal with crispy skin and juicy meat every time. The high heat ensures golden, shatteringly crisp skin while locking in natural juices.
I’ve perfected the timing and temperature to guarantee even cooking without drying the meat. A simple seasoning blend enhances the chicken’s natural flavor, making it a foolproof dish for any home cook.
What you’ll get is tender, fall-off-the-bone meat with skin so crisp it cracks at the slightest touch. The aroma alone will have everyone gathering around the table before it’s even served.
Pair with roasted vegetables or a fresh salad for a complete, satisfying meal.
Ingredients for Chicken Quarters
Bone-in, skin-on chicken quarters plus a handful of pantry spices. Simple stuff, big results.
| Ingredient | Amount | Notes |
|---|---|---|
| Chicken Quarters 🍗 | 4 whole | Bone-in, skin-on, patted dry |
| Olive Oil 🫒 | 2 tbsp | Extra-virgin for richness |
| Kosher Salt 🧂 | 1 ½ tsp | Diamond Crystal preferred |
| Black Pepper 🌶️ | 1 tsp | Freshly ground coarse |
| Garlic Powder 🧄 | 1 tsp | Not garlic salt |
| Onion Powder 🧅 | 1 tsp | Fresh ground preferred |
| Smoked Paprika 🌶️ | 1 tsp | Sweet or hot variety |
| Dried Thyme 🍃 | ½ tsp | Rubbed between fingers |
| Dried Oregano 🌿 | ½ tsp | Mediterranean origin preferred |
| Cayenne Pepper 🔥 | ¼ tsp | Adjust for heat preference |
| Lemon 🍋 | 1 whole | Zested and juiced |
| Fresh Rosemary 🌿 | 2 sprigs | Leaves stripped, chopped |
The chicken is the star here. Bone-in, skin-on quarters are a must—skinless won’t crisp right, and boneless dries out. Most supermarkets sell them pre-cut, but ask the butcher if you don’t see them. I grab mine from Costco for bulk savings. Look for pieces with even sizing so they cook uniformly. Pat them bone-dry before seasoning (this is non-negotiable for crispy skin).
No smoked paprika? Regular paprika plus a pinch of liquid smoke works in a pinch. Fresh out of thyme? Dried at half the amount. The lemon can be swapped for lime if that’s what you’ve got—just use the same quantity. Want more herb action? Fresh sage or marjoram pair beautifully. The olive oil matters here—use something you’d actually eat with bread, not the ancient stuff in the back of your cabinet.
Seasoned chicken keeps 2 days in the fridge before cooking, but honestly it’s best used right away. Leftovers? Shred the meat for tacos or salads. Stores cooked in the fridge for 4 days, freezes for 3 months (the skin softens when thawed, but still tasty).
Why You’ll Love This Recipe
- One Pan Magic: That’s it—just olive oil, salt, pepper, garlic powder, and the chicken. Toss it all on a sheet pan and let the oven do the work.
- Crispy & Juicy: The skin gets so golden and crisp while the meat stays fall-off-the-bone tender. Honestly, the garlic powder makes every bite sing.
- Feeds Everyone: I make a big batch for Sunday dinner and we’re set for leftovers all week. Between us, it’s even better the next day in a sandwich.
- Budget Hero: Chicken quarters are cheap, and this recipe turns them into something crave-worthy. I’ll be real: it’s my go-to when I need to stretch a dollar.
Step-by-Step Instructions for Oven-Roasted Chicken Quarters
Here’s how I get that perfect balance of crispy skin and juicy meat every single time.
Step 1: Season the Chicken Quarters Generously
Pat the 4 whole Chicken Quarters completely dry with paper towels. I can’t stress this enough—moisture is the enemy of crispy skin. In a small bowl, combine the 1.5 tsp Kosher Salt, 1 tsp Black Pepper, 1 tsp Garlic Powder, 1 tsp Onion Powder, 1 tsp Smoked Paprika, 0.5 tsp Dried Thyme, 0.5 tsp Dried Oregano, and 0.25 tsp Cayenne Pepper.
Rub this spice mixture all over the chicken quarters, making sure to get it under the skin and into all the nooks and crannies. The spices should adhere well to the dry surface. Let the seasoned chicken sit at room temperature for 15-20 minutes while you preheat the oven.
Step 2: Prepare the Aromatics and Oven
Preheat your oven to 425°F. While it heats, zest the 1 whole Lemon and chop the leaves from the 2 sprigs Fresh Rosemary. The lemon zest adds a bright, citrusy note that cuts through the richness of the chicken.
Stir the lemon zest and chopped rosemary into the 2 tbsp Olive Oil. This infused oil will add layers of flavor to the chicken as it roasts. The aroma alone will make your kitchen smell incredible—you’ll know you’re on the right track.
Step 3: Roast the Chicken to Perfection
Place the chicken quarters skin-side up on a wire rack set over a baking sheet. Brush them generously with the lemon-rosemary olive oil. The wire rack ensures hot air circulates underneath, crisping the skin all around.
Roast in the preheated oven for 35-40 minutes. Then, flip the chicken quarters skin-side down and roast for another 15-20 minutes. The skin should turn deep golden brown and crispy, and the juices should run clear when you pierce the thickest part of the meat.
Step 4: Rest and Finish with Lemon Juice
Transfer the chicken quarters to a cutting board and let them rest for 5-10 minutes. This resting period allows the juices to redistribute, ensuring every bite is moist and flavorful. Tent them loosely with foil to keep warm.
Just before serving, squeeze a bit of the lemon juice over the chicken. This final touch brightens up all the rich, roasted flavors. Serve immediately while the skin is still crispy and the meat is juicy. The contrast between the crispy skin and tender meat is what makes this dish special.
Pro Tips For Making Chicken Quarters
- Dry the Skin: Pat the chicken quarters completely dry with paper towels before seasoning—this is the only way to get that crispy, golden skin. I learned this the hard way after too many soggy results.
- Hot Pan Start: Get your pan ripping hot before adding the chicken, then resist the urge to move it for at least 5 minutes. This guarantees a good sear without steaming the skin.
- Season Under the Skin: Slide your fingers under the skin of each quarter and sprinkle a pinch of salt, pepper, and garlic powder directly on the meat. It’s a small step that actually changes the outcome.
- Rest Before Serving: Let the chicken rest 5-10 minutes after cooking—it keeps the juices inside where they belong. My grandmother swore by this, and she was right.
Common Mistakes When Making Great chicken quarters
Skipping the Drying Step
Never skip patting the chicken completely dry with paper towels. Moisture on the skin prevents proper crisping, leaving you with rubbery results. I once rushed this step and the skin never browned properly. 💡
Overcrowding the Pan
Give each quarter space on the rack. Crowding traps steam, which softens the skin. Use two pans if needed—I always do when cooking for a crowd. The hot air needs to circulate freely for that perfect crunch.
Incorrect Oven Temperature
Using a low oven temperature (350°F) won’t achieve crispy skin. Stick to 425°F as specified. I learned this the hard way when my early attempts produced pale, soggy skin instead of golden perfection.
Skipping the Rest
Cutting into the chicken immediately after roasting causes all the juices to escape. Always rest for 5-10 minutes first. This simple pause makes the difference between dry and succulent meat.
Uneven Seasoning
Don’t just sprinkle seasoning on top. Rub it thoroughly under the skin and into all crevices. I use my fingers to ensure every surface gets coated. This guarantees flavor in every bite, not just on the surface.
Flipping Too Soon
Resist flipping before 35 minutes. The skin needs this time to crisp and set. I check for a deep golden color before turning. Patience here prevents the skin from sticking to the rack. 🔥
Nutrition Facts
Frequently Asked Questions
Can I use chicken thighs and drumsticks separately?
Yes, but adjust cooking times. Thighs take about 35-40 minutes, while drumsticks may need 5-10 minutes longer. Use a meat thermometer to ensure both reach 165°F internally.
Why rest the chicken after cooking?
Resting for 5-10 minutes lets juices redistribute. Cutting too soon causes dryness. This simple step guarantees moist, flavorful meat every time.
Can I marinate the chicken overnight?
Marinate for up to 12 hours for deeper flavor. Pat dry before seasoning and roasting to ensure crispy skin. Avoid marinating longer or it may become mushy.
What if my oven doesn’t go to 425°F?
Use your oven’s highest setting, but extend cooking time. Check for deep golden skin and 165°F internal temp. Rotate the pan halfway for even browning.

- Jollof Rice Sauce Recipe: West African Tomato and Spice Infusion - September 25, 2026
- Japanese Rice Soup Recipe: Umami-Rich Comfort in a Bowl - September 25, 2026
- Homemade Cream Of Rice Recipe: Silk-Smooth Breakfast in Minutes - September 25, 2026