
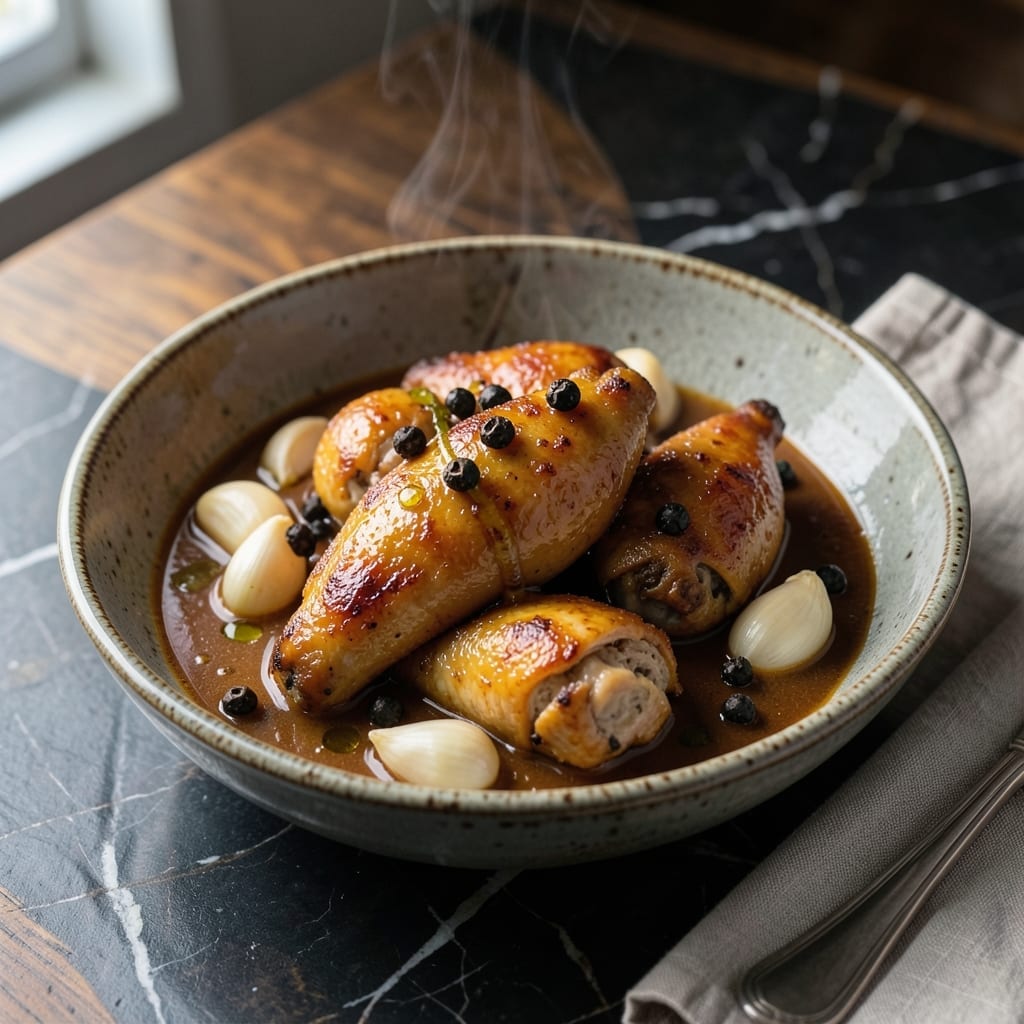
This adobo-style chicken brings the heart of Filipino cuisine to your kitchen with its perfect balance of savory, tangy, and slightly sweet flavors.
The dish relies on simple yet bold ingredients—soy sauce, vinegar, garlic, and black peppercorns—simmered together to create a rich, aromatic sauce that penetrates every piece of chicken.
What emerges is tender meat coated in a glossy, flavorful glaze that’s both comforting and deeply satisfying. The vinegar cuts through the richness, while the garlic adds depth.
Traditional techniques ensure authentic results, making this a dish worth mastering for weeknight dinners or special occasions.
Ingredients for Chicken Recipe Tagalog
Bold Filipino flavors start with these pantry staples and fresh aromatics ready for your pot.
| Ingredient | Amount | Notes |
|---|---|---|
| Chicken Thighs 🍗 | 2 lb | Boneless, skin-on preferred |
| Soy Sauce 🥫 | ¾ cup | Regular or low-sodium |
| White Vinegar 💧 | ½ cup | Or cane vinegar for authenticity |
| Garlic Cloves 🧄 | 10 cloves | Peeled, lightly smashed |
| Black Peppercorns 🌶️ | 1 tbsp | Whole, slightly crushed |
| Brown Sugar 🍚 | 2 tbsp | Light or dark variety |
| Bay Leaves 🍃 | 3 whole | Dried, whole leaves |
| Water 💧 | 1 cup | For braising liquid |
| Vegetable Oil 🫒 | 2 tbsp | For searing chicken |
| Green Onions 🧅 | 4 whole | Thinly sliced for garnish |
| Salt 🧂 | ½ tsp | Kosher or sea salt |
The chicken sets the foundation here. Thighs with skin-on render fat for richness—Costco carries high-quality packs at a good value. For soy sauce, Silver Swan or Datu Puti (Filipino brands at Asian markets) deliver authentic depth, but any standard soy sauce works. The vinegar should be white or cane—avoid balsamic, as its sweetness overpowers the balance.
No black peppercorns? Pre-ground black pepper at half the amount works, though whole delivers better aroma. Out of brown sugar? Coconut sugar or honey (if not strictly traditional) can substitute. Bay leaves are essential—dried is fine, but fresh (if you have a tree) adds complexity. For extra tang, add a splash of calamansi juice if available at specialty stores.
This tastes even better the next day as flavors meld. Store in an airtight container in the fridge for up to 5 days, or freeze for 3 months. Reheat gently to preserve the sauce’s consistency.
Why You’ll Love This Recipe
- One Pot Wonder: I toss everything in a single pan—chicken, soy sauce, vinegar, garlic—and let it simmer. Cleanup’s a breeze.
- Tangy Garlic Punch: The soy-vinegar combo with garlic hits that sweet-savory-tangy spot I crave every time.
- Feeds My Crew: Honestly, it’s my go-to for family dinners, potlucks, or even when I’m meal prepping for the week.
- Stretches Far: Leftovers taste even better the next day, and chicken thighs keep it budget-friendly without skimp on flavor.
Step-by-Step Instructions for Adobo-Style Chicken
Master this classic technique for perfectly balanced sweet, tangy, and savory flavors in every bite.
Step 1: Sear the Chicken Thighs
Heat the 2 tbsp vegetable oil in a large, heavy-bottomed pot or Dutch oven over medium-high heat. While the oil shimmers, pat the 2 lb chicken thighs dry with paper towels and season lightly with the 0.5 tsp salt on both sides.
Add the chicken thighs skin-side down in a single layer, ensuring they are not crowded. Sear undisturbed for 5-6 minutes until the skin is deep golden brown and crisp. Flip and sear the other side for an additional 3-4 minutes until evenly browned. Remove the chicken and set aside.
Step 2: Build the Adobo Sauce Foundation
In the same pot, reduce the heat to medium and add the 10 cloves garlic cloves, 1 tbsp black peppercorns, and 3 whole bay leaves. Sauté for 1-2 minutes until the garlic is lightly golden and fragrant, taking care not to burn it.
Pour in the 0.75 cup soy sauce, 0.5 cup white vinegar, 2 tbsp brown sugar, and 1 cup water. Stir to dissolve the sugar and combine all the ingredients. Bring the mixture to a gentle simmer, which should take about 3-4 minutes.
Step 3: Braise the Chicken to Perfection
Return the seared chicken thighs to the pot, skin-side up, along with any accumulated juices. The liquid should mostly cover the chicken. If needed, adjust the heat to maintain a gentle simmer.
Cover the pot and let the chicken braise for 35-40 minutes. Occasionally spoon the sauce over the chicken to ensure even flavor distribution. The chicken is done when it reaches an internal temperature of 165°F and the meat easily pulls away from the bone.
Step 4: Reduce the Sauce and Finish
Once the chicken is cooked, transfer it to a serving platter and cover to keep warm. Increase the heat to medium-high and let the sauce simmer uncovered for 5-7 minutes, stirring occasionally, until it thickens slightly and reduces by about a third.
The sauce should coat the back of a spoon and have a glossy, syrupy consistency. Taste and adjust the seasoning if needed, though the balance of soy, vinegar, and sugar should already provide a harmonious flavor profile.
Step 5: Garnish and Serve
Pour the reduced sauce over the chicken thighs. Garnish with the 4 whole green onions, thinly sliced. Let the dish rest for 5 minutes to allow the flavors to meld together.
Serve the adobo-style chicken hot over steamed rice, ensuring each serving is generously coated with the rich, tangy sauce. The chicken should be tender and flavorful, with a perfect balance of savory, sweet, and acidic notes.
Pro Tips For Making Chicken Recipe Tagalog
- Simmer Low and Slow: I learned this the hard way—boil the sauce too hard and the vinegar will overpower the dish. Keep it at a gentle simmer for 20-25 minutes to let the flavors meld without turning the chicken tough.
- Crush the Garlic: Sounds weird, but it works: smash the garlic cloves with the flat of your knife before peeling. It releases way more flavor into the soy-vinegar sauce than mincing ever did for me.
- Skip the Lid: Resist the urge to cover the pan while simmering—you want the sauce to reduce slightly so it clings to the chicken instead of turning watery. My first few attempts were soupy messes because I kept it covered.
- Use Thighs, Not Breast: After trying both, I finally figured out that chicken thighs stay juicy even in the acidic vinegar sauce, while breast meat tends to dry out. Plus, the fat renders into the sauce for extra flavor.
Pro Cooking Tips for Perfect Results
Searing for Maximum Flavor
I always start by searing the chicken thighs skin-side down in 2 tbsp vegetable oil over medium-high heat. Pat them completely dry first—this ensures a deep golden brown crust in 5-6 minutes. Don’t move them prematurely; that crispy skin locks in juices. 🔥
Sauce Simmering Secrets
After removing the chicken, I sauté the 10 garlic cloves and 1 tbsp black peppercorns until fragrant. Then I add the vinegar and soy sauce last to prevent the vinegar from evaporating too quickly during cooking. This preserves the tangy balance.
Perfect Braising Technique
Return the chicken to the pot and braise at a gentle simmer for 35-40 minutes. I spoon the sauce over the meat every 10 minutes to ensure even flavor penetration. The chicken should reach 165°F internally and feel tender when pierced.
Sauce Reduction Trick
Once the chicken is done, I remove it and reduce the sauce uncovered over medium-high heat. It thickens beautifully in 5-7 minutes—look for a syrupy consistency that coats the back of a spoon. Stir occasionally to prevent sticking.
Resting for Best Results
Before serving, I let the chicken rest for 5 minutes under a tent of foil. This allows the juices to redistribute. Then I pour that glossy, reduced sauce over the top and garnish with fresh green onions. 💛
Nutrition Facts
Frequently Asked Questions
What can I use instead of cane vinegar?
White vinegar works perfectly as a substitute. For a slightly different flavor, apple cider vinegar can also be used, though it may add a mild fruity note.
How do I know when the chicken is done?
Use a meat thermometer to check for an internal temperature of 165°F. The meat should also pull away easily from the bone.
Can I make this dish ahead of time?
Yes! The flavors actually deepen after a day. Store in an airtight container in the fridge for up to 5 days, or freeze for 3 months.
Why did my sauce turn out too salty?
This usually happens if the sauce reduces too much. Next time, add a splash of water or vinegar to balance it out.

- Jollof Rice Sauce Recipe: West African Tomato and Spice Infusion - September 25, 2026
- Japanese Rice Soup Recipe: Umami-Rich Comfort in a Bowl - September 25, 2026
- Homemade Cream Of Rice Recipe: Silk-Smooth Breakfast in Minutes - September 25, 2026