
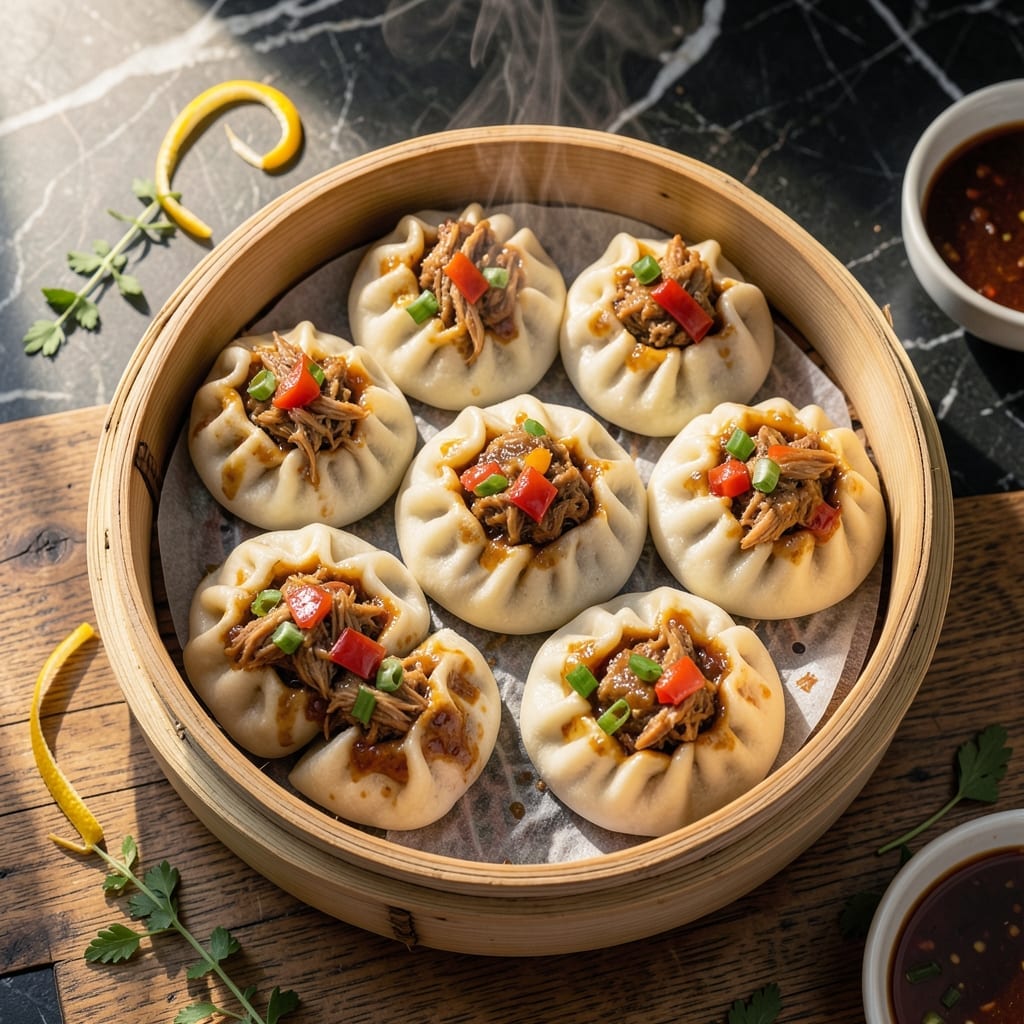
This recipe delivers the authentic taste of Filipino steamed buns with a filling that stays juicy in every bite. The secret lies in the perfect balance of tender chicken and a sweet, savory sauce that defines this classic dish.
The dough requires patience, with a slow rise ensuring the right texture for steaming. Meanwhile, the chicken filling comes together quickly with simple ingredients, creating a rich, flavorful center that pairs perfectly with the soft bun.
When steamed to perfection, these buns emerge light, fluffy, and packed with that signature juicy filling. The contrast between the pillowy dough and the hearty chicken makes each bite irresistible.
Follow the steps precisely for professional results every time.
Ingredients for Chicken Siopao
Simple dough ingredients and a flavorful chicken filling create these authentic steamed buns.
| Ingredient | Amount | Notes |
|---|---|---|
| All-Purpose Flour 🌾 | 3 cups | Plus extra for dusting |
| Granulated Sugar 🍚 | ¼ cup | For dough sweetness |
| Active Dry Yeast 🍞 | 1 package | 2 1/4 tsp equivalent |
| Warm Water 💧 | 1 cup | 110°F, for activating yeast |
| Vegetable Oil 🫒 | 2 tbsp | Plus extra for greasing |
| Baking Powder 🧂 | 1 tbsp | For lift in dough |
| Boneless Chicken Thighs 🍗 | 1 lb | Diced, skinless preferred |
| Soy Sauce 🫒 | 3 tbsp | Low-sodium for balance |
| Oyster Sauce 🫒 | 2 tbsp | Or vegetarian oyster sauce |
| Brown Sugar 🍯 | 1 tbsp | For sauce sweetness |
| Garlic Cloves 🧄 | 4 cloves | Minced for filling |
| Fresh Ginger 🌿 | 1 tbsp | Grated, for depth |
| Cornstarch 🌾 | 1 tbsp | For thickening sauce |
| Green Onions 🧅 | 3 whole | Thinly sliced for garnish |
| Sesame Oil 🫒 | 1 tsp | For finishing aroma |
The flour forms the base—King Arthur or Gold Medal all-purpose work perfectly. Yeast must be fresh (check the expiration date) for proper rise. For the filling, thighs stay juicier than breasts during steaming. Most Asian markets carry oyster sauce, but larger supermarkets like H-E-B or Kroger often stock it too. The dough needs time to rise—don’t rush this step.
No oyster sauce? Hoisin sauce at half the amount works as a substitute. Chicken breasts can replace thighs (but may be less tender). Fresh ginger is ideal, but ground ginger at one-third the amount in a pinch. For a vegetarian version, swap chicken for mushrooms or tofu. The soy sauce should be fresh—old soy sauce loses its punch.
Dough can rest overnight in the fridge for deeper flavor. Filling keeps 2-3 days refrigerated. Assembled buns freeze well for up to 1 month—steam straight from frozen, adding 5 extra minutes. Always bring filling to room temperature before using.
Why You’ll Love This Recipe
- No-Fuss Dough: I love that the yeast activates in warm water with just a pinch of sugar—no fancy equipment, and the dough comes together in minutes.
- Comfort in Every Bite: That first pull of the soft, slightly sweet bun with the savory chicken filling? Pure cozy.
- Meal Prep Hero: I make a big batch on Sunday and freeze them—microwave for 2 minutes and it’s like they’re fresh from the steamer.
- Budget Stretcher: A kilo of flour and a few pantry staples make dozens. Honestly, it’s cheaper than takeout and twice as satisfying.
Step-by-Step Instructions for Chicken Siopao
This method ensures tender buns with a rich, flavorful filling every time.
Step 1: Activate the Yeast and Prepare the Dough
In a small bowl, combine the 1 package Active Dry Yeast with the 1 cup Warm Water and let it sit for 5-10 minutes until it becomes frothy. This confirms the yeast is active and ready to leaven your dough.
In a large mixing bowl, whisk together the 3 cups All-Purpose Flour, 0.25 cup Granulated Sugar, and 1 tbsp Baking Powder. Pour in the yeast mixture and 2 tbsp Vegetable Oil, then stir until a shaggy dough forms. The dough should pull away from the sides of the bowl but remain slightly sticky.
Turn the dough onto a lightly floured surface and knead for 8-10 minutes until smooth and elastic. The dough is ready when it springs back slowly when pressed with a finger.
Step 2: Make the Chicken Filling
In a saucepan, heat a small amount of oil over medium heat. Add the minced 4 cloves Garlic Cloves and 1 tbsp Fresh Ginger, sautéing until fragrant—about 30 seconds. Be careful not to let them burn, as this will make the filling bitter.
Add the diced 1 lb Boneless Chicken Thighs and cook until the meat is no longer pink, about 5-7 minutes. Stir in the 3 tbsp Soy Sauce, 2 tbsp Oyster Sauce, and 1 tbsp Brown Sugar. Simmer for 5 minutes to allow the flavors to meld.
In a small bowl, mix the 1 tbsp Cornstarch with 2 tbsp of water to create a slurry. Stir this into the chicken mixture and cook for another 2-3 minutes until the filling thickens into a glossy, rich sauce. Remove from heat and set aside to cool.
Step 3: Assemble and Steam the Siopao
Divide the risen dough into 12 equal portions and roll each into a smooth ball. Flatten each ball into a 3-inch circle, leaving the center slightly thicker than the edges. This ensures the bun can hold the filling without tearing.
Place a spoonful of the cooled chicken filling in the center of each dough circle. Gather the edges of the dough around the filling, pinching them together to seal completely. Twist the sealed edges gently to ensure a tight closure, which prevents the buns from opening during steaming.
Line a steamer basket with parchment paper, ensuring there are small holes poked in it to allow steam to circulate. Arrange the siopao in the basket, leaving 1 inch of space between each bun to allow for expansion. Cover and let them rest for 15 minutes.
Step 4: Steam to Perfection
Bring water to a rolling boil in a pot that fits your steamer basket. Place the basket over the pot, ensuring the bottom doesn’t touch the water. Steam the siopao over high heat for 15-20 minutes.
Check the water level periodically to ensure it doesn’t evaporate completely. The siopao are done when the dough has puffed up and feels firm to the touch. Avoid lifting the lid during the first 10 minutes to prevent the buns from collapsing due to sudden temperature changes.
Remove the siopao from the steamer and brush the tops with 1 tsp Sesame Oil for a glossy finish. Garnish with thinly sliced 3 whole Green Onions before serving warm. Each bun should have a soft, fluffy texture with a juicy, flavorful filling.
Pro Tips For Making Chicken Siopao
- Activate Yeast Properly: Use warm water around 110°F—hotter than that kills the yeast, colder and it won’t rise. I learned this the hard way after wasting three batches of dough that refused to puff up.
- Knead Thoroughly: Work the dough for at least 10 minutes until smooth and elastic—this develops the gluten so your siopao buns stay soft and fluffy, not dense.
- Skip Packed Brown Sugar: Stick to granulated sugar for the dough—brown sugar adds moisture that can throw off the texture, and the molasses flavor doesn’t belong in classic siopao.
- Use Oil Generously: Coat your hands and the bowl with vegetable oil when handling the dough to prevent sticking—makes shaping the buns way easier and keeps them from tearing.
Serving Suggestions for chicken siopao
Traditional Presentation
Serve these buns hot from the steamer in their parchment paper liners for an authentic touch. The paper prevents sticking and makes handling easier. I like arranging them on a bamboo steamer tray for a restaurant-style presentation. 🥢
Dipping Sauce Pairing
Offer a simple dipping sauce of 2 tbsp soy sauce mixed with 1 tsp rice vinegar and ½ tsp chili oil. This adds an extra layer of flavor that complements the filling. For a sweeter option, use banana ketchup—a Filipino favorite.
Meal Combinations
Pair with sinangag (Filipino garlic fried rice) and a side of atchara (pickled papaya) for a complete meal. The tangy crunch of atchara cuts through the richness of the buns beautifully.
Party Platter Idea
For gatherings, arrange on a large platter with small dipping bowls in the center. Include calamansi wedges for guests to squeeze over their buns. This citrus touch brightens the flavors. ✨
Breakfast Twist
Serve with hot chocolate or coffee for a hearty breakfast. The warmth of the buns pairs perfectly with a steaming cup. I often make extra filling for breakfast burritos the next day.
Garnishing Tip
Finish with extra green onions and a drizzle of sesame oil just before serving. This adds freshness and a glossy sheen that makes them look as good as they taste.
Nutrition Facts
Frequently Asked Questions
How long should the dough rise?
Let it rise until doubled in size, usually 1-2 hours at room temperature. For deeper flavor, refrigerate overnight. The slow rise develops better texture and taste.
Can I use chicken breast instead of thighs?
Yes, but thighs stay juicier during steaming. If using breast, avoid overcooking to prevent dryness. Dice evenly for consistent texture in every bite.
Why did my buns collapse after steaming?
This often happens if the lid is lifted too soon. Wait 5 minutes after steaming before opening to let them set properly. Also ensure the dough is fully risen before shaping.
Can I freeze the assembled buns?
Yes! Freeze before the final rise. Steam from frozen, adding 5-10 extra minutes. Thawing first isn’t necessary.

- Jollof Rice Sauce Recipe: West African Tomato and Spice Infusion - September 25, 2026
- Japanese Rice Soup Recipe: Umami-Rich Comfort in a Bowl - September 25, 2026
- Homemade Cream Of Rice Recipe: Silk-Smooth Breakfast in Minutes - September 25, 2026