
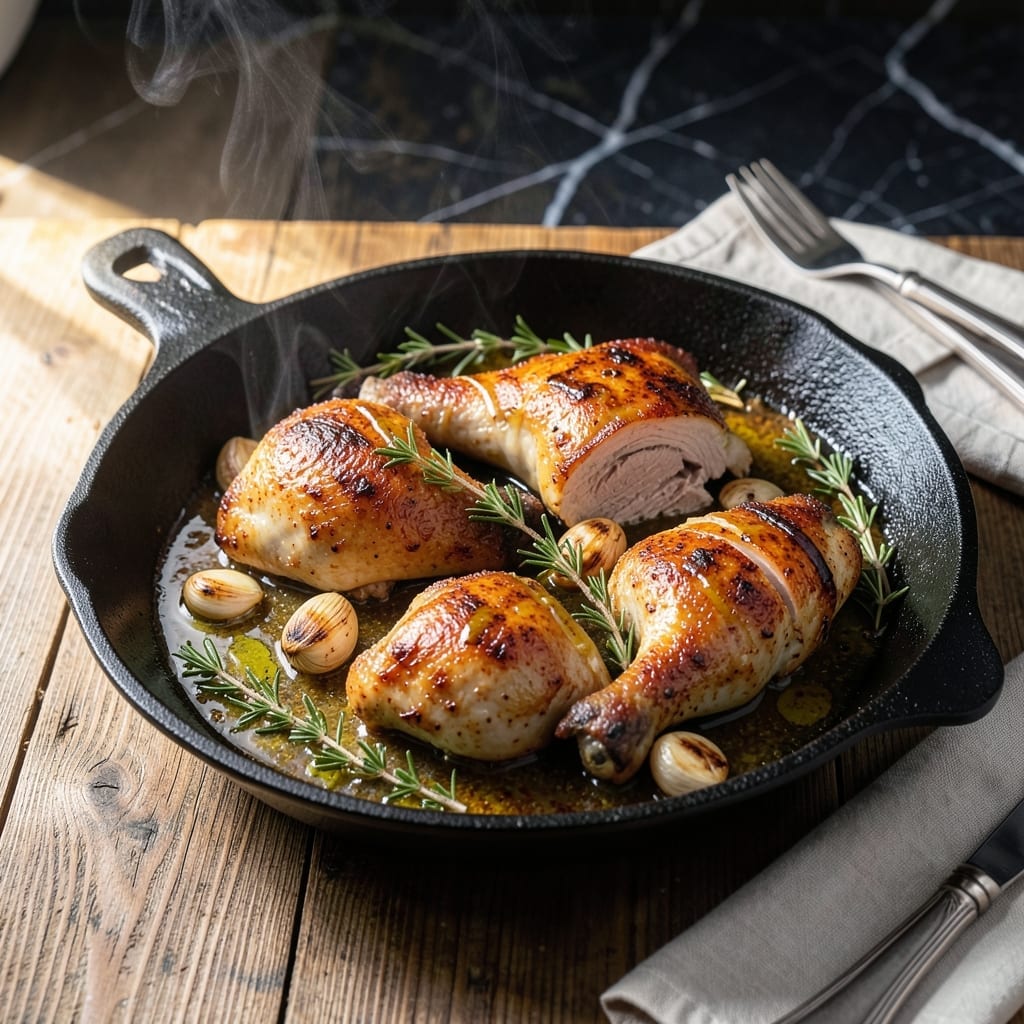
This skillet method transforms ordinary chicken thighs into something extraordinary with minimal effort. The secret lies in achieving a golden-brown sear while keeping the meat juicy and flavorful throughout.
I’ve perfected this technique through countless trials, focusing on precise timing and temperature control. The garlic infusion elevates the dish, creating layers of aroma that fill your kitchen as it cooks.
You’ll end up with thighs that have crispy skin and tender meat, all in one pan. The garlic butter basting ensures every bite is packed with rich, savory flavor.
Ready in under 40 minutes, this becomes a reliable weeknight staple that never disappoints. Serve with your favorite sides for a complete meal.
Ingredients for Chicken Thighs Skillet
Bone-in thighs, fresh herbs, and garlic butter make this dish sing with minimal effort.
| Ingredient | Amount | Notes |
|---|---|---|
| Chicken Thighs 🍗 | 2 lb | Bone-in, skin-on preferred |
| Unsalted Butter 🧈 | 4 tbsp | Divided for basting |
| Garlic Cloves 🧄 | 8 cloves | Smashed for infusion |
| Fresh Thyme Sprigs 🌿 | 4 pieces | Optional for aroma |
| Fresh Rosemary Sprigs 🌿 | 2 pieces | Optional for aroma |
| Olive Oil 🫒 | 2 tbsp | For initial searing |
| Kosher Salt 🧂 | 1 ½ tsp | Diamond Crystal preferred |
| Freshly Ground Black Pepper 🌶️ | 1 tsp | Coarse grind ideal |
| Lemon 🍋 | 1 whole | Zest and juice |
| Chicken Stock 🥫 | ½ cup | Low-sodium preferred |
| All-Purpose Flour 🌾 | ¼ cup | For dredging skin |
| Paprika 🌶️ | 1 tsp | Sweet or smoked variety |
The chicken thighs are everything here. Bone-in, skin-on gives you that crispy skin and juicy meat combo. I grab mine from Whole Foods or Costco—look for plump pieces with smooth skin (no tears). The butter needs to be unsalted so you control the seasoning. And don’t skip the fresh herbs (thyme and rosemary)—they add that restaurant-quality aroma as they toast in the pan.
No fresh herbs? Dried at one-third the amount works fine—just add them earlier so they rehydrate. If you’re out of chicken stock, water with a bouillon cube gets the job done. The flour dredge is optional but guarantees extra-crispy skin. For the garlic, fresh is non-negotiable here—it’s infusing the butter as it melts. And the paprika? Mostly for color, so skip if you’re out.
Leftover thighs keep in an airtight container for 4 days in the fridge. Reheat in a skillet to re-crisp the skin—microwave ruins it. The garlic butter can be made ahead and stored in the fridge for 1 week. Always bring it to room temp before using though (don’t melt cold butter).
Why You’ll Love This Recipe
- One Pan Wonder: I just throw everything in the skillet—thighs, butter, garlic, and herbs—and let it work its magic.
- Buttery Herb Delight: The butter soaks up the garlic, thyme, and rosemary, making every bite ridiculously good.
- Weeknight Lifesaver: This is my go-to when I need dinner fast, and honestly, it tastes like I spent hours.
- Budget Stretcher: Chicken thighs are cheap, and this recipe makes them taste like a million bucks.
Step-by-Step Instructions for Chicken Thighs Skillet
Here’s my method for achieving perfectly crispy skin and juicy meat every time.
Step 1: Season and Dredge the Chicken Thighs
Pat the 2 lb Chicken Thighs dry with paper towels—this is crucial for crispy skin. Season both sides generously with 1.5 tsp Kosher Salt, 1 tsp Freshly Ground Black Pepper, and 1 tsp Paprika. The paprika adds a subtle depth of flavor and beautiful color.
Dredge the thighs lightly in 0.25 cup All-Purpose Flour, shaking off any excess. This creates a thin, even coating that will crisp up beautifully in the pan. Don’t skip this step—it’s the secret to that perfect golden crust.
Step 2: Sear the Chicken to Golden Perfection
Heat 2 tbsp Olive Oil in a large skillet over medium-high heat until it shimmers. Add the floured chicken thighs, skin-side down, and cook undisturbed for 6-7 minutes. You’ll see the edges start to turn golden brown—that’s your signal that a crispy crust is forming.
Resist the urge to move them. The skin needs time to crisp and release naturally from the pan. Flip and cook for another 5-6 minutes until the other side is equally browned and the internal temperature reaches 165°F.
Step 3: Infuse with Garlic and Herbs
Reduce heat to medium and add 4 tbsp Unsalted Butter, 8 cloves Garlic Cloves (smashed), 4 pieces Fresh Thyme Sprigs, and 2 pieces Fresh Rosemary Sprigs to the pan. Tilt the skillet slightly and spoon the melted butter, garlic, and herbs over the chicken repeatedly for 2-3 minutes.
This basting process infuses the meat with incredible aroma and flavor. The garlic will turn light golden and the herbs will release their essential oils into the butter. Keep the butter moving to prevent it from burning.
Step 4: Deglaze and Finish with Brightness
Transfer the chicken to a plate and pour out excess fat, leaving the browned bits in the pan. Add 0.5 cup Chicken Stock and scrape up all those flavorful browned bits with a wooden spoon. Let it simmer for 2-3 minutes until slightly reduced.
Zest and juice the 1 whole Lemon into the pan sauce. The acidity cuts through the richness and adds a bright, fresh note. Return the chicken to the pan, turn to coat in the sauce, and cook for another 1-2 minutes to heat through.
Pro Tips For Making Chicken Thighs Skillet
- Pat Thighs Dry: Sounds tedious, but it’s worth the 30 seconds—drying the skin with paper towels guarantees a crispy, golden crust instead of steamed meat.
- Start Hot, Finish Low: Crank the heat to medium-high for the first 3-4 minutes to render fat and sear the skin, then drop to medium-low to cook through without burning the butter and herbs.
- Smash the Garlic: Press the garlic cloves with the flat side of your knife before adding them—this releases more flavor without the risk of burning small minced pieces in the hot butter.
- Baste with Butter: Tilt the skillet and spoon the foaming butter over the chicken every minute or so—I learned this the hard way after years of dry, under-flavored thighs.
Flavor Customization for This chicken thighs skillet
Herb Variations
Swap the thyme and rosemary for 2 tbsp fresh sage and 1 tbsp fresh oregano for an earthier profile. I love this combo in fall—it pairs beautifully with the garlic butter. The sage leaves crisp up slightly in the pan, adding texture. 🌿
Spice It Up
Add ½ tsp cayenne pepper or 1 tsp chili flakes to the flour dredge for a subtle kick. For serious heat, mix 1 tbsp gochujang into the basting butter. I’ve found this balances the richness perfectly without overpowering the dish.
Citrus Twists
Replace the lemon with lime zest and juice for a brighter, zingier finish. Alternatively, add 1 tbsp orange zest to the butter for a sweeter, aromatic note. The citrus oils in the zest elevate the garlic infusion beautifully.
Umami Boost
Stir 1 tbsp soy sauce or 1 tsp fish sauce into the pan sauce for depth. A splash of Worcestershire sauce works too—just 1 tsp is enough. These small additions amplify the savory layers without altering the dish’s character. 💡
Sweet & Smoky
Swap the paprika for 1 tsp smoked paprika in the seasoning mix. For a touch of sweetness, add 1 tbsp honey to the basting butter. The honey caramelizes slightly, creating a glossy, sticky glaze on the skin.
Mediterranean Flip
Add ½ tsp ground cumin and ½ tsp ground coriander to the flour dredge. Finish with a sprinkle of chopped parsley and a squeeze of lemon. This transports the dish to the Mediterranean with minimal effort.
Nutrition Facts
Frequently Asked Questions
Do I need to use bone-in thighs?
Bone-in, skin-on gives the best results for crispiness and flavor. Boneless will cook faster (4-5 minutes per side) but may dry out more easily. The bone helps distribute heat evenly.
Why pat the chicken dry first?
Moisture is the enemy of crispy skin. Patting dry ensures a perfect sear and prevents steaming. Even a little water can create a barrier between the meat and pan.
Can I use a nonstick skillet?
Use stainless steel or cast iron for best browning. Nonstick won’t develop the same deep color or flavorful fond. If using nonstick, avoid metal utensils to prevent scratching.
How do I know when it’s done?
Use a meat thermometer—165°F in the thickest part. The juices should run clear, and the skin should be golden brown and crisp. Don’t cut into it to check!

- Jollof Rice Sauce Recipe: West African Tomato and Spice Infusion - September 25, 2026
- Japanese Rice Soup Recipe: Umami-Rich Comfort in a Bowl - September 25, 2026
- Homemade Cream Of Rice Recipe: Silk-Smooth Breakfast in Minutes - September 25, 2026