
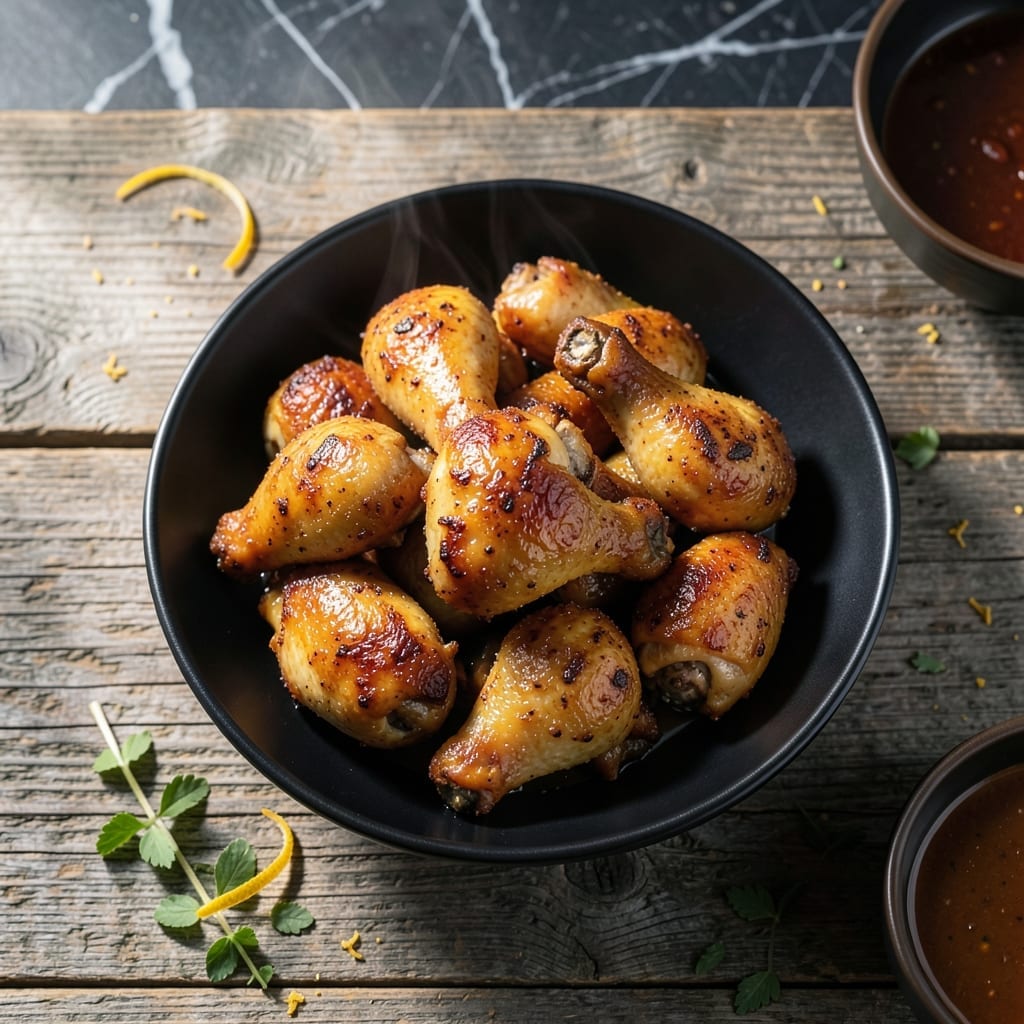
This rice cooker method delivers fall-off-the-bone chicken wings with minimal effort. The steam function ensures crispy skin while keeping the meat juicy and tender.
I developed this technique during busy service nights, adapting my pitmaster skills to home kitchen constraints. The key is timing—just 30 minutes in the rice cooker for perfect results every time.
The wings emerge with a golden, slightly sticky exterior that holds up to any sauce. Whether you prefer buffalo, teriyaki, or dry rub, this hands-off approach guarantees restaurant-quality texture without the fuss.
Serve with celery sticks and blue cheese dressing for a complete meal that’s impressive yet simple to prepare.
Ingredients for Chicken Wing Rice Cooker
Pantry staples plus chicken wings. Rice cooker does all the heavy lifting here.
| Ingredient | Amount | Notes |
|---|---|---|
| Chicken Wings 🍗 | 2 ½ lb | Split into drumettes and flats |
| Kosher Salt 🧂 | 1 ½ tsp | Diamond Crystal preferred for texture |
| Black Pepper 🌶️ | 1 tsp | Freshly ground for best flavor |
| Garlic Powder 🧄 | 1 tsp | Not garlic salt substitute |
| Onion Powder 🧅 | 1 tsp | Balances savory depth |
| Paprika 🌶️ | 1 tsp | Sweet or smoked variety |
| Baking Powder 🧂 | ½ tsp | For extra crispiness |
| Water 💧 | 1 cup | For rice cooker steam function |
| Buffalo Sauce 🍯 | ½ cup | Frank’s RedHot recommended |
| Unsalted Butter 🧈 | 4 tbsp | Melted for sauce |
| Celery Sticks 🌿 | 4 whole | Cut into 3-inch pieces |
| Blue Cheese Dressing 🥛 | ½ cup | Store-bought or homemade |
The wings are the star—look for plump, moist pieces with skin that’s not too loose. I grab mine from Costco for the best price per pound. If you’re buying from a butcher, ask for the drumettes and flats to be separated. The baking powder is the secret to that crispy skin without frying. Don’t skip it (worth the extra minute).
No buffalo sauce? Hot sauce plus melted butter gets you 90% there. Want it milder? Use half the amount and add more to taste. The garlic and onion powders can be swapped for 1 tbsp fresh minced garlic and onion, but the dried stuff works great here. If you’re out of paprika, cayenne or chili powder adds a nice kick (adjust to preference).
Leftovers keep 3-4 days in the fridge, but they’re best fresh from the rice cooker. Reheat in the air fryer or oven to restore crispiness. The sauce can be made ahead and stored separately for up to 1 week in the fridge.
Why You’ll Love This Recipe
- Set and Forget: I toss the wings in with salt, pepper, and garlic powder, then let the rice cooker do all the work.
- Garlic-Pepper Punch: The combo of garlic powder and onion powder gives these wings a savory depth I can’t resist.
- Feeds the Crew: Perfect for Sunday football or a casual dinner—everyone always grabs seconds.
- Budget Stretch: A big batch of wings cooks cheaply in one go, with leftovers that reheat beautifully.
Step-by-Step Instructions for Chicken Wing Rice Cooker
Here’s the method that delivers crispy, saucy wings with almost no effort on your part.
Step 1: Season and Prep the Chicken Wings
Pat the 2.5 lb chicken wings completely dry with paper towels—this is non-negotiable for crispiness. I split them into drumettes and flats at the joint if they aren’t pre-cut. In a large bowl, toss the wings with 1.5 tsp kosher salt, 1 tsp black pepper, 1 tsp garlic powder, 1 tsp onion powder, 1 tsp paprika, and 0.5 tsp baking powder.
The baking powder is the secret here—it raises the pH of the skin, helping it brown and crisp beautifully. Make sure every wing is evenly coated. Let them sit for 10 minutes while you prep the rice cooker.
Step 2: Steam to Perfection in the Rice Cooker
Add the 1 cup water to your rice cooker and place the insert or steamer basket inside. Arrange the wings in a single layer (you may need to do this in batches depending on your cooker’s size). Close the lid and set to the steam function for 30 minutes.
This method gently cooks the wings through while keeping them moist. You’ll know they’re ready when the internal temperature hits 165°F and the skin looks slightly translucent. Don’t skip this step—it ensures the wings are fully cooked before we crisp them up.
Step 3: Crisp Under the Broiler
Preheat your oven’s broiler to high. Transfer the steamed wings to a wire rack set over a baking sheet (this allows air circulation for even crisping). Broil for 5-7 minutes per side, watching closely to prevent burning.
You’re looking for deep golden brown, crispy skin. The baking powder will help create that beautiful blistering effect. Rotate the pan halfway through for even browning if your broiler has hot spots.
Step 4: Toss in Buffalo Sauce
While the wings crisp, melt the 4 tbsp unsalted butter in a microwave-safe bowl, then whisk in the 0.5 cup buffalo sauce until smooth. As soon as the wings come out of the oven, toss them in the sauce while they’re still hot.
The heat helps the sauce cling to every nook and cranny. I like to use tongs to ensure each wing gets evenly coated. Serve immediately with the 4 whole celery sticks (cut into 3-inch pieces) and 0.5 cup blue cheese dressing on the side.
Pro Tips For Making Chicken Wing Rice Cooker
- Dry the Wings: Pat the wings completely dry with paper towels before seasoning—this ensures the skin crisps up in the rice cooker instead of steaming into a sad, soggy mess.
- Season Twice: Toss the wings with half the salt, pepper, garlic, and onion powder before cooking, then hit them with the rest right after they come out. I learned this the hard way—once just isn’t enough for that deep, even flavor.
- Don’t Overcrowd: Arrange the wings in a single layer in the rice cooker, with a little space between each piece. Crowding them traps steam, and you’ll end up with boiled-tasting wings instead of roasted ones.
- Use the Steam Basket: Elevate the wings on the rice cooker’s steam rack—if you have one—to let hot air circulate underneath. Sounds weird, but it works: the difference between flabby and crispy is about an inch of airflow.
Essential Equipment for This Recipe
Rice Cooker Choice
For this recipe, you need a rice cooker with a reliable steam function. I use my Zojirushi 5.5-cup model—it’s a workhorse that maintains consistent steam. Avoid single-function models without steam capability; they won’t work here. 🔥
Steamer Basket
A stainless steel steamer basket fits perfectly in most rice cookers. I prefer the OXO brand for its sturdy construction. Ensure it’s elevated above the water for even cooking.
Wire Rack
After steaming, transfer wings to a wire rack set over a baking sheet. This allows air circulation for crisping under the broiler. I use a Nordic Ware rack—it’s durable and non-stick.
Tongs for Tossing
Use kitchen tongs to toss wings in sauce. I love my OXO spring-loaded pair—they grip wings securely without piercing the meat. Look for heat-resistant handles for safety.
Meat Thermometer
Verify doneness with an instant-read thermometer. I trust my ThermoWorks ThermoPop—it’s accurate to 1°F and responds in 3-4 seconds. Aim for 165°F internally.
Sauce Bowl
A microwave-safe mixing bowl melts butter and combines sauce easily. I use a Pyrex 4-cup bowl—it’s heatproof and easy to clean. Ensure it’s large enough for tossing wings. 💡
Nutrition Facts
Frequently Asked Questions
Do I need a special rice cooker for this?
Any rice cooker with a steam function works. Standard models like Zojirushi or Aroma are perfect. Just ensure it has a steamer basket or insert.
Can I skip the baking powder?
You can, but the skin won’t get as crispy. The 0.5 tsp baking powder raises the skin’s pH for better browning. It’s worth the extra minute.
How do I know when they’re done?
Use a meat thermometer to check for 165°F internally. The skin should look golden and slightly blistered after broiling for 5-7 minutes.
Can I use frozen wings?
Thaw them first in the fridge overnight. Frozen wings won’t cook evenly in the 30-minute steam time, and the texture will suffer.

- Jollof Rice Sauce Recipe: West African Tomato and Spice Infusion - September 25, 2026
- Japanese Rice Soup Recipe: Umami-Rich Comfort in a Bowl - September 25, 2026
- Homemade Cream Of Rice Recipe: Silk-Smooth Breakfast in Minutes - September 25, 2026