
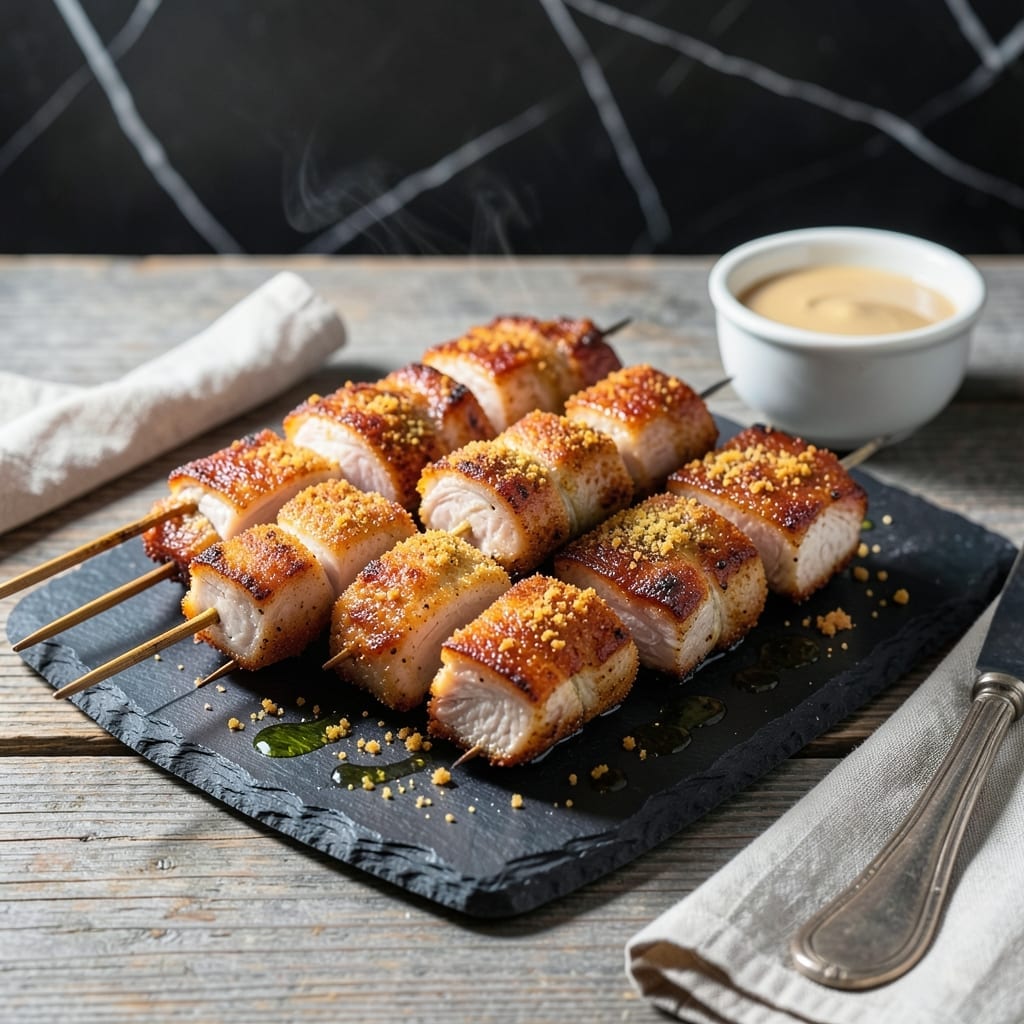
This recipe transforms simple pork cubes into a crispy skewered delight that’s surprisingly easy to make at home.
I developed this method after testing various breading techniques to ensure every bite stays tender inside while achieving that signature golden exterior. The key is a double-dredge process that locks in moisture.
The result is juicy pork with a perfectly crispy coating, seasoned just right and cooked to ideal doneness. Each skewer delivers that nostalgic flavor with a satisfying crunch.
Serve with mashed potatoes or a fresh salad for a complete meal that’s sure to impress.
Ingredients for City Chicken
Transform pork shoulder into crispy skewered perfection with these pantry staples and fresh ingredients.
| Ingredient | Amount | Notes |
|---|---|---|
| Pork Shoulder 🍖 | 1 ½ lb | Cut into 1-inch cubes, boneless |
| All-Purpose Flour 🌾 | 1 cup | For initial dredging layer |
| Large Eggs 🥚 | 2 whole | Beaten for egg wash binder |
| Seasoned Breadcrumbs 🍞 | 2 cups | Panko for extra crispiness |
| Paprika 🌶️ | 1 tbsp | Sweet or smoked for color |
| Garlic Powder 🧄 | 1 tsp | For savory depth in coating |
| Onion Powder 🧅 | 1 tsp | Balances the seasoning blend |
| Salt 🧂 | 1 ½ tsp | Diamond Crystal kosher preferred |
| Black Pepper 🌶️ | 1 tsp | Freshly ground for best flavor |
| Buttermilk 🥛 | 1 cup | For tenderizing the pork |
| Wooden Skewers 🪵 | 8 pieces | Soaked in water 30 minutes |
| Vegetable Oil 🫒 | 2 cups | For deep frying to golden |
The pork shoulder is non-negotiable here. Bone-in or boneless both work, but boneless is easier to cube. Look for good marbling at Whole Foods or your local butcher—this fat renders down, keeping the meat moist during frying. Avoid lean cuts like tenderloin; they dry out. For the breadcrumbs, Progresso Italian-style has the right texture, but panko from Kikkoman adds extra crunch.
No buttermilk? Whole milk with 1 tbsp vinegar (let it sit 5 minutes) works in a pinch. Out of paprika? Cayenne at half the amount adds heat and color. The eggs can be swapped for aquafaba (3 tbsp per egg) if needed. For gluten-free, use cornstarch instead of flour and gluten-free breadcrumbs. The oil quantity seems high, but you’ll reuse most of it.
Marinate the pork in buttermilk up to 12 hours for maximum tenderness. Skewers can be breaded and refrigerated 4 hours ahead—cover tightly. Leftovers? Reheat in a 400°F oven for 10 minutes to restore crispiness. Oil can be strained and reused 2-3 times if kept cool and dark.
Why You’ll Love This Recipe
- One Pan Wonder: I love that I only need a single skillet—dredge the pork in flour, dip in egg, coat with breadcrumbs and paprika, then fry. Cleanup’s a breeze.
- Crispy, Juicy Bite: That paprika-spiced crust with the tender pork shoulder inside? Honestly, it’s the kind of texture that makes you go back for seconds.
- Weeknight Hero: Between us, this is my go-to for busy evenings. It’s ready faster than takeout and way more satisfying.
- Stretches the Budget: Pork shoulder is cheap, and a little goes a long way. I’ll be real: it’s a solid, filling meal that doesn’t break the bank.
Step-by-Step Instructions for Skewered Pork Delight
This method ensures a perfectly crispy coating while keeping the pork tender and juicy inside.
Step 1: Prepare the Pork and Seasoning Blend
Cut the 1.5 lb pork shoulder into 1-inch cubes, ensuring uniform size for even cooking. In a shallow dish, combine the 1 cup all-purpose flour, 1 tbsp paprika, 1 tsp garlic powder, 1 tsp onion powder, 1.5 tsp salt, and 1 tsp black pepper. Whisk until evenly distributed—this seasoned flour creates the first layer of flavor and crust.
Soak the 8 pieces wooden skewers in water for 30 minutes to prevent burning during cooking. This step is non-negotiable for safety and presentation. Pat the pork cubes dry with paper towels before dredging to ensure the coating adheres properly.
Step 2: Create the Breading Station and Coat the Pork
Set up a breading station with three shallow dishes. Place the seasoned flour in the first, 2 whole large eggs beaten with 1 cup buttermilk in the second, and 2 cups seasoned breadcrumbs in the third. The buttermilk acts as a tenderizer while the eggs help the breadcrumbs stick.
Dredge each pork cube in the flour mixture, shaking off excess, then dip into the buttermilk-egg wash, letting any excess drip off. Finally, roll in the breadcrumbs, pressing gently to ensure full coverage. Place the coated cubes on a wire rack set over a baking sheet to maintain crispness before frying.
Step 3: Thread the Skewers and Rest
Thread 4-5 breaded pork cubes onto each soaked wooden skewer, leaving a small gap between each piece for even cooking. Arrange the skewers on a clean plate, ensuring they don’t touch to prevent the coating from sticking together.
Let the skewers rest for 10-15 minutes at room temperature. This rest period allows the coating to set, which prevents it from falling off during frying. It also takes the chill off the pork, promoting more even cooking.
Step 4: Fry to Golden Perfection
In a deep, heavy-bottomed pot, heat the 2 cups vegetable oil to 350°F. Use a deep-fry or candy thermometer for accuracy—maintaining the correct temperature is critical for achieving a crispy exterior without undercooking the interior.
Carefully lower 2-3 skewers into the hot oil at a time to avoid overcrowding, which lowers the oil temperature. Fry for 4-5 minutes until the coating is deep golden brown and the internal temperature reaches 145°F. Turn the skewers occasionally for uniform browning.
Transfer the fried skewers to a paper towel-lined plate to drain excess oil. The coating should be crispy and audibly crunchy when bitten, while the pork inside remains juicy and tender. Serve immediately while hot for the best texture.
Pro Tips For Making City Chicken
- Pound the Pork: Use a meat mallet to flatten the pork shoulder cubes to an even 1/4-inch thickness—I learned this the hard way after bite-sized pieces cooked unevenly.
- Double Dredge: Dip the pork in flour, then egg, then breadcrumbs, and repeat the egg and breadcrumb step for a crust that actually stays put during frying.
- Check the Oil: Keep your frying oil at 350°F; any hotter and the breading burns before the pork cooks through, any cooler and you get a greasy, soggy mess.
- Rest Before Serving: Let the fried pieces drain on a rack for 5 minutes—this keeps the crust crisp instead of turning it into a sad, steamy coating.
Dietary Considerations for This city chicken
Gluten-Free Option
Swap the all-purpose flour for cornstarch and use gluten-free breadcrumbs like Aleia’s or Ian’s. The cornstarch creates a crispier coating than any gluten-free flour blend I’ve tried. 💪
Dairy-Free Adaptation
Replace buttermilk with unsweetened almond milk plus 1 tbsp vinegar. Use aquafaba (3 tbsp per egg) instead of eggs for binding. The texture remains surprisingly similar.
Egg-Free Version
Use aquafaba (3 tbsp per egg) for the wash. I’ve also had success with flax eggs (1 tbsp ground flax + 3 tbsp water per egg), though the coating may be slightly less crisp.
Lower-Fat Alternative
For a lighter version, bake at 400°F for 20-25 minutes on a wire rack. Spray with olive oil before baking for extra crispiness. Turn halfway through cooking for even browning.
Pork Substitutes
Try chicken thighs (skinless, boneless) for a leaner option. For plant-based, Extra Firm Tofu cubes pressed and marinated overnight work well with the same breading process.
Nut Allergy Note
Ensure all breadcrumbs and flour substitutes are nut-free. Check labels carefully as some gluten-free products may contain almond or other nut flours. 💡
Nutrition Facts
Frequently Asked Questions
Why use pork shoulder instead of other cuts?
Pork shoulder has ideal marbling that keeps the meat juicy during frying. Leaner cuts like tenderloin dry out too easily. The fat renders down, creating that signature tender interior with a crispy coating.
Can I bake instead of fry?
Bake at 400°F for 20-25 minutes on a wire rack. Spray with oil first for extra crispiness, and turn halfway through for even browning.
How do I know when it’s done?
The coating should be deep golden brown, and the internal temperature must reach 145°F. Use a meat thermometer for accuracy—this ensures both safety and perfect tenderness.

- Jollof Rice Sauce Recipe: West African Tomato and Spice Infusion - September 25, 2026
- Japanese Rice Soup Recipe: Umami-Rich Comfort in a Bowl - September 25, 2026
- Homemade Cream Of Rice Recipe: Silk-Smooth Breakfast in Minutes - September 25, 2026