
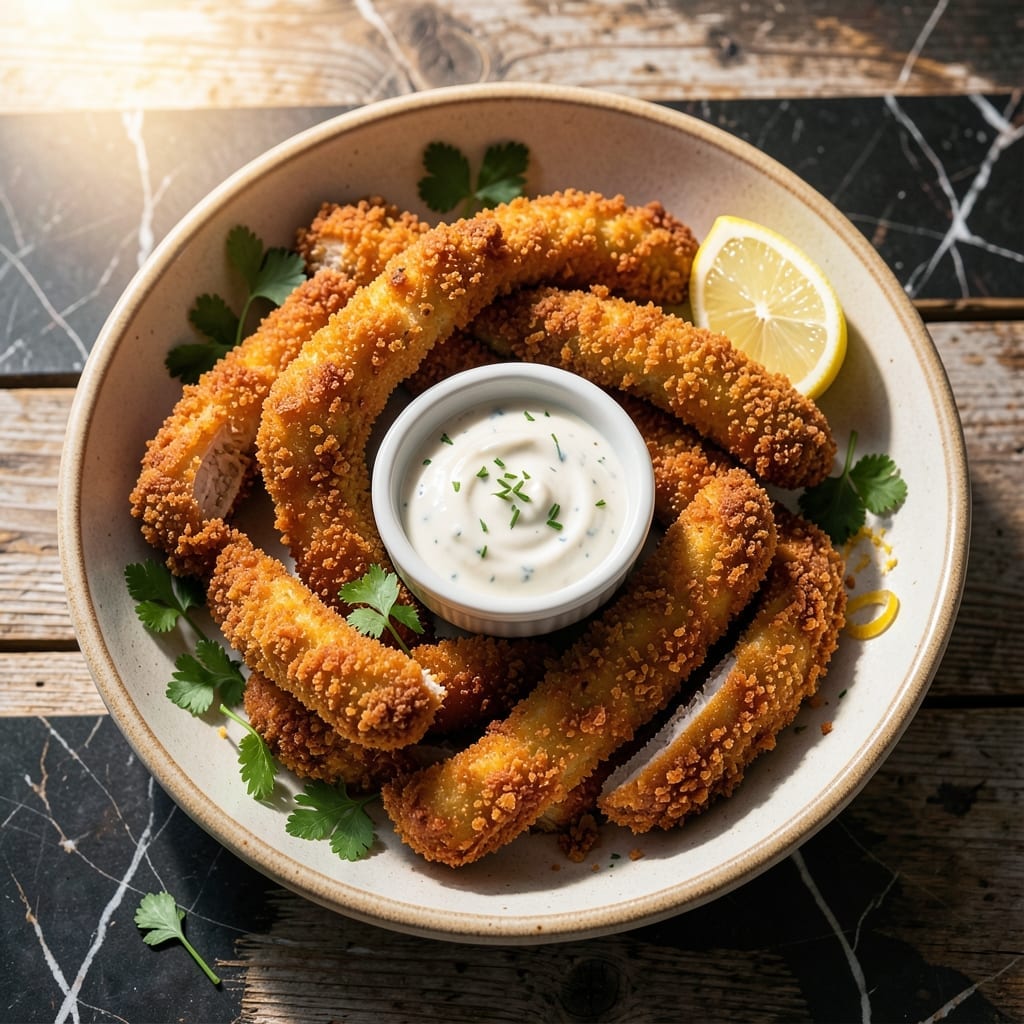
Achieving maximum crunch on chicken fingers requires a double-breading technique that creates an extra-thick, shatteringly crisp coating. This method ensures every bite delivers that satisfying resistance before giving way to tender, juicy chicken inside.
The secret lies in the two-step breading process: first a flour dredge, then an egg wash, followed by a final coating of seasoned breadcrumbs. Baking or frying at the right temperature locks in moisture while creating a golden, crispy exterior that stays intact.
What you get is a restaurant-quality result with uniform texture and perfect crunch in every piece. The double layer prevents the coating from falling off during cooking, while the chicken remains succulent and flavorful.
Serve with your favorite dipping sauces for a meal that satisfies every time.
Ingredients for Crunchy Chicken Fingers
Double-breading means double crunch. These are the ingredients that make it happen.
| Ingredient | Amount | Notes |
|---|---|---|
| Chicken Breast Tenders 🍗 | 1 ½ lb | Boneless, skinless, evenly sized |
| All-Purpose Flour 🌾 | 1 cup | For initial dredging layer |
| Large Eggs 🥚 | 2 whole | Beaten for egg wash |
| Buttermilk 🥛 | ½ cup | For extra crispiness in wash |
| Panko Breadcrumbs 🍞 | 2 cups | Japanese-style for maximum crunch |
| Plain Breadcrumbs 🍞 | 1 cup | For seasoned inner coating |
| Paprika 🌶️ | 1 tsp | Sweet or smoked variety |
| Garlic Powder 🧄 | 1 tsp | For seasoning breadcrumbs |
| Onion Powder 🧅 | 1 tsp | For breadcrumb flavor |
| Salt 🧂 | 1 tsp | Diamond Crystal kosher preferred |
| Black Pepper 🌶️ | ½ tsp | Freshly ground for best flavor |
| Vegetable Oil 🫒 | 2 cups | For frying, or as needed |
| Cornstarch 🌾 | 2 tbsp | Mixed with flour for crispier coating |
The chicken tenders are key—look for uniform size so they cook evenly. Costco has great pre-cut tenders, or buy whole breasts and slice them yourself (aim for 1-inch strips). For the breadcrumbs, Panko is non-negotiable for that shatteringly crisp texture. I always grab mine from the Asian aisle at Kroger. The buttermilk in the egg wash is the secret to extra crunch and juiciness.
No buttermilk? Whole milk plus 1 tbsp vinegar works in a pinch. Swap Panko for regular breadcrumbs if you must, but the crunch won’t be the same. Trader Joe’s has a great pre-seasoned Panko that saves time. For the flour dredge, all-purpose is perfect—no need for anything fancy. The cornstarch in the flour mix adds an extra crispy layer that’s worth the extra minute.
Breaded chicken freezes beautifully—3 months max for best texture. Store raw tenders in the fridge for up to 2 days before cooking. Leftovers? Re-crisp in a 400°F oven for 10 minutes (the microwave will make them soggy).
Why You’ll Love This Recipe
- No-Fuss Coating: I love that I can set up the flour, buttermilk, and panko in three shallow bowls and have these prepped in minutes. No fancy techniques—just dip, dredge, and bake.
- That Crunch: The panko and buttermilk combo creates this insane crispy shell that stays crunchy even after dipping in sauce. Honestly, it’s the only way I’ll make chicken fingers now.
- Kid-Approved Dinner: These disappear faster than I can make them, whether it’s a weeknight or a birthday party. My picky nephew even asks for seconds.
- Leftovers? No Problem: They reheat beautifully in the oven or air fryer—still crispy, never soggy. I’ll be real: I sometimes make a double batch just to have them for lunch the next day.
Step-by-Step Instructions for Crunchy Chicken Fingers
Double-breading is the secret, and here’s exactly how to nail that irresistible crunch.
Step 1: Prep the Breading Stations
Combine the all-purpose flour and cornstarch in a shallow bowl. This blend creates an ultra-crisp base layer that adheres better than flour alone. In a second bowl, whisk the large eggs with buttermilk until fully incorporated and slightly frothy.
In a third bowl, mix the panko breadcrumbs, plain breadcrumbs, paprika, garlic powder, onion powder, salt, and black pepper. The panko’s larger flakes will give you that signature crunch, while the seasoned plain breadcrumbs add depth of flavor to the inner coating.
Step 2: Dredge and Double-Coat the Chicken
Pat the chicken breast tenders dry with paper towels—this is crucial for the coating to stick properly. Dredge each piece in the flour mixture, pressing gently to adhere. Shake off any excess, as clumps will create uneven cooking and a gummy texture.
Dip the floured tenders into the egg wash, letting any excess drip off for a moment. Then press each piece firmly into the breadcrumb mixture, turning to coat evenly on all sides. Press hard enough that the crumbs really cling—this double-coating is what creates maximum crunch. Place breaded tenders on a wire rack set over a baking sheet.
Step 3: Heat the Oil and Fry in Batches
Pour the vegetable oil into a large, heavy-bottomed skillet to a depth of about 1 inch. Heat over medium-high heat until the oil reaches 350-375°F. To test readiness without a thermometer, drop in a pinch of breadcrumbs—if it sizzles immediately and floats to the surface within seconds, the oil is ready.
Working in batches to avoid crowding (which lowers oil temperature), carefully add the breaded tenders to the hot oil. Fry for 3-4 minutes per side until deep golden brown and crispy. The internal temperature should reach 165°F. Don’t flip too early—the coating needs time to set and develop that perfect crunch.
Step 4: Drain and Keep Warm
Transfer the cooked tenders to a wire rack or paper towel-lined plate to drain excess oil. Avoid stacking them directly on paper towels, as this can make the coating soggy. The wire rack allows air circulation, preserving the crispiness while any residual oil drips away.
If frying in multiple batches, keep the finished tenders warm in a 200°F oven on a wire rack. This maintains their crispness without overcooking. Serve immediately while hot and at peak crunch—these are best fresh from the fryer when the coating is at its most satisfying texture.
Pro Tips For Making Crunchy Chicken Fingers
- Double Dredge: Dip the tenders in flour, then buttermilk, then back in flour before the egg wash and panko—this extra layer makes the crust shatter when you bite into it.
- Press the Panko: After coating, press the panko into the chicken firmly with your palm so it sticks better and doesn’t flake off in the pan.
- Skip Cold Oil: I learned this the hard way—start frying only when the oil is hot enough (350°F) or the crust will absorb grease and turn soggy instead of crispy.
- Rest Before Frying: Let the breaded tenders sit on a rack for 10 minutes before frying—this helps the coating set so it doesn’t slide off in the oil.
Creative Variations of This crunchy chicken fingers
Spicy Buffalo Style
Toss your hot tenders in ½ cup Frank’s RedHot sauce mixed with 2 tbsp melted butter for that classic buffalo kick. The double-breading holds up perfectly to the saucy coating. I like to serve these with ranch or blue cheese dressing and celery sticks. 🌶️
Honey Mustard Glaze
Swap the dipping sauce for a glaze by brushing hot tenders with a mix of 3 tbsp honey and 2 tbsp Dijon mustard. Return to the oven for 2 minutes to set. The sweetness caramelizes slightly, adding a sticky, glossy finish that kids and adults love alike.
Asian-Inspired Sesame
Add 1 tbsp sesame seeds and 1 tsp ground ginger to your breadcrumb mix before coating. After frying, drizzle with a sauce of ¼ cup soy sauce, 2 tbsp rice vinegar, and 1 tbsp honey. Garnish with sliced green onions for a fusion twist. ✨
Parmesan Herb Crust
Mix ½ cup grated Parmesan cheese and 1 tbsp dried Italian seasoning into your breadcrumb mixture. The Parmesan adds a sharp, salty depth while the herbs bring freshness. Bake at 400°F for 15-18 minutes for a lighter but equally crispy version.
Coconut Crunch
Replace half the panko with 1 cup unsweetened shredded coconut for a tropical twist. The coconut toasts beautifully in the oil, adding a nutty flavor and extra crunch. Pair with a mango dipping sauce for a sweet-savory combination that feels like a vacation.
Air Fryer Method
For a healthier take, arrange breaded tenders in a single layer in your air fryer basket. Cook at 375°F for 12-15 minutes, flipping halfway. Spray with cooking oil before air frying for extra crispiness. The results are surprisingly close to deep-frying with a fraction of the oil. 💡
Nutrition Facts
Frequently Asked Questions
Why does the recipe use both flour and cornstarch?
The cornstarch creates an ultra-crisp base layer that adheres better than flour alone. This combo ensures the coating stays put and gets extra crunchy.
Can I bake instead of fry?
Yes! Bake at 400°F for 15-18 minutes on a wire rack for even air circulation. Flip halfway for uniform crispiness.
How do I keep them crispy after cooking?
Place on a wire rack, not paper towels, to allow air circulation. Keep warm in a 200°F oven if frying in batches.
What if my coating falls off during cooking?
Press the breadcrumbs firmly onto the chicken during coating. Also, ensure oil is hot enough (350-375°F) before frying.

- Curd Rice Recipe: South Indian Comfort With Cooling Yogurt - September 25, 2026
- Rice Mix Recipe: Fluffy Grains With Customizable Flavor Boost - September 25, 2026
- Soupy Rice Recipe: Broth-Soaked Grains With Rustic Depth - September 25, 2026