
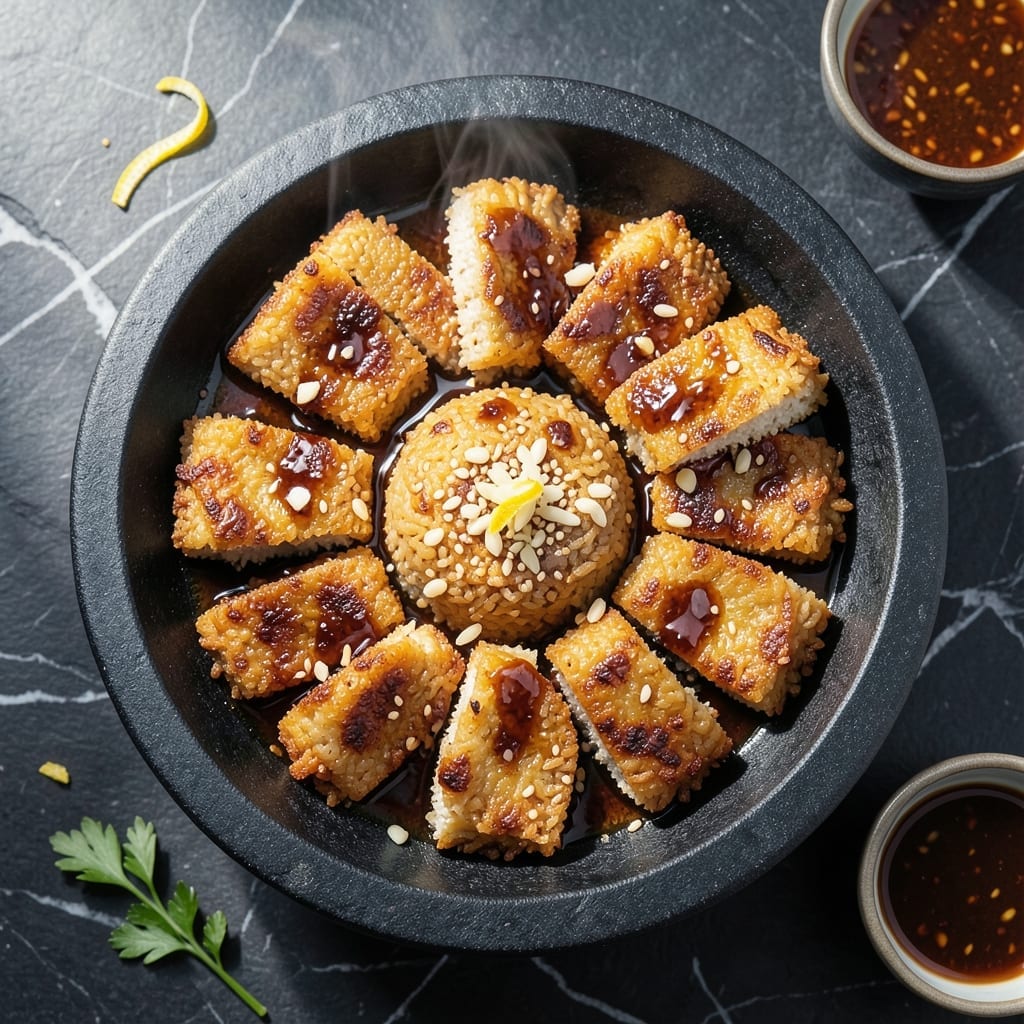
This recipe transforms simple rice into a crisp, golden dish with deep nutty flavor. The technique ensures every bite delivers satisfying crunch and rich aroma.
With precise cooking and resting time, you’ll achieve perfectly textured rice cakes that stay crispy. Ideal for serving as a main or snack, this method highlights the natural sweetness of the rice.
Ingredients for Crunchy Rice Cake
Transform simple rice into golden crispy cakes with rich nutty flavor and satisfying crunch.
| Ingredient | Amount | Notes |
|---|---|---|
| Short-Grain White Rice 🍚 | 2 cups | Rinsed until water runs clear |
| Water 💧 | 3 cups | For cooking rice |
| Salt 🧂 | 1 tsp | Divided for seasoning |
| Sugar 🍬 | 1 tsp | Enhances natural sweetness |
| Soy Sauce 🫒 | 2 tbsp | For umami depth |
| Sesame Oil 🫒 | 1 tbsp | Toasted for nutty aroma |
| Garlic Cloves 🧄 | 3 cloves | Minced finely |
| Green Onions 🧅 | 4 whole | Thinly sliced for garnish |
| Vegetable Oil 🫒 | ¼ cup | For frying rice cakes |
| Sesame Seeds 🌰 | 2 tbsp | Toasted for garnish |
| Eggs 🥚 | 2 whole | Beaten for binding |
| All-Purpose Flour 🌾 | ¼ cup | For dusting rice cakes |
The rice is the foundation here. Short-grain white rice gives the best texture—sushi rice works perfectly. Rinse it thoroughly until the water runs clear to remove excess starch (this ensures crispiness). Koshihikari or Calrose are excellent varieties. Most grocery stores carry these, but Asian markets often have better quality at lower prices. Avoid instant rice, as it lacks the starch needed for binding.
No soy sauce? Tamari or coconut aminos work as substitutes. Out of sesame oil? Perilla oil (found at H Mart or Korean markets) adds a similar nutty depth. For a gluten-free version, use gluten-free tamari and swap all-purpose flour for cornstarch or rice flour. The eggs can be omitted for a vegan approach, but the cakes may need extra flour for binding.
Cooked rice can be made a day ahead and refrigerated (this actually helps with crispiness). The rice cakes are best fried fresh but can be kept warm in a 200°F oven for up to 1 hour. Leftovers store in the fridge for 2-3 days—reheat in a toaster oven to revive the crunch.
Why You’ll Love This Recipe
- One Pot Wonder: I just dump the rice, water, and a pinch of salt in a pot—no fancy steps, no stress.
- Sweet-Savory Magic: The sugar and soy sauce caramelize into this addictive crust that’s crispy outside, soft inside.
- Snack or Side: Honestly, I serve these as a quick snack, pair them with soup, or pack them for lunchbox treats.
- Budget Stretch: A cup of short-grain rice turns into a big batch, and leftovers crisp up even better the next day.
Step-by-Step Instructions for Crunchy Rice Cake
Here’s the method. Straightforward, tested, works every time.
Step 1: Cook and Season the Rice
Rinse the 2 cups Short-Grain White Rice under cold water until the water runs clear. This removes excess starch and prevents the rice from becoming gummy. Drain well in a fine-mesh strainer.
Combine the rice with 3 cups Water in a saucepan. Add ½ tsp Salt and the 1 tsp Sugar. Bring to a boil, then reduce heat to low, cover, and simmer for 15 minutes. Remove from heat and let it sit, covered, for an additional 10 minutes.
The rice should be tender with no hard center. Spread it on a baking sheet and let it cool to room temperature. Stir in the 2 tbsp Soy Sauce and 1 tbsp Sesame Oil while it’s still warm for even flavor distribution.
Step 2: Prepare the Binding Mixture
In a small bowl, beat the 2 whole Eggs until smooth. Mince the 3 cloves Garlic Cloves finely and stir them into the beaten eggs. This mixture will help bind the rice cakes and add a subtle garlicky aroma.
Thinly slice the 4 whole Green Onions, separating the white and green parts. Set aside the green parts for garnish. The white parts can be mixed into the rice for extra flavor.
Step 3: Form and Coat the Rice Cakes
Once the rice is cool enough to handle, take about ½ cup portions and shape them into small patties, about ½-inch thick. Press firmly to ensure they hold together.
Place the 0.25 cup All-Purpose Flour on a plate. Lightly coat each rice cake in the flour, shaking off any excess. This creates a thin, crispy outer layer when fried. The flour also helps the egg mixture adhere better.
Step 4: Fry to Golden Perfection
Heat the 0.25 cup Vegetable Oil in a large skillet over medium-high heat until it shimmers. Dip each floured rice cake into the egg mixture, ensuring both sides are fully coated, then place them in the hot oil.
Fry for 3-4 minutes per side until they are golden brown and crispy. Avoid crowding the pan—work in batches if necessary. Transfer the fried rice cakes to a paper towel-lined plate to drain excess oil.
Step 5: Garnish and Serve
While the rice cakes are still hot, sprinkle them with the reserved green onion slices and 2 tbsp Sesame Seeds. The sesame seeds will toast slightly from the residual heat, enhancing their nutty flavor.
Serve immediately while crispy. The contrast of the crunchy exterior and the soft, flavorful rice inside makes these rice cakes irresistible. Pair with a dipping sauce or enjoy as they are.
Pro Tips For Making Crunchy Rice Cake
- Soak the Rice: Give the short-grain rice a good 30-minute soak before cooking—it swells just enough to bind better when pressed into cakes, but doesn’t turn mushy. I learned this the hard way after my first batch crumbled apart.
- Press Hard, Then Rest: Pack the cooked rice into the mold as tightly as you can, then let the cakes rest for at least 10 minutes before frying. Sounds tedious, but it’s the only way to get that solid crunch without them falling apart mid-flip.
- Use Cold Rice: Always start with day-old or chilled cooked rice—fresh rice holds too much moisture and steams instead of crisping. I was skeptical until I tried it, but now I plan ahead every time.
- High Heat, Less Oil: Crank the pan to medium-high and use just enough oil to coat the bottom, about 1 tablespoon. Too much oil fries them, but the right heat gives that deep golden crust without greasiness.
Serving Suggestions for Leftovers
Dipping Sauces
Serve these with a simple soy-based dip: mix 3 tbsp soy sauce, 1 tbsp rice vinegar, 1 tsp honey, and ½ tsp sesame oil. I love how the tangy-sweet balance complements the nutty crunch. 💛
Fresh Garnishes
Beyond sesame seeds, try topping with pickled radishes or kimchi for a tangy kick. A sprinkle of fresh cilantro adds brightness. I always keep these on hand for last-minute garnishing.
Main Course Pairing
Turn these into a meal by serving with grilled bulgogi beef or spicy tofu. The crispy texture holds up well against hearty proteins. I often pair with a simple cucumber salad for freshness.
Breakfast Twist
For a morning treat, serve with a fried egg on top and a drizzle of sriracha mayo. The runny yolk soaks into the rice cake beautifully. This became my weekend brunch go-to.
Party Platter
Arrange on a platter with other Korean appetizers like mandu dumplings or vegetable pancakes. They’re perfect for sharing. I use a bamboo serving tray for an authentic touch. ✨
Kid-Friendly Option
For picky eaters, serve with ketchup or honey mustard for dipping. The mild flavor and fun shape make them appealing. My nieces can’t get enough of them.
Nutrition Facts
Frequently Asked Questions
Can I use leftover rice for this?
Day-old rice works perfectly since it’s drier. Spread it out to cool completely before shaping into patties.
How do I keep them crispy?
Fry in small batches to avoid steaming. Drain on a wire rack instead of paper towels for better airflow.
Can I bake instead of fry?
Yes, bake at 400°F for 20-25 minutes, flipping halfway. They won’t be as crispy but will still be delicious.
What if my cakes fall apart?
Chill the shaped patties for 30 minutes before frying. If needed, add an extra egg to the binding mixture.

- Rice Pudding Recipe With Eggs and Milk: Old-Fashioned Custard-Style Comfort - September 30, 2026
- Rice Noodle Sauce Recipe: Bold Umami Depth for Authentic Stir-Fry - September 30, 2026
- Rice Pilaf Recipe: Fragrant Basmati With Toasted Vermicelli - September 30, 2026