
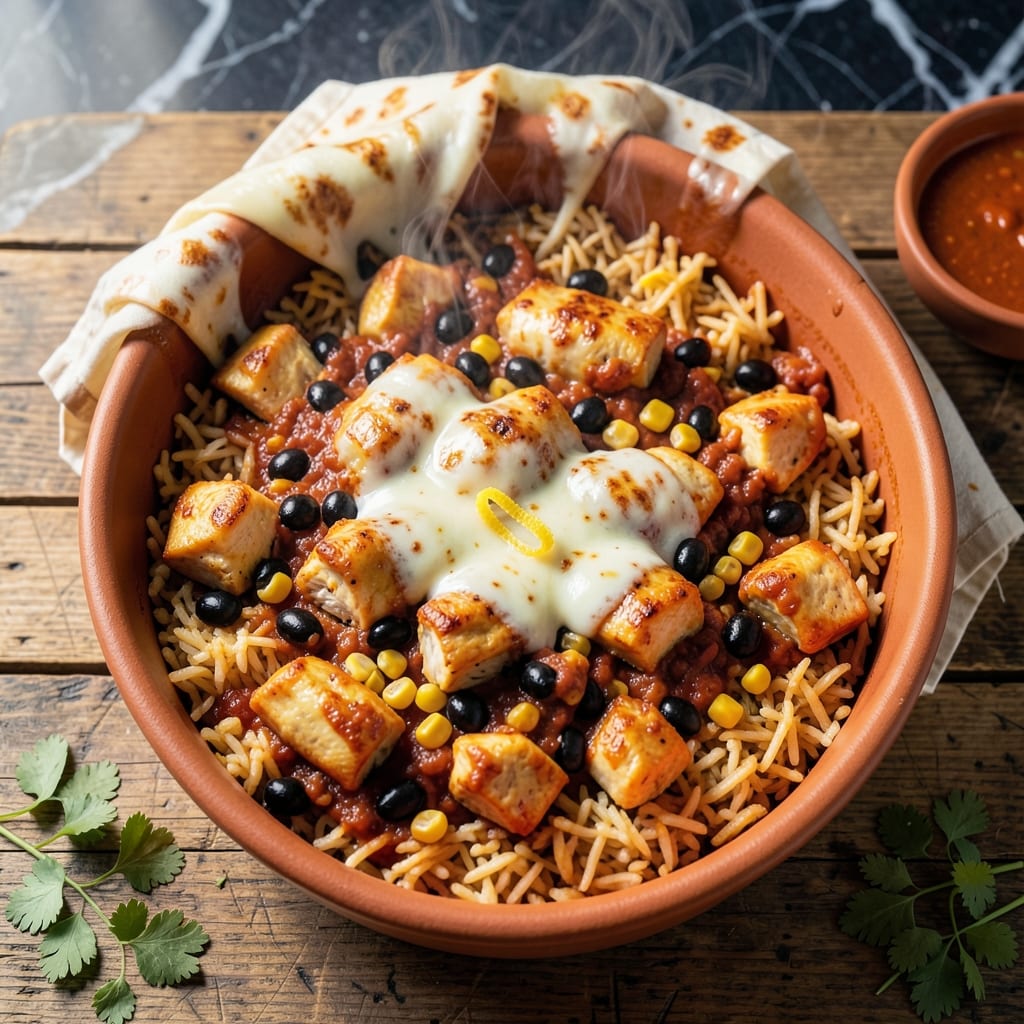
This streamlined method delivers a one-dish fiesta with minimal effort. No pre-cooking required—just combine the ingredients and let the oven do the work.
You’ll get tender chicken, flavorful rice, and rich enchilada sauce all in one baking dish. The result is a satisfying meal that comes together without the fuss of traditional layering.
Ingredients for Dump and Bake Chicken Enchilada and Rice
One baking dish, minimal prep, and maximum flavor for this satisfying meal.
| Ingredient | Amount | Notes |
|---|---|---|
| Boneless Skinless Chicken Breasts 🍗 | 1 ½ lb | Cut into bite-sized pieces |
| Long-Grain White Rice 🍚 | 1 ½ cups | Uncooked, rinsed thoroughly |
| Red Enchilada Sauce 🍅 | 2 cups | Canned or homemade |
| Black Beans 🫘 | 1 can | 15 oz, drained and rinsed |
| Corn Kernels 🌽 | 1 cup | Fresh, canned, or frozen |
| Shredded Monterey Jack Cheese 🧀 | 2 cups | Divided for layering |
| Shredded Cheddar Cheese 🧀 | 1 cup | Sharp or mild variety |
| Yellow Onion 🧅 | 1 whole | Medium, finely diced |
| Bell Pepper 🌶️ | 1 whole | Any color, diced |
| Garlic Cloves 🧄 | 3 cloves | Minced for maximum flavor |
| Chicken Broth 🍲 | 2 ½ cups | Low-sodium preferred |
| Ground Cumin 🌿 | 1 tsp | Toasted for enhanced aroma |
| Chili Powder 🌶️ | 1 tsp | Adjust for heat preference |
| Salt 🧂 | 1 tsp | Diamond Crystal kosher salt |
| Black Pepper 🌶️ | ½ tsp | Freshly ground preferred |
The chicken quality matters—opt for boneless, skinless breasts with even thickness for consistent cooking. Costco or Whole Foods offer reliable options, but standard grocery store brands work too. For the rice, long-grain white absorbs the enchilada sauce best (jasmine or basmati are acceptable substitutes). The canned enchilada sauce should be red for authentic flavor; Las Palmas is a trusted brand.
No red enchilada sauce? Tomato sauce plus taco seasoning can work in a pinch. Short on cheese? Pepper Jack adds a nice kick. Fresh corn can be swapped for frozen (no need to thaw), and pinto beans can replace black beans. The cumin and chili powder are essential—Penzeys offers high-quality spices if you’re restocking. For heat lovers, add a pinch of cayenne.
Store uncooked chicken in the fridge for up to 2 days or freeze for 9 months. The dish reheats well—cover with foil and warm at 350°F for 15-20 minutes. Leftovers keep in the fridge for 4-5 days or freeze for up to 3 months.
Why You’ll Love This Recipe
- One Pan Wonder: I just dump everything in—chicken, rice, enchilada sauce, beans, corn—and let the oven do the work.
- Crave-Worthy Flavor: The red enchilada sauce soaks into the rice and chicken, making every bite rich and satisfying.
- Feeds a Crowd: Between us, this stretches easily for potlucks or meal prep—just double the batch.
- Budget Friendly: Honestly, it’s packed with protein and fiber from the beans and corn, and it won’t break the bank.
Step-by-Step Instructions for Dump and Bake Chicken Enchilada and Rice
This streamlined method delivers maximum flavor with minimal effort and cleanup.
Step 1: Prepare the Base Components
Preheat your oven to 375°F. While it heats, cut the 1.5 lb boneless skinless chicken breasts into bite-sized pieces—uniform sizing ensures even cooking. In a large mixing bowl, combine these with the 1.5 cups long-grain white rice, 1 can black beans (drained and rinsed), 1 cup corn kernels, finely diced yellow onion, and diced bell pepper.
Add the 3 minced garlic cloves, 1 tsp ground cumin, 1 tsp chili powder, 1 tsp salt, and 0.5 tsp black pepper. Stir thoroughly to distribute the spices evenly throughout the mixture. This layering of flavors at the start ensures every bite is packed with taste.
Step 2: Combine Wet Ingredients and Transfer to Baking Dish
Pour the 2 cups red enchilada sauce and 2.5 cups chicken broth over the chicken and rice mixture. Stir well to combine, ensuring the liquid fully saturates the dry ingredients. The sauce should coat everything with a vibrant red hue.
Transfer the entire mixture to a greased 9×13-inch baking dish, spreading it out evenly. Press down gently to submerge the rice and chicken in the liquid. This prevents dry spots and promotes even cooking. The dish should look slightly soupy at this stage—this is exactly what you want.
Step 3: Bake Until Rice is Tender and Chicken is Cooked
Cover the baking dish tightly with aluminum foil and bake for 45 minutes. After this time, carefully remove the foil and check that the rice is beginning to absorb the liquid and the chicken pieces are turning opaque. If the top appears dry, add a splash of water or broth before proceeding.
Return the dish to the oven, now uncovered, and bake for an additional 15-20 minutes until the rice is tender and the chicken reaches an internal temperature of 165°F. You’ll see the edges bubble and the sauce thicken as it reduces.
Step 4: Add Cheese and Finish
Remove the dish from the oven and sprinkle the 2 cups shredded Monterey Jack cheese and 1 cup shredded cheddar cheese evenly over the top. Return it to the oven for 5-7 minutes, just long enough for the cheese to melt completely and turn golden brown in spots.
Let the casserole rest for 5 minutes before serving. This brief pause allows the cheese to set slightly and the flavors to meld together. The final dish should have a creamy, cheesy top with tender rice and juicy chicken beneath, ready to be scooped straight from the dish.
Pro Tips For Making Dump And Bake Chicken Enchilada And Rice
- Pre-cook the chicken: Dice the chicken into 1-inch pieces before baking—it cooks faster and absorbs the enchilada sauce better than whole breasts. I learned this the hard way after pulling out dry, rubbery chunks from my first few attempts.
- Rinse the rice: Give the long-grain white rice a quick rinse under cold water to remove excess starch. Sounds weird, but it works: your baked rice will be fluffier instead of gummy.
- Don’t drown it: Use just enough enchilada sauce to coat everything—about 2 cups max for a 9×13 dish. After burning three batches, I finally figured out that too much liquid makes the rice mushy and the casserole soggy.
- Add beans last: Stir in the black beans and corn kernels only after the chicken and rice are mostly baked—around the 30-minute mark. This keeps them from turning to mush while still letting them warm through.
Dietary Considerations for dump and bake chicken enchilada and rice
Gluten-Free Adaptations
This dish is naturally gluten-free if you verify your enchilada sauce brand. I use Frito-Lay or Las Palmas red sauce, both certified gluten-free. Always check labels, as some brands add wheat as a thickener.
Dairy-Free Options
Swap the cheeses for dairy-free alternatives like Violife or Daiya shreds. Both melt well and provide that stretchy texture. Use 1:1 ratio—2 cups dairy-free Monterey Jack style and 1 cup cheddar style.
For extra richness, stir in ¼ cup nutritional yeast before baking. It adds a cheesy depth that complements the enchilada flavors perfectly. 🌱
Lower Sodium Version
Use low-sodium chicken broth and no-salt-added enchilada sauce. I recommend Pacific Foods for broth and Muir Glen for sauce. Reduce added salt to ½ tsp and skip the canned beans—use dried beans you’ve cooked without salt.
Vegetarian Adaptation
Replace chicken with 1.5 lbs extra-firm tofu, pressed and cubed. Or use chickpeas instead—2 cans (drained) works well. Both absorb the enchilada sauce beautifully and maintain the dish’s hearty texture.
Spice Adjustments
For sensitive palates, reduce chili powder to ½ tsp and omit cumin. For kids, I often make a mild batch with just ½ tsp salt and ¼ tsp black pepper. Add heat at the table with hot sauce or jalapeños. 🌶️
Nutrition Facts
Frequently Asked Questions
Can I use brown rice instead of white?
Yes, but increase broth to 3 cups and bake covered for 60 minutes. Brown rice needs more liquid and time.
Can I prep this dish the night before?
Combine all ingredients except cheese, cover, and refrigerate up to 24 hours. Add 10 minutes to baking time when cold.
Why is my rice still crunchy after baking?
Likely not enough liquid. Ensure rice is fully submerged before baking. If needed, add ½ cup hot broth and bake 10-15 minutes more.

- Jollof Rice Sauce Recipe: West African Tomato and Spice Infusion - September 25, 2026
- Japanese Rice Soup Recipe: Umami-Rich Comfort in a Bowl - September 25, 2026
- Homemade Cream Of Rice Recipe: Silk-Smooth Breakfast in Minutes - September 25, 2026