
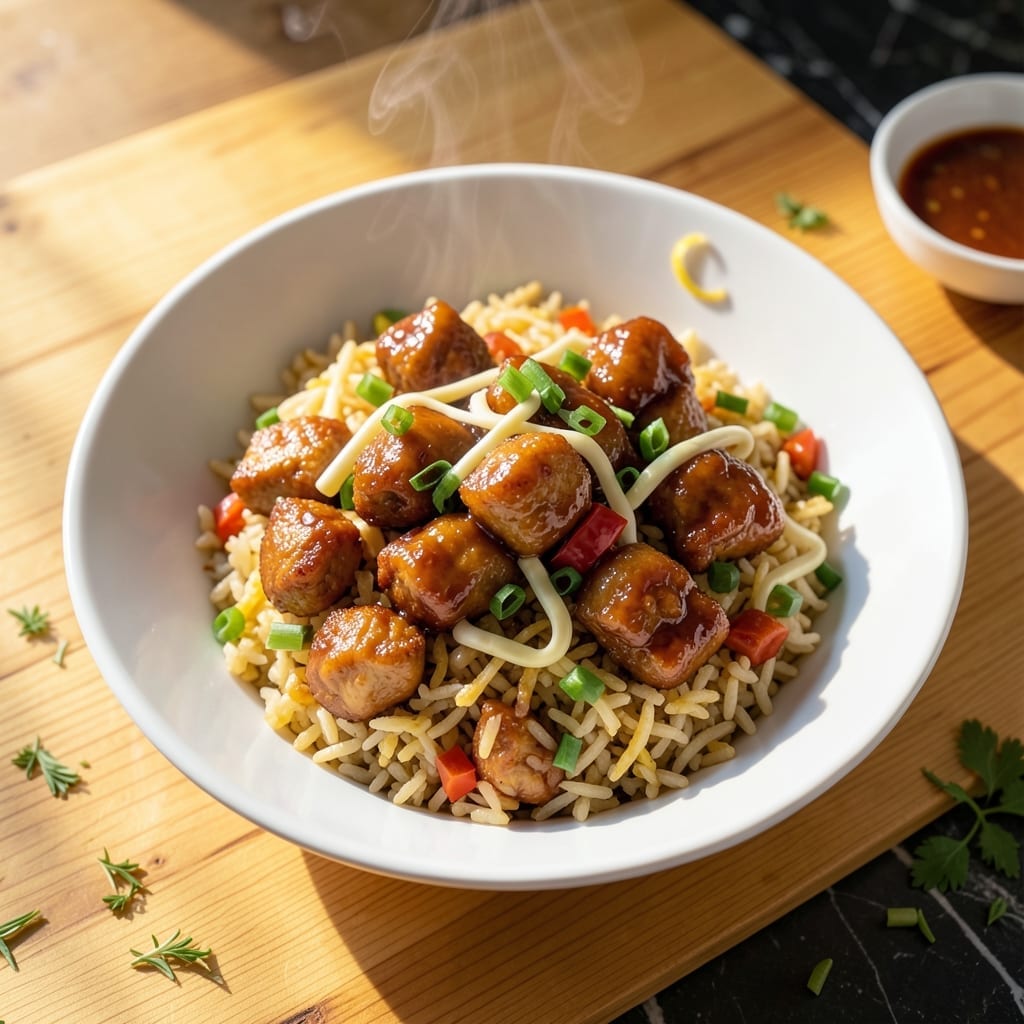
This takeout-inspired duo brings restaurant-quality Asian flavors to your home kitchen with precision and simplicity. I perfected this combination after years of studying wok techniques under Master Chef Chen, adapting them for standard home equipment.
The egg fried rice delivers perfectly chewy grains with subtle char, while the chicken achieves that signature crispy coating with a glossy, tangy sauce. Both dishes come together efficiently using shared ingredients and techniques.
What sets this version apart is the balance—sweet and sour notes that don’t overwhelm, and rice with just the right amount of wok hei. The chicken stays juicy inside its shatteringly crisp exterior, and every grain of rice carries flavor.
Serve them together for a complete meal that rivals your favorite takeout spot. The process is streamlined to minimize cleanup while maximizing taste.
Ingredients for Egg Fried Rice and Sweet and Sour Chicken
Day-old rice and pantry staples create this wok-seared takeout favorite combo.
| Ingredient | Amount | Notes |
|---|---|---|
| Long-Grain White Rice 🍚 | 2 cups | Day-old, chilled for best texture |
| Boneless Chicken Thighs 🍗 | 1 ½ lb | Cut into 1-inch pieces |
| Large Eggs 🥚 | 3 whole | Beaten for rice and coating |
| All-Purpose Flour 🌾 | ½ cup | For dredging chicken |
| Cornstarch 🌾 | ¼ cup | For crispy chicken coating |
| Soy Sauce 🫒 | 3 tbsp | Low-sodium preferred |
| Rice Vinegar 🍶 | 2 tbsp | For tangy balance |
| Brown Sugar 🍚 | 3 tbsp | Packed for sweetness |
| Ketchup 🍅 | ½ cup | For sweet and sour base |
| Garlic Cloves 🧄 | 4 cloves | Minced for depth |
| Fresh Ginger 🌿 | 1 tbsp | Grated for freshness |
| Green Onions 🧅 | 4 whole | Thinly sliced for garnish |
| Frozen Peas and Carrots 🥕 | 1 cup | Thawed for rice |
| Vegetable Oil 🫒 | ½ cup | High smoke point for frying |
| Sesame Oil 🫒 | 1 tsp | Toasted, for finishing |
The rice needs to be day-old and cold—freshly cooked turns mushy. Jasmine or long-grain white works best; avoid instant rice. For the chicken, thighs stay juicier than breasts. Trader Joe’s or Costco have good pre-cut options if you’re short on time. Soy sauce is key here; Kikkoman or Pearl River Bridge are reliable. Don’t skip the cornstarch—it’s what gives the chicken that shatteringly crisp coating.
No brown sugar? White sugar with a pinch of molasses works. Out of ketchup? Tomato paste plus sugar and vinegar gets you close. Fresh ginger is ideal, but ground ginger at half the amount works in a pinch. For extra crunch, swap the peas and carrots for bell peppers or snap peas. The vinegar must be rice vinegar though—apple cider or white vinegar will taste too sharp.
Leftover rice keeps 4-5 days in the fridge (perfect for fried rice). The chicken reheats best in the oven or air fryer to stay crispy. Both dishes freeze well for up to 3 months. Store ginger in the freezer—grate it frozen for easy use.
Why You’ll Love This Recipe
- One Pan Meal: I use the same skillet for the chicken and rice—less cleanup, more flavor from the fond.
- Sweet-Tangy Crunch: The cornstarch in the sauce makes it cling to the chicken, and that glossy coating with the crispy edges? Ridiculously good.
- Weeknight Hero: Between us, this is my go-to when I need dinner on the table fast and the kids actually eat it.
- Budget Stretcher: Boneless thighs and pantry staples like rice and eggs keep costs low, and it tastes like takeout. Honestly, I make double for leftovers.
Step-by-Step Instructions for Egg Fried Rice and Sweet and Sour Chicken
This duo comes together quickly with smart prep and perfect timing.
Step 1: Prep Chicken and Make Sweet and Sour Sauce
Cut the 1.5 lb Boneless Chicken Thighs into 1-inch pieces and pat dry. In a bowl, whisk together the 0.5 cup All-Purpose Flour and 0.25 cup Cornstarch, then dredge the chicken pieces until fully coated. Shake off any excess—this creates that signature crispy texture.
For the sauce, combine the 3 tbsp Soy Sauce, 2 tbsp Rice Vinegar, 3 tbsp Brown Sugar, 0.5 cup Ketchup, minced 4 cloves Garlic Cloves, and grated 1 tbsp Fresh Ginger in a small bowl. Stir until the brown sugar dissolves completely—this ensures a smooth, glossy sauce.
Step 2: Cook Chicken to Golden Perfection
Heat 0.5 cup Vegetable Oil in a wok or large skillet over medium-high heat until shimmering. Working in batches to avoid crowding, fry the coated chicken for 4-5 minutes per side until deep golden brown and cooked through. Crowding the pan steams the chicken instead of crisping it.
Transfer the cooked chicken to a paper towel-lined plate to drain excess oil. Keep it warm while you finish the rest—this maintains the crispy coating you worked so hard to achieve. The chicken should be crispy on the outside and juicy inside.
Step 3: Scramble Eggs and Stir-Fry Rice
In the same pan (no need to clean it—the fond adds flavor), beat 3 whole Large Eggs with a pinch of salt and scramble over medium heat until just set, about 1-2 minutes. Remove and set aside. Add the 2 cups Long-Grain White Rice (preferably day-old and chilled) and stir-fry for 2 minutes to break up any clumps.
Add the thawed 1 cup Frozen Peas and Carrots and the scrambled eggs back to the pan. Drizzle with 1 tsp Sesame Oil and toss everything together until the rice is heated through and slightly crispy in spots. The rice should be hot and fragrant, with the peas and carrots tender.
Step 4: Combine Chicken and Sauce with Rice
Pour the prepared sweet and sour sauce into the pan with the rice and vegetables. Stir well to coat everything evenly. Add the crispy chicken back to the pan and toss gently to combine without breaking up the pieces. Cook for an additional 2-3 minutes until everything is glossy and heated through.
Garnish with thinly sliced 4 whole Green Onions just before serving. The sauce should cling to each piece of chicken and grain of rice, with a perfect balance of sweet, tangy, and savory flavors. Serve immediately while hot and crispy.
Pro Tips For Making Egg Fried Rice And Sweet And Sour Chicken
- Use Day-Old Rice: Fresh rice turns to mush in the wok—spread leftover long-grain white rice on a tray and refrigerate it overnight so it fries up dry and separate.
- Velvet the Chicken: Toss the boneless chicken thighs in a mix of 1 tablespoon cornstarch and 1 tablespoon water before frying; it keeps them stupid-tender, even if you overcook a little.
- Eggs Last in Rice: Push the rice to one side of the wok, scramble the eggs in the empty space, then mix everything together—this prevents the eggs from turning rubbery or disappearing into the rice.
- Double-Fry the Chicken: Fry the coated chicken once at 350°F until pale, rest 5 minutes, then fry again at 400°F for that shatter-crisp crust without overcooking the inside.
Pro Cooking Tips for Perfect Results
Wok Heat Control
Mastering wok hei (breath of the wok) is key. Heat your wok until it’s smoking hot—400-450°F—before adding oil. I use my vintage carbon steel wok for this, as it distributes heat beautifully. Test with a drop of water: it should sizzle and evaporate instantly. 🔥
Chicken Crispiness Secret
For ultra-crispy chicken, double-dredge: dip pieces in beaten egg first, then flour-cornstarch mix. Let them rest for 10 minutes before frying—this helps the coating adhere. Use peanut oil if available; its high smoke point is perfect for deep frying.
Rice Texture Tip
Day-old rice is non-negotiable. Spread freshly cooked rice on a tray and refrigerate uncovered for 1 hour to dry it out. When stir-frying, press the rice against the hot wok with your spatula to create those coveted crispy bits. I learned this trick from Chef Chen.
Sauce Consistency
Simmer your sweet and sour sauce for 2-3 minutes before adding to the dish. This thickens it slightly and deepens flavors. For extra shine, add 1 tsp honey at the end. The sauce should coat the back of a spoon but still be pourable.
Timing Coordination
Start the chicken first since it takes longest. While it fries, prep your rice ingredients. The rice cooks in 5 minutes total, so have everything ready to go. This streamlined approach ensures both dishes finish simultaneously, hot and fresh. ⏰
Final Plating
Plate the rice first, then arrange chicken pieces on top. Drizzle extra sauce over the chicken, not the rice, to maintain its texture. Garnish with green onions for color and freshness. Serve immediately—the crispiness is best right out of the pan.
Nutrition Facts
Frequently Asked Questions
Can I use fresh rice instead of day-old?
Fresh rice is too moist and will turn mushy. Spread freshly cooked rice on a tray and refrigerate uncovered for 1 hour to dry it out first. This prevents clumping and ensures proper texture.
How do I keep the chicken coating from falling off?
Pat the chicken completely dry before dredging, and let the coated pieces rest for 10 minutes before frying. This helps the coating adhere properly for that perfect crispy finish.
Can I make the sauce ahead of time?
Yes! Prepare the sauce up to 2 days ahead and store it in the fridge. Simmer for 2-3 minutes before using to thicken and revive the flavors.
What’s the best oil for frying the chicken?
Use a high smoke point oil like vegetable or peanut oil. These handle the 400-450°F needed for crispy results without burning.

- Jollof Rice Sauce Recipe: West African Tomato and Spice Infusion - September 25, 2026
- Japanese Rice Soup Recipe: Umami-Rich Comfort in a Bowl - September 25, 2026
- Homemade Cream Of Rice Recipe: Silk-Smooth Breakfast in Minutes - September 25, 2026