
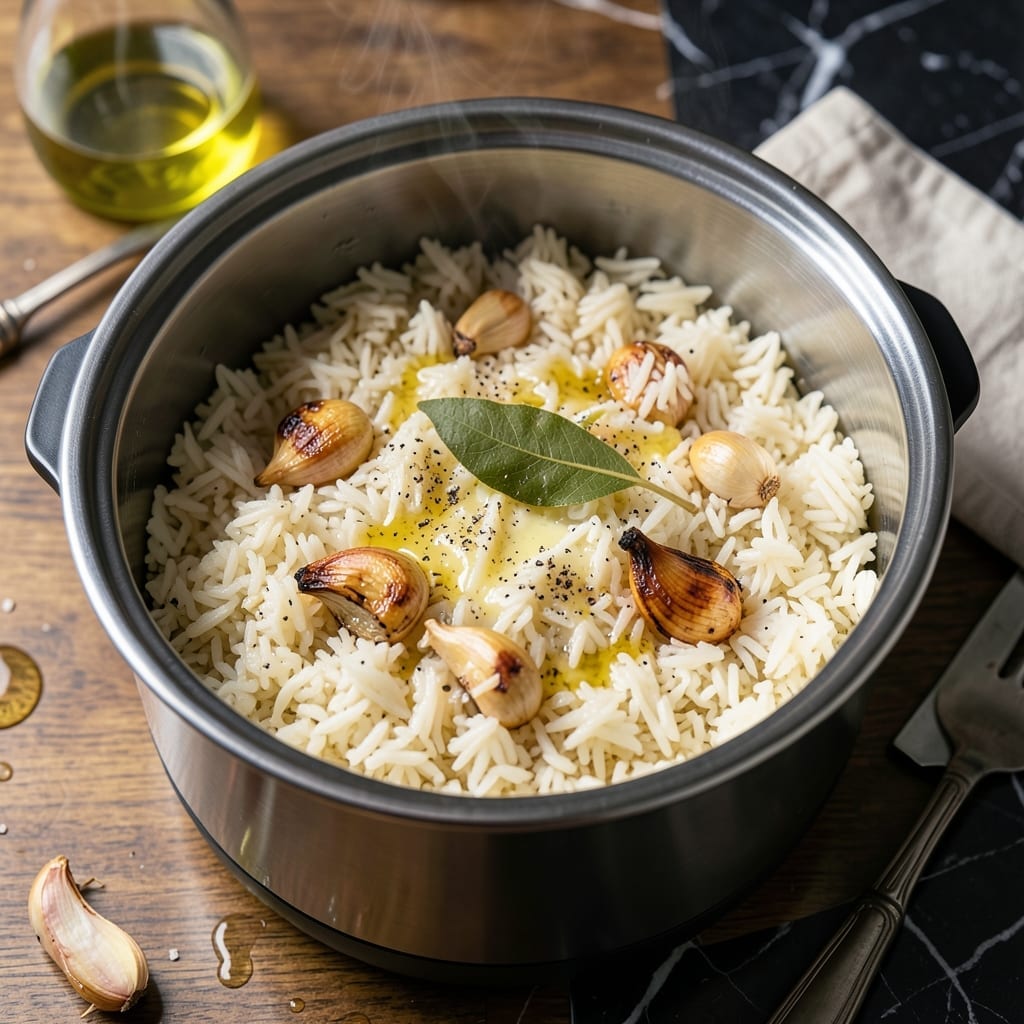
This professional method delivers perfectly fluffy rice every time with your electric pressure cooker. No more sticky or undercooked grains—just consistent results.
With precise water ratios and cooking times, you’ll achieve restaurant-quality rice in a fraction of the time. Ideal for busy weeknights or meal prep.
Ingredients for Electric Pressure Cooker Rice
Nine ingredients transform into fluffy, professional-quality rice with this electric pressure cooker method.
| Ingredient | Amount | Notes |
|---|---|---|
| Long-Grain White Rice 🍚 | 2 cups | Rinsed until water runs clear |
| Water 💧 | 2 ½ cups | Filtered or distilled preferred |
| Kosher Salt 🧂 | 1 tsp | Diamond Crystal preferred for consistency |
| Unsalted Butter 🧈 | 1 tbsp | Optional for richness (or sub olive oil) |
| Garlic Cloves 🧄 | 2 cloves | Minced fine (optional for flavor) |
| Bay Leaf 🍃 | 1 whole | Dried, for subtle aroma |
| Fresh Parsley 🌿 | 2 tbsp | Chopped fine, for garnish |
| Lemon Zest 🍋 | ½ tsp | Optional for brightness |
| Olive Oil 🫒 | 1 tsp | For sautéing aromatics |
| Chicken Stock 🍲 | ½ cup | Substitute water for neutral flavor |
The rice is non-negotiable here—long-grain white rice (jasmine or basmati work best) gives you that separate, fluffy grain. Find it in any grocery store, but bulk bins let you grab exactly 2 cups without leftovers. Water ratio is critical: 1.25 cups per cup of rice. Use filtered if your tap water has a strong taste. The salt? Diamond Crystal kosher is my go-to for even distribution (it’s less dense than table salt).
Out of long-grain? Short-grain will turn sticky—save it for risotto. No butter? Olive oil or ghee adds richness. Skip the bay leaf and garlic if you want plain rice (perfect for Asian dishes). Want more flavor? Toast the rice in the pot with oil first (adds nuttiness). The chicken stock is optional but gives depth—vegetable stock works too. Just don’t use pre-seasoned brochs (too salty).
Cooks in 3 minutes high pressure, plus natural release. Leftovers keep 4-5 days in the fridge, freeze for up to 3 months. Reheat with a splash of water to fluff back up (microwave works fine).
Why You’ll Love This Recipe
- Set It and Forget: I dump everything in, press a button, and walk away—no stirring, no watching, just perfect rice every time.
- Garlic Butter Magic: The butter and garlic turn plain rice into something rich and aromatic, with every grain coated in flavor.
- Meal Prep Hero: I make a big batch on Sunday and it pairs with everything from grilled chicken to stir-fried veggies all week long.
- Budget Stretcher: A pound of rice, a few cloves of garlic, and butter—feeds my family for days without breaking the bank.
Step-by-Step Instructions for Electric Pressure Cooker Rice
This method delivers perfectly fluffy grains with minimal effort and maximum flavor.
Step 1: Rinse and Sauté Aromatics
Rinse the 2 cups long-grain white rice under cold water until the water runs clear. This removes excess starch and prevents gummy rice. I always use a fine-mesh strainer for this step—it makes the process much easier.
Set your electric pressure cooker to the sauté function. Add the 1 tsp olive oil and heat for 1 minute until shimmering. Add the 2 cloves minced garlic cloves and cook for 30 seconds until fragrant, stirring constantly to prevent burning. The garlic should just start to turn golden at the edges.
Step 2: Toast Rice and Add Liquids
Add the drained rice to the pot and stir to coat with the oil and garlic. Toast the rice for 2 minutes, stirring frequently, until the grains become slightly translucent at the edges. You’ll notice a subtle nutty aroma—this is your signal that it’s ready.
Pour in the 2.5 cups water and 0.5 cup chicken stock. Add the 1 tsp kosher salt, 1 tbsp unsalted butter, and 1 whole bay leaf. Stir well to combine and dissolve the salt. The liquid should come about halfway up the side of the pot.
Step 3: Pressure Cook to Perfection
Secure the lid on your pressure cooker and set the valve to sealing position. Cook on high pressure for 3 minutes. I know this seems short, but the pressure cooker works its magic quickly. The cooker will take about 10 minutes to come to pressure before the timer starts.
Once the cooking time is complete, let the pressure release naturally for 10 minutes. This gradual release prevents the rice from becoming mushy. After 10 minutes, carefully switch the valve to venting to release any remaining pressure. The float valve should drop, indicating it’s safe to open.
Step 4: Fluff and Finish
Open the lid and discard the bay leaf. Gently fluff the rice with a fork, starting from the bottom and working your way up. This separates the grains and releases excess steam. The rice should be tender with no hard bits in the center.
If the rice seems too wet, let it sit uncovered for 2-3 minutes to allow excess moisture to evaporate. Stir in the 0.5 tsp lemon zest for a bright finish. The grains should be distinct and fluffy, with a subtle sheen from the butter.
Step 5: Garnish and Serve Immediately
Transfer the rice to a serving bowl or individual plates. Sprinkle with the 2 tbsp chopped fresh parsley for a pop of color and fresh flavor. The parsley adds a nice contrast to the rich, buttery rice.
Serve immediately while hot. The texture is best right out of the pot—light, separate grains with a delicate aroma from the bay leaf and garlic. If you need to hold it, keep it covered in the warm pressure cooker for up to 30 minutes, but it’s truly at its peak fresh from the cooker.
Pro Tips For Making Electric Pressure Cooker Rice
- Rinse the Rice: Always give your long-grain white rice a quick rinse before cooking—I learned this the hard way after ending up with gummy rice more than once.
- Use Equal Water: For perfect texture, stick to a 1:1 rice-to-water ratio; about 1 cup of each works every time in my electric pressure cooker.
- Toast the Garlic: Sauté the minced garlic in the butter for just 30 seconds before adding rice—it adds depth without burning, which I’ve done when rushing.
- Natural Release: Let the pressure release naturally for 10 minutes before quick-releasing; skipping this leaves the rice undercooked in the center.
Flavor Customization for This Dish
Herb Infusions
Swap the bay leaf for 3 sprigs fresh thyme or 1 tsp dried rosemary for earthy depth. I love adding 1 tbsp chopped fresh dill at the end for a Mediterranean twist. These herbs pair beautifully with the buttery base.
Citrus Variations
Boost brightness by adding 1 tsp orange zest or 1 tbsp lime juice with the lemon zest. For a tropical note, stir in 2 tbsp toasted coconut flakes after cooking. The acidity cuts through the richness perfectly.
Spice It Up
Add ½ tsp turmeric for golden color and warmth, or ¼ tsp cayenne for subtle heat. I often toss in 1 cinnamon stick while cooking for a Moroccan-inspired aroma. Remove it before serving. 🌶️
Umami Boosters
Stir in 1 tbsp soy sauce or 1 tsp fish sauce for Asian-inspired depth. 2 tsp nutritional yeast adds a cheesy, nutty flavor that vegans love. These work especially well with jasmine rice.
Creamy Additions
After cooking, fold in ¼ cup grated Parmesan for Italian flair or 2 tbsp cream cheese for extra richness. I sometimes add ½ cup cooked lentils for protein-packed rice. 💡
Sweet Touches
For dessert rice, add 2 tbsp brown sugar and ½ tsp cinnamon with the liquids. Stir in ½ cup raisins or diced apples for a sweet pilaf. This works surprisingly well with the pressure cooker method.
Nutrition Facts
Frequently Asked Questions
What rice-to-water ratio should I use?
Use 1.25 cups water per 1 cup rice for perfect results. This ratio accounts for the minimal evaporation in a sealed pressure cooker. For 2 cups rice, that means 2.5 cups liquid total.
Can I use brown rice instead?
Yes, but increase cook time to 22 minutes high pressure with a 1:1.5 rice-to-water ratio. Brown rice needs more time and liquid to soften its outer bran layer.
Why is my rice sticky or mushy?
This usually means too much water or insufficient rinsing. Always rinse until water runs clear and use exact measurements. Also, let pressure release naturally for 10 minutes to prevent overcooking.
How do I double the recipe?
Scale ingredients proportionally but never exceed your cooker’s 2/3 max fill line. For most 6-quart models, 4 cups rice is the safe maximum. Cook time remains 3 minutes.

- Fried Rice Mix Recipe: Customizable Pantry Staple for Quick Meals - October 6, 2026
- Fruit Loop Rice Crispy Treats Recipe: Colorful Crunch With Marshmallow Magic - October 6, 2026
- Erewhon Rice Balls Recipe: Copycat Crispy and Creamy Bites - October 6, 2026