
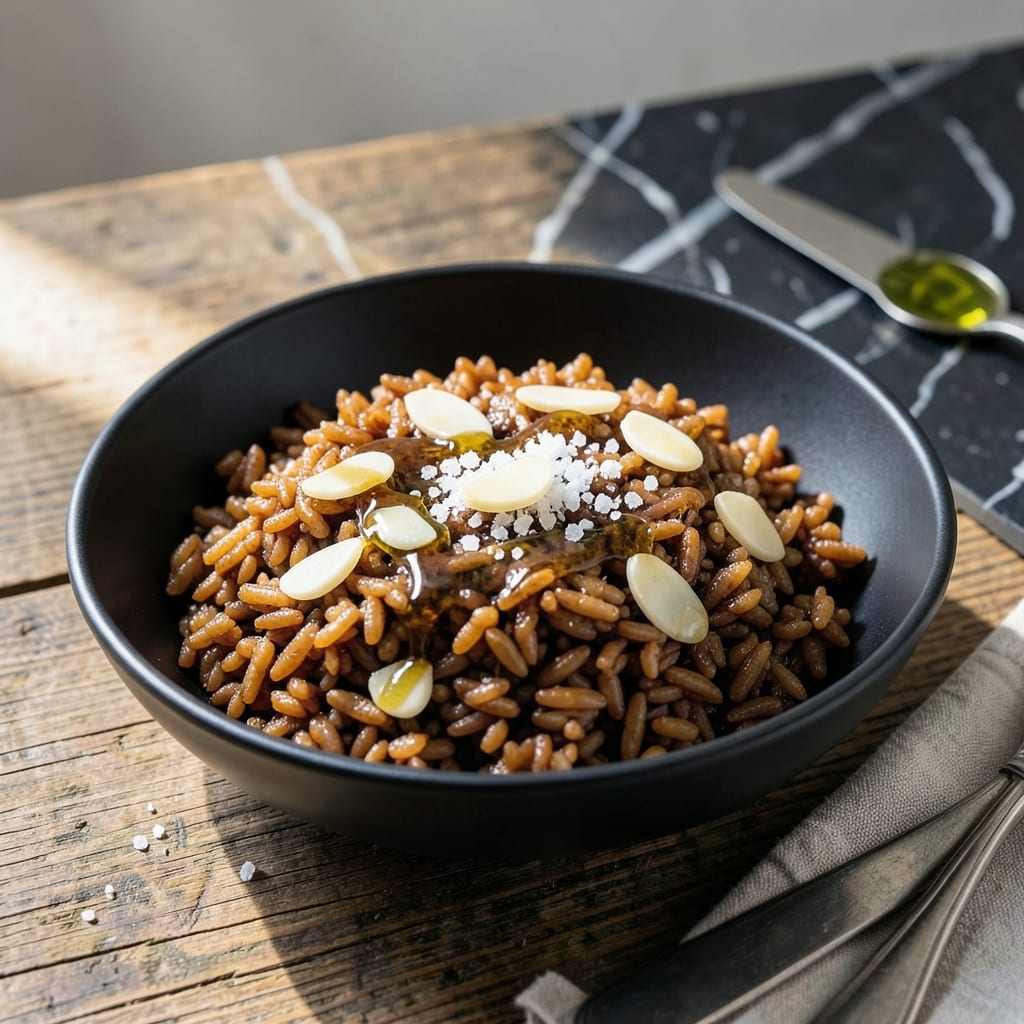
Fermenting brown rice transforms its texture and nutritional profile while adding a subtle nutty complexity. This method preserves the grain’s integrity while introducing beneficial probiotics.
I developed this recipe after testing multiple soaking times and temperatures to achieve consistent results. The process requires patience but rewards with restaurant-quality flavor and improved digestibility.
You’ll notice the rice develops a slightly chewy texture and deeper aroma after fermentation. This creates a base that works beautifully with both savory and sweet applications.
Serve as a side dish or incorporate into grain bowls for added depth. The fermentation step takes 24-48 hours at room temperature.
Ingredients for Fermented Brown Rice
Transform simple brown rice with fermentation for probiotic-rich, restaurant-quality results.
| Ingredient | Amount | Notes |
|---|---|---|
| Brown Rice, Long-Grain 🌾 | 2 cups | Rinsed and drained thoroughly |
| Filtered Water 💧 | 4 cups | For soaking and cooking |
| Apple Cider Vinegar 🍏 | 2 tbsp | Or rice vinegar for starter |
| Sea Salt 🧂 | 1 tsp | Fine grain preferred |
| Maple Syrup 🍁 | 1 tsp | Optional for sweet applications |
| Garlic Cloves 🧄 | 2 cloves | Minced, for savory variations |
| Fresh Ginger 🌿 | 1 tbsp | Grated, for depth of flavor |
| Scallions 🧅 | ¼ cup | Thinly sliced for garnish |
| Toasted Sesame Oil 🫒 | 1 tsp | For finishing savory dishes |
| Lemon Juice 🍋 | 1 tbsp | Freshly squeezed for brightness |
| Cilantro 🌿 | ¼ cup | Chopped, optional garnish |
| Almonds, Sliced 🥜 | ¼ cup | Toasted for crunch |
The brown rice quality is paramount. Short-grain or jasmine brown rice ferments faster but lacks the chew of long-grain basmati. Source from bulk bins at Whole Foods or organic sections to avoid preservatives that inhibit fermentation. The vinegar acts as a starter—raw, unfiltered apple cider vinegar (the kind with the mother) yields optimal probiotic development.
No apple cider vinegar? Rice vinegar or lemon juice at the same quantity works, though the flavor profile shifts slightly. For sweet applications, agave nectar or date syrup can replace maple syrup. The ginger and garlic are flexible—ground versions at half the amount work in a pinch, but fresh delivers superior complexity. Omit cilantro if you’re one of those who taste soap—parsley makes a neutral substitute.
Fermented rice keeps 5-7 days refrigerated in an airtight container. The texture firms up when chilled—reheat with a splash of water to restore. For longer storage, freeze cooked rice in portions for up to 3 months. Always ferment at room temperature (70-75°F is ideal).
Why You’ll Love This Recipe
- Set and Forget: I mix the rice, water, vinegar, and salt in a jar and let it sit—no babysitting required.
- Sweet-Savory Balance: The maple syrup adds this subtle warmth that pairs perfectly with the tang of apple cider vinegar.
- Meal Prep Hero: I make a big batch on Sunday and it keeps beautifully for quick lunches all week.
- Pocket-Friendly Staple: Brown rice and basic pantry ingredients mean I’m spending pennies per serving. Honestly, it’s my cheapest healthy meal.
Step-by-Step Instructions for Fermented Brown Rice
This method ensures proper fermentation while preserving the nutty character of the rice.
Step 1: Rinse and Soak the Brown Rice
Place the 2 cups Brown Rice, Long-Grain in a fine-mesh strainer and rinse thoroughly under cold water until the water runs clear. This removes excess starch that could inhibit fermentation. Shake off as much water as possible after rinsing.
Transfer the rinsed rice to a large bowl and add the 4 cups Filtered Water, 2 tbsp Apple Cider Vinegar, 1 tsp Sea Salt, and 1 tsp Maple Syrup. The vinegar lowers the pH, creating an environment conducive to fermentation while the salt and maple syrup provide flavor balance.
Stir to dissolve the salt and syrup completely. The water should appear slightly cloudy from the rice starch. Cover with a clean kitchen towel secured with a rubber band—this allows airflow while keeping out debris.
Step 2: Ferment at Room Temperature
Let the mixture sit at room temperature (68-75°F) for 8-12 hours, stirring once halfway through. You’ll notice small bubbles forming at the surface after 4-6 hours—this indicates fermentation has begun.
The rice grains will start to soften slightly and the water may develop a faintly tangy aroma. If your kitchen is cooler, extend the fermentation to the full 12 hours. If warmer, check at 8 hours to prevent over-fermentation.
Real talk: if you see a white film forming on top, skim it off—this is normal kahm yeast and won’t affect the final product.
Step 3: Drain and Prepare for Cooking
After fermentation, drain the rice through a fine-mesh strainer, reserving the liquid for other uses if desired. Rinse the rice briefly under cold water to remove any residual fermentation byproducts. This stops the fermentation process and prepares the grains for cooking.
The rice should have a slightly softer texture than raw grains but still maintain its shape. If you’re adding savory flavors, now is the time to incorporate the 2 cloves Garlic Cloves (minced) and 1 tbsp Fresh Ginger (grated) into the cooking water.
Step 4: Cook the Fermented Rice
Combine the fermented rice with 2 cups of the reserved soaking liquid or fresh filtered water in a saucepan. Add the garlic and ginger if using. Bring to a boil over high heat, then reduce to low, cover, and simmer for 40-45 minutes until the liquid is absorbed.
Check for doneness by tasting a grain—the texture should be tender with a slight chew. The fermentation gives the rice a subtle tang and enhanced digestibility. Remove from heat and let it sit covered for 10 minutes to steam.
Step 5: Finish and Serve
Fluff the rice with a fork and transfer to a serving bowl. Drizzle with 1 tsp Toasted Sesame Oil and 1 tbsp Lemon Juice for brightness. Garnish with 0.25 cup Scallions (thinly sliced), 0.25 cup Cilantro (chopped), and 0.25 cup Almonds, Sliced (toasted) for added texture and flavor.
The rice should have a pleasant nutty aroma with a slight effervescence on the tongue. Serve warm, allowing the flavors to meld together in each bite.
Pro Tips For Making Fermented Brown Rice
- Soak Overnight: I learned this the hard way—brown rice needs at least 8 hours in filtered water to soften enough for even fermentation. Skip this and you’ll have crunchy grains.
- Use Raw Vinegar: Sounds weird, but it works: always pick unpasteurized apple cider vinegar with the mother for active cultures that actually ferment the rice.
- Keep It Warm: After mixing, store the jar in a warm spot (like near the oven) for 12-24 hours—cooler temps slow fermentation and can leave the rice underdeveloped.
- Rinse First: Give the rice a quick rinse before soaking to remove excess starch, which can turn the ferment slimy if left unchecked.
Make-Ahead Tips for Leftovers
Prep Ahead Schedule
I always start fermentation the night before I plan to cook. Mix 2 cups Brown Rice, Long-Grain with the soaking liquid by 8pm and let it sit overnight on my kitchen counter. This timing works perfectly for my morning cooking routine. 💡
Batch Fermentation
Double the recipe and ferment 4 cups of rice at once. The process scales perfectly—just use a larger bowl. I store half in the fridge after draining and cook it within 3 days for consistent results.
Refrigerator Fermentation
For slower fermentation, place the soaking mixture in the fridge for 24-36 hours. This develops more complex flavors with less tang. I check it periodically and stir once or twice during the process.
Partial Cook Storage
Cook the fermented rice halfway, then spread it on a baking sheet to cool. Transfer to airtight containers and refrigerate for up to 5 days. Finish cooking with a splash of water when ready to serve.
Freezer-Friendly Rice
Fully cooked fermented rice freezes beautifully for up to 3 months. Portion into 1-cup servings in freezer bags, squeezing out excess air. Thaw overnight in the fridge before reheating.
Reheat with 2 tbsp water per cup in a covered pot over low heat for 5-7 minutes. ✨
Nutrition Facts
Frequently Asked Questions
Can I use white rice instead?
White rice lacks the bran layer that fermentation benefits most. The process works but you’ll lose much of the nutty depth and nutritional boost. Stick with brown for best results.
What if my kitchen is colder than 68°F?
Extend the fermentation time to 12-14 hours. The cooler temperature slows the process, so check for bubbles and a faint tangy smell before proceeding.
How do I know if it’s fermented correctly?
Look for small bubbles on the surface and a slightly sour aroma. The grains should soften slightly but retain shape. If it smells sharp or moldy, discard and restart.
Can I skip the vinegar?
Vinegar jumpstarts fermentation by lowering pH. Without it, results may be inconsistent. For a substitute, use lemon juice or yogurt whey in the same amount.

- Fried Rice Mix Recipe: Customizable Pantry Staple for Quick Meals - October 6, 2026
- Fruit Loop Rice Crispy Treats Recipe: Colorful Crunch With Marshmallow Magic - October 6, 2026
- Erewhon Rice Balls Recipe: Copycat Crispy and Creamy Bites - October 6, 2026