
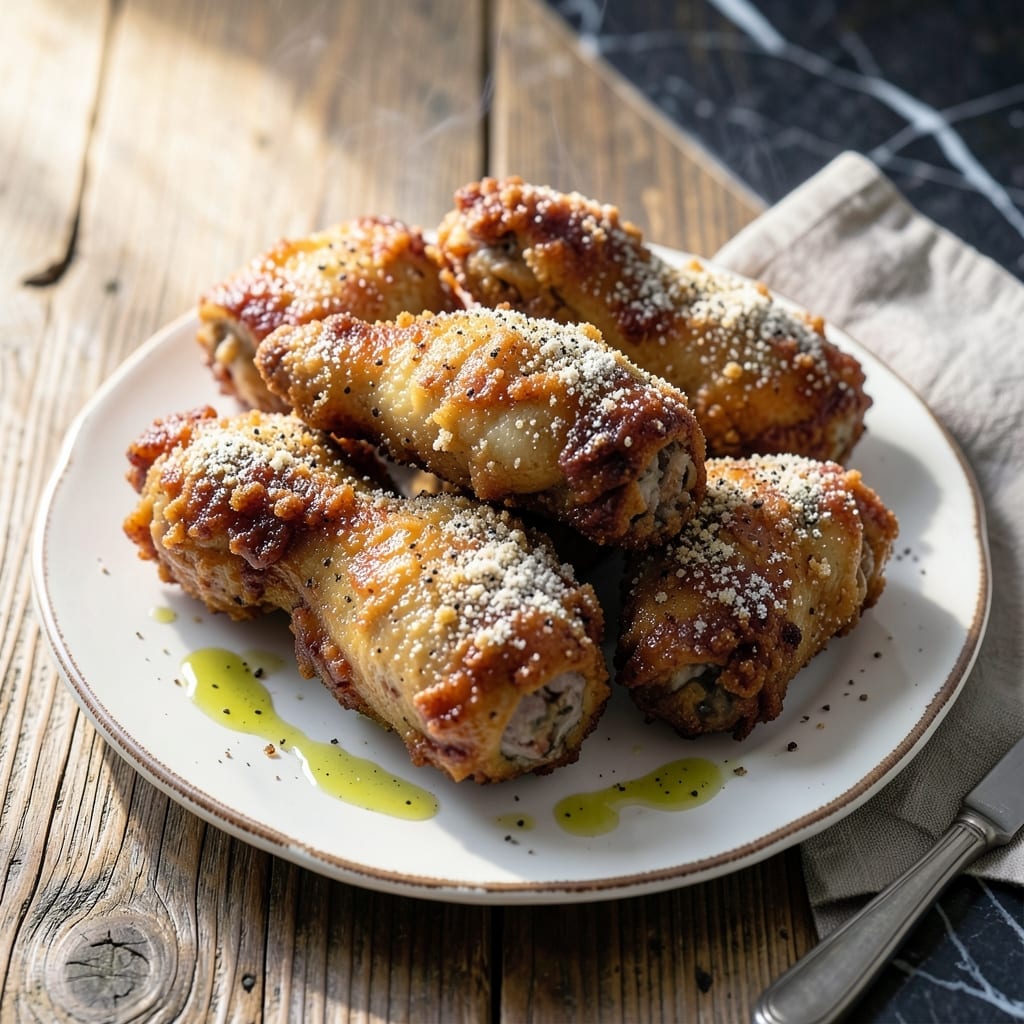
This double-dredged fried chicken delivers extra crunch in every bite without complicated techniques. The method guarantees a thick, shatteringly crisp crust that locks in juicy, tender meat beneath.
Two coatings of seasoned flour create layers of texture that single-dredged versions can’t match. I’ve tested this approach extensively to ensure consistent restaurant-quality results every time.
Hot oil transforms the batter into a golden, craggy shell while cooking the chicken through perfectly. The exterior stays crisp long after frying, even when served with sauces.
Serve immediately for maximum crunch, or keep warm briefly in the oven. This technique works for any cut of chicken.
Ingredients for Fried Chicken Pieces
These carefully selected ingredients create layers of texture and flavor for restaurant-quality results every time.
| Ingredient | Amount | Notes |
|---|---|---|
| Chicken Thighs and Drumsticks 🍗 | 3 lb | Bone-in, skin-on for maximum flavor and juiciness |
| All-Purpose Flour 🌾 | 3 cups | Plus extra for dusting work surface |
| Cornstarch 🌽 | ½ cup | For extra crispiness in the crust |
| Kosher Salt 🧂 | 1 tbsp | Diamond Crystal preferred for even seasoning |
| Freshly Ground Black Pepper 🌶️ | 1 tbsp | Coarsely ground for texture |
| Garlic Powder 🧄 | 1 tbsp | Not garlic salt for pure flavor |
| Onion Powder 🧅 | 1 tbsp | Balances the seasoning blend |
| Paprika 🌶️ | 1 tbsp | Sweet or smoked for color and depth |
| Cayenne Pepper 🔥 | ½ tsp | Adjust to heat preference |
| Large Eggs 🥚 | 2 whole | For binding the first flour coating |
| Buttermilk 🥛 | 1 ½ cups | Full-fat for tenderizing and richness |
| Vegetable Oil 🫒 | 8 cups | For frying, high smoke point essential |
| Baking Powder 🧂 | 1 tsp | Helps create air pockets for crunch |
The chicken must be bone-in, skin-on—thighs and drumsticks yield the juiciest results. Source from a trusted butcher like Whole Foods or local farms for superior quality. The flour and cornstarch blend is non-negotiable for that signature craggy crust. King Arthur all-purpose flour is my go-to for consistency. For the buttermilk, avoid low-fat versions (they lack the richness needed for tenderizing).
No buttermilk? Stir 1 tbsp lemon juice or vinegar into regular milk and let sit 5 minutes. Swap cornstarch with arrowroot powder at a 1:1 ratio. The cayenne can be omitted for mild heat, but don’t skip the paprika—it’s essential for that golden color. Penzeys spices deliver optimal potency if you’re investing in quality.
Fry in batches to avoid crowding—this keeps the oil temperature stable for perfect crispiness. Store leftover chicken in the fridge for up to 4 days, though it’s best eaten fresh. Reheat in a 350°F oven for 15-20 minutes to revive the crunch.
Why You’ll Love This Recipe
- One Pan Magic: I love that everything—flour, cornstarch, and chicken—goes straight into one pan. No fancy gadgets, just my trusty skillet.
- Crispy Perfection: That cornstarch in the coating gives it this ridiculous crunch that’s impossible to resist. I’ll be real: I always sneak a piece straight from the pan.
- Feeds Everyone: Thighs and drumsticks are my go-to for family dinners or game day spreads. Honestly, it’s the only thing that disappears faster than the dip.
Step-by-Step Instructions for Fried Chicken Pieces
This double-dredging technique creates an impossibly crisp crust with tender, juicy meat inside.
Step 1: Season and Prepare the Chicken
Pat the 3 lb Chicken Thighs and Drumsticks completely dry with paper towels. This is critical—any moisture will prevent the coating from adhering properly and compromise the crispiness. Season both sides generously with 1 tbsp Kosher Salt and 1 tbsp Freshly Ground Black Pepper, pressing the seasoning into the skin so it sticks.
The skin-on, bone-in pieces add maximum flavor and help keep the meat moist during frying. Let the seasoned chicken rest at room temperature for 15 minutes while you prepare the dredging stations. This brief rest allows the salt to penetrate slightly, enhancing the natural juiciness of the meat.
Step 2: Set Up the Double-Dredge Stations
In a large bowl, whisk together the 2 whole Large Eggs and 1.5 cups Buttermilk until fully combined. This buttermilk wash tenderizes the chicken and helps the flour coating adhere. In a separate large bowl, combine the 3 cups All-Purpose Flour, 0.5 cup Cornstarch, 1 tbsp Garlic Powder, 1 tbsp Onion Powder, 1 tbsp Paprika, 0.5 tsp Cayenne Pepper, and 1 tsp Baking Powder. Whisk until evenly distributed.
The cornstarch and baking powder are the secrets to extra crunch. The cornstarch creates a lighter, crispier texture, while the baking powder introduces tiny air pockets that expand during frying, adding another layer of crunch to your crust.
Step 3: Double-Dredge for Maximum Crunch
Working with one piece at a time, dip the chicken into the buttermilk mixture, letting any excess drip off. Then dredge it in the flour mixture, pressing firmly to ensure an even, thick coating. Shake off any loose flour. Dip it back into the buttermilk, then dredge in the flour mixture a second time. This double-dredging creates layers that crisp up beautifully.
Place the dredged pieces on a wire rack set over a baking sheet. This setup allows air to circulate around the chicken, preventing the coating from becoming soggy while you finish dredging the remaining pieces. Let the coated chicken rest for 10 minutes to help the coating set.
Step 4: Fry to Golden Perfection
In a large, heavy-bottomed pot or Dutch oven, heat the 8 cups Vegetable Oil to 350°F. Use a deep-fry or candy thermometer to monitor the temperature accurately—maintaining the correct temperature is key to even cooking and a crisp exterior. The oil should be deep enough to submerge the chicken pieces completely.
Carefully lower 3-4 pieces of chicken into the hot oil, being careful not to overcrowd the pot. Fry the chicken for 12-15 minutes, turning occasionally, until the coating is deep golden brown and the internal temperature reaches 165°F. Dark meat can handle higher temperatures, so don’t be afraid to let it cook until it’s truly crisp. Transfer the fried chicken to a wire rack or paper towels to drain.
Pro Tips For Making Fried Chicken Pieces
- Double Dredge: Dip the chicken in flour, then water, then flour again—I learned this the hard way, but that extra coat makes the crust shatter when you bite into it.
- Heat the Oil: Use a thermometer and aim for 350°F. After burning three batches, I finally figured out that guessing the temp just doesn’t cut it.
- Skip the Crowding: Fry in batches, even if it takes longer. My grandmother swore by this, and she was right: crowded pieces steam instead of crisp.
- Rest Before Frying: Let the dredged chicken sit for 10 minutes before hitting the oil. Sounds weird, but it works: the coating sticks better and fries up crunchier.
Essential Equipment for fried chicken pieces
Deep Fryer Setup
For home frying, I use my Cuisinart 4-quart deep fryer with precise temperature control. It maintains 350°F perfectly and has a built-in filter for easier oil cleanup. The basket lifts out smoothly, making it safe to lower and remove chicken pieces. 🔥
Heavy-Duty Dutch Oven
If you prefer stovetop frying, a Lodge 7-quart Dutch oven is my go-to. Its heavy cast iron distributes heat evenly and retains temperature when adding chicken. The deep sides prevent oil splatter, and it’s oven-safe for keeping chicken warm.
Thermometer Essentials
Never fry without a thermometer. I rely on the ThermoWorks ChefAlarm for its accuracy and durability. It clips to the pot and has a probe for monitoring oil temp. Aim for 350-375°F range for perfect crunch.
Dredging Station
Set up with two large bowls—one for wet mix, one for dry. I prefer stainless steel mixing bowls from Winco for their weight and stability. Use a wire rack over a baking sheet for resting dredged pieces to allow air circulation.
Oil Management
For oil, I use Peanut oil (high smoke point) or Vegetable oil as specified. A fine-mesh skimmer from OXO removes debris between batches. Store used oil in a clean, airtight container for reuse.
Safety Gear
Always have a fire extinguisher rated for grease fires nearby. I keep long silicone tongs (12-inch) for safe handling. Paper towels should be within reach for draining, but never leave them near open flame. 💡
Nutrition Facts
Frequently Asked Questions
Can I use boneless chicken for this recipe?
Bone-in works best for juiciness, but boneless thighs can be used. Reduce frying time to 8-10 minutes and check for 165°F internal temperature. The coating may not adhere as well without skin.
Why does the coating fall off during frying?
This usually happens if the chicken isn’t dry before dredging or if the oil temperature drops too low. Maintain 350°F oil and pat pieces completely dry first. Let the double-dredged chicken rest 10 minutes before frying.
Can I bake instead of fry?
For a lighter version, bake at 400°F for 25-30 minutes on a wire rack. The crust won’t be as crispy, but it’ll still be flavorful. Spray the chicken lightly with oil for better browning.

- Jollof Rice Sauce Recipe: West African Tomato and Spice Infusion - September 25, 2026
- Japanese Rice Soup Recipe: Umami-Rich Comfort in a Bowl - September 25, 2026
- Homemade Cream Of Rice Recipe: Silk-Smooth Breakfast in Minutes - September 25, 2026