
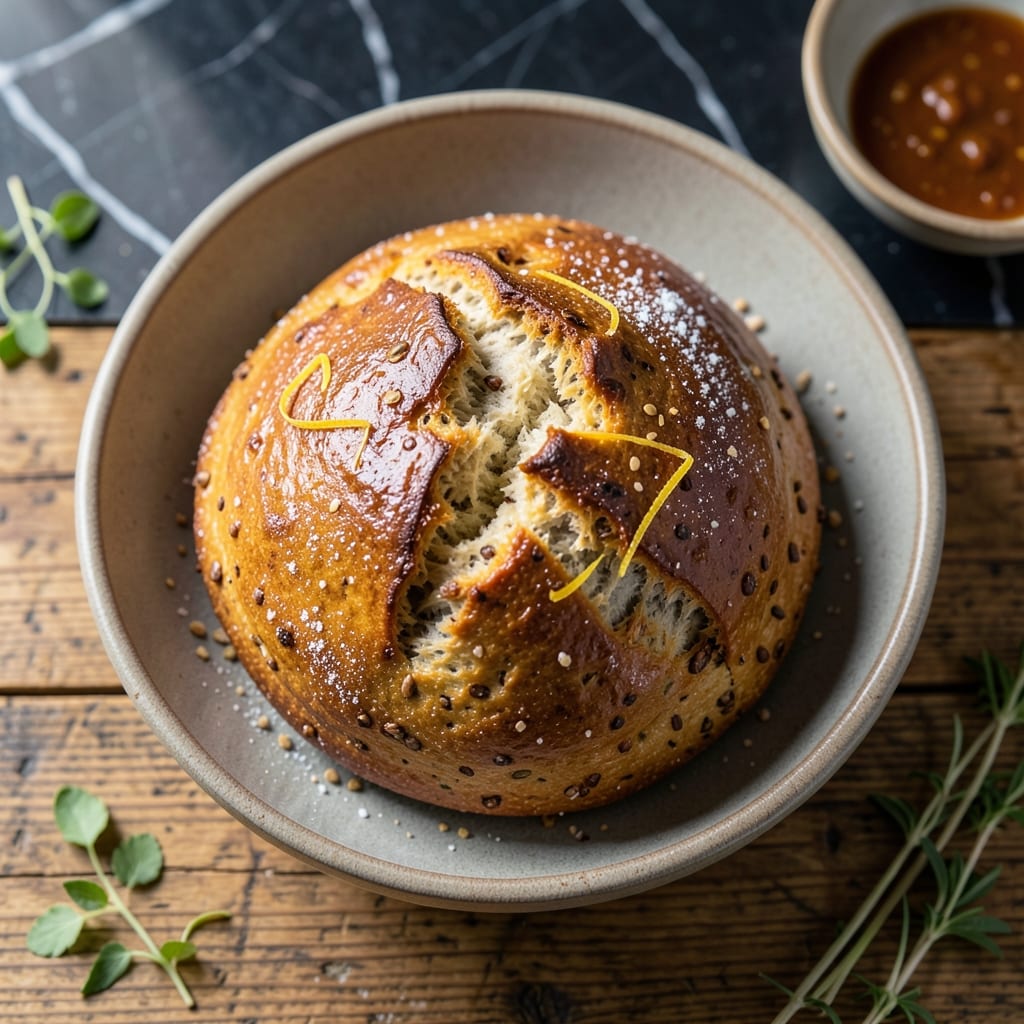
After years of testing, I’ve perfected a light and airy gluten-free bread using rice flour that rivals traditional loaves.
This recipe delivers a soft, sliceable loaf with a tender crumb and golden crust. No dense, crumbly results—just homemade bread you’ll be proud to serve.
Ingredients for Gluten Free Bread Recipe Using Rice Flour
Pantry staples plus a few specialty flours. Nothing complicated, just good bread.
| Ingredient | Amount | Notes |
|---|---|---|
| White Rice Flour 🌾 | 2 ½ cups | Fine grind for best texture |
| Brown Rice Flour 🌾 | ½ cup | Adds structure and fiber |
| Tapioca Starch 🌾 | ½ cup | For elasticity and chew |
| Xanthan Gum 🧪 | 1 tsp | Essential binder for rise |
| Active Dry Yeast 🍞 | 2 ¼ tsp | One packet, proofed in warm water |
| Granulated Sugar 🧂 | 1 tbsp | Feeds the yeast for rise |
| Salt 🧂 | 1 tsp | Fine sea salt preferred |
| Unsweetened Almond Milk 🥛 | 1 ¼ cups | Warm, about 110°F |
| Extra-Virgin Olive Oil 🫒 | ¼ cup | Light flavor for moisture |
| Apple Cider Vinegar 🍏 | 1 tbsp | Adds tang and structure |
| Flaxseed Meal 🌿 | 2 tbsp | Mixed with water for egg substitute |
| Water 💧 | ½ cup | For flax egg mixture |
The rice flour blend is non-negotiable here. Bob’s Red Mill is my go-to for consistency—look for super-fine white rice flour and avoid the gritty stuff. Brown rice flour adds nuttiness and structure, so don’t skip it. Xanthan gum is the secret to that stretchy, bread-like texture (find it in the gluten-free aisle at Whole Foods or Sprouts). The yeast needs to be fresh—check the expiration date on the packet.
No almond milk? Any unsweetened plant milk works (soy, oat, cashew). Swap apple cider vinegar for white vinegar or lemon juice in a pinch. If you don’t have flaxseed meal, chia seeds ground with water do the same trick. The olive oil can be replaced with melted coconut oil (use refined for neutral flavor). For a denser loaf, skip the xanthan gum, but expect a crumblier result.
Store flours in airtight containers in a cool, dark place—they’ll keep for 3-6 months. Baked loaf stays fresh for 3 days at room temperature (wrapped tightly), or slice and freeze for up to 1 month. Always bring ingredients to room temp before mixing for best rise (worth the extra minute).
Why You’ll Love This Recipe
- I’ll be real: a bag of rice flour costs pennies compared to store-bought gluten-free loaves, and this makes two.
- One Bowl Wonder: I love that I can mix the dry ingredients—white rice flour, brown rice flour, tapioca starch, and xanthan gum—in a single bowl, then just add yeast and water.
- Warm and Toasty: Honestly, the smell of freshly baked rice flour bread with its slightly nutty, warm flavor makes my kitchen feel like home.
- Sandwich Savior: Between us, this loaf holds up to turkey, avocado, or even just butter—no crumbling, no mess.
Step-by-Step Instructions for Gluten Free Bread Using Rice Flour
This method delivers a soft, airy loaf that rises beautifully every time.
Step 1: Prepare the Flax Egg and Proof the Yeast
In a small bowl, whisk together the 2 tbsp Flaxseed Meal and 0.5 cup Water. Let it sit for 5 minutes to thicken into a gel-like consistency. This flax egg acts as our binder, replacing traditional eggs in gluten-free baking.
Meanwhile, in a separate bowl, combine the 2.25 tsp Active Dry Yeast, 1 tbsp Granulated Sugar, and 1.25 cups Unsweetened Almond Milk that’s been warmed to about 110°F. Stir gently and let sit for 5-7 minutes until foamy—this confirms your yeast is active and ready to leaven your bread.
Step 2: Mix the Dry Ingredients
In a large mixing bowl, whisk together the 2.5 cups White Rice Flour, 0.5 cup Brown Rice Flour, 0.5 cup Tapioca Starch, 1 tsp Xanthan Gum, and 1 tsp Salt. The xanthan gum is non-negotiable here—it mimics the elasticity of gluten, giving your bread structure.
Use a fine-mesh sieve if your flours are lumpy. I’ve found that sifting prevents dense spots in the final loaf. The brown rice flour adds a subtle nuttiness, while the tapioca starch contributes a chewy texture that’s often missing in gluten-free baking.
Step 3: Combine Wet and Dry Ingredients
Pour the proofed yeast mixture into the dry ingredients, followed by the flax egg, 0.25 cup Extra-Virgin Olive Oil, and 1 tbsp Apple Cider Vinegar. The vinegar might seem odd, but it reacts with the baking process to create a lighter crumb.
Mix on medium speed for 2-3 minutes until the batter is smooth and slightly sticky. It should resemble thick pancake batter. Don’t overmix—just ensure there are no dry pockets. If it’s too thick, add a splash of warm almond milk; if too thin, let it rest for 5 minutes to thicken.
Step 4: Bake to Golden Perfection
Transfer the batter to a greased 9×5-inch loaf pan and smooth the top with a wet spatula. Cover loosely with a damp towel and let rise in a warm place for 45-60 minutes until it’s puffed about 1 inch above the pan.
Preheat your oven to 375°F. Bake the loaf for 45-50 minutes until the top is deep golden brown and a toothpick inserted in the center comes out clean. If the top browns too quickly, tent it with foil for the remaining time. The internal temperature should reach 205°F for a fully baked loaf.
Step 5: Cool Completely Before Slicing
Remove the bread from the pan and transfer it to a wire rack. Let it cool for at least 1 hour before slicing. I know it’s tempting to cut into it right away, but gluten-free bread firms up as it cools, and slicing too soon can result in a gummy texture.
The finished loaf should have a tender, slightly springy crumb with a crisp, golden crust. Store it wrapped at room temperature for up to 3 days, or freeze slices for longer storage. For best results, toast slices lightly before serving to enhance the flavor and texture.
Pro Tips For Making Gluten Free Bread Recipe Using Rice Flour
- Proof the Yeast: I learned this the hard way—always activate your yeast in warm water (110°F) with a pinch of sugar before mixing. If it doesn’t foam within 5 minutes, your bread won’t rise, no matter how patient you are.
- Weigh Your Flours: Rice flour is tricky—1 cup of white rice flour weighs about 120g, but brown rice flour is heavier. Measuring by volume can throw off the texture, so use a kitchen scale for consistency.
- Don’t Skip Xanthan Gum: Sounds weird, but it works: xanthan gum mimics gluten’s elasticity. Use 1 teaspoon per cup of flour blend, or your loaf will crumble like a sad biscuit.
- Bake Low and Slow: After burning three batches, I finally figured out gluten-free bread needs a lower temp (350°F) and longer bake time (45-55 minutes) to cook through without a gummy center.
Health Benefits of This Dish
Digestive Benefits
Rice flour is naturally gluten-free, making this bread ideal for anyone with celiac disease or gluten sensitivity. Unlike wheat flour, it’s gentle on the digestive system and won’t trigger inflammation for those with sensitivities. I’ve seen firsthand how it helps friends with gluten intolerance enjoy bread again. 💪
Rich in Fiber
The blend of white and brown rice flour provides a good dose of dietary fiber—about 2-3 grams per slice. Brown rice flour, in particular, adds that extra fiber boost, supporting gut health and keeping you fuller longer. It’s a small but meaningful upgrade from typical white bread.
Low in Saturated Fat
This recipe uses olive oil instead of butter, keeping saturated fat levels minimal. A slice contains less than 1 gram of saturated fat, which is excellent for heart health. The olive oil also adds healthy monounsaturated fats that support cardiovascular wellness.
Nutrient-Dense Ingredients
Flaxseed meal brings omega-3 fatty acids and a boost of plant-based protein to each slice. Almond milk adds vitamin E and calcium, while apple cider vinegar contributes trace minerals like potassium. Every ingredient pulls double duty for nutrition.
Blood Sugar Friendly
Rice flour has a lower glycemic index than wheat flour, helping to prevent blood sugar spikes. The combination of fiber and protein in this recipe slows digestion, providing steady energy. This makes it a better choice for those managing blood sugar levels. 💡
Allergen-Free
This bread is free from common allergens like dairy, eggs, and nuts (if using a nut-free milk alternative). It’s a safe option for many with food allergies. Just ensure your oats and flours are processed in allergen-free facilities for complete peace of mind.
Nutrition Facts
Frequently Asked Questions
Why is xanthan gum necessary?
Xanthan gum replaces gluten, giving structure and elasticity. Without it, your loaf may crumble or collapse. Use 1 tsp per 3 cups of flour blend for best results.
Can I use only white rice flour?
Not recommended. Brown rice flour adds fiber and structure. Using only white may result in a denser, less stable loaf. Stick to the 2.5:0.5 ratio for ideal texture.
How do I prevent a gummy center?
Ensure the internal temperature reaches 205°F. Cool completely before slicing—this lets the structure set. Baking for 45-50 minutes at 375°F also helps.
What’s the best way to store leftovers?
Wrap tightly and keep at room temperature for up to 3 days. For longer storage, freeze slices and toast as needed. Avoid refrigeration—it dries out the bread faster.

- Glutinous Rice Flour Bread Recipe: Soft Pillows with Nutty Depth - October 12, 2026
- Green Rice Casserole Recipe: Cheesy Baked Comfort with Vibrant Herbs - October 12, 2026
- Glutinous Rice Coconut Milk Recipe: Chewy Sweetness With Tropical Depth - October 12, 2026