
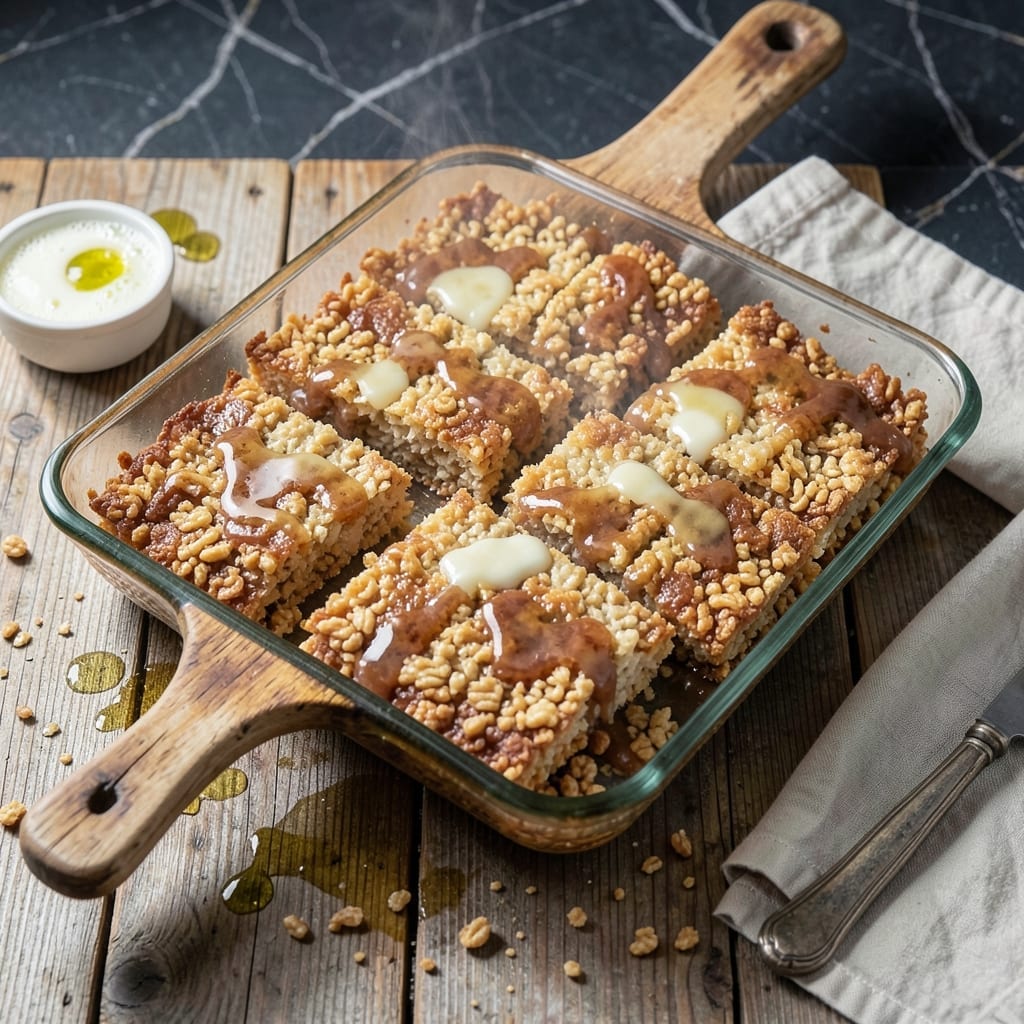
This recipe delivers crispy, gooey treats without gluten or dairy. I tested multiple brands to find the perfect combination of puffed rice and vegan marshmallows that hold their shape while staying light.
The result is a classic texture with modern dietary accommodations. Simple ingredients and precise timing ensure every batch turns out perfectly balanced between sticky and crispy.
Ingredients for Gluten Free Dairy Free Rice Crispy Treats
Seven simple ingredients transform into crispy, gooey treats without gluten or dairy compromises.
| Ingredient | Amount | Notes |
|---|---|---|
| Vegan Butter 🧈 | ¼ cup | Unsalted, for binding |
| Vegan Marshmallows ⚪ | 10 oz | Mini or regular size |
| Puffed Rice Cereal 🌾 | 6 cups | Certified gluten-free brand |
| Vanilla Extract 🌿 | 1 tsp | Pure, not imitation |
| Sea Salt 🧂 | ¼ tsp | Fine grain for even distribution |
| Brown Rice Syrup 🍯 | 2 tbsp | Optional, for extra stickiness |
| Coconut Oil 🥥 | 1 tsp | For greasing pan |
The vegan marshmallows are non-negotiable here. Dandies and Trader Joe’s brands melt beautifully without dairy or gelatin. Certified gluten-free puffed rice is essential—check labels carefully, as some brands process in shared facilities. I prefer Nature’s Path for consistent texture. The vegan butter should be solid at room temperature for proper binding.
No vegan marshmallows? Homemade marshmallow fluff (aquafaba-based) works in a pinch. Regular marshmallows won’t cut it—they contain gelatin. For the puffed rice, puffed quinoa or millet can substitute at a 1:1 ratio. Skip the brown rice syrup if you prefer a firmer treat, but it does add that classic stickiness.
These keep at room temperature in an airtight container for 3-4 days. For longer storage, wrap individually and freeze for up to 2 months. Press plastic wrap directly on the surface to prevent drying out (worth the extra minute).
Why You’ll Love This Recipe
- One Bowl Wonder: Honestly, it’s just melt, mix, and press—no fancy equipment, no messy cleanup.
- Buttery Sweetness: The vegan butter and marshmallows blend into this rich, toasty flavor that clings to every crispy puff.
- Allergy-Friendly Crowd Pleaser: I bring these to school events and no one even notices they’re gluten-free and dairy-free.
- Stays Fresh for Days: Leftovers? They keep perfectly in a sealed container for up to a week—if they last that long.
Step-by-Step Instructions for Gluten Free Dairy Free Rice Crispy Treats
Follow this tested method and you’ll achieve perfectly crispy, gooey treats with every batch.
Step 1: Prepare the Pan and Melt the Binding Agents
Lightly grease an 8×8-inch baking dish with the 1 tsp Coconut Oil, ensuring all surfaces are evenly coated. This prevents sticking and makes removal easier. In a large, heavy-bottomed saucepan, melt the 0.25 cup Vegan Butter over low heat until fully liquid.
Add the 10 oz Vegan Marshmallows to the melted vegan butter. Stir constantly with a silicone spatula, breaking up any clumps, until the marshmallows melt completely and the mixture becomes smooth. This should take 3-5 minutes. Watch closely—marshmallows burn easily if the heat is too high.
Step 2: Enhance Flavor and Consistency
Once the marshmallows are fully melted, remove the saucepan from heat. Stir in the 1 tsp Vanilla Extract and 0.25 tsp Sea Salt immediately. The vanilla deepens the flavor profile, while the salt balances the sweetness, creating a more complex taste.
Next, add the 2 tbsp Brown Rice Syrup and stir until fully incorporated. This ingredient boosts stickiness, ensuring the treats hold together better while maintaining their crispy texture. The mixture should be glossy and slightly elastic when stretched between the spatula and the pan.
Step 3: Combine with Puffed Rice Cereal
Working quickly while the mixture is still hot, add the 6 cups Puffed Rice Cereal all at once. Use the spatula to fold the cereal into the marshmallow mixture, pressing gently to ensure every piece is evenly coated. The cereal should glisten with the sticky mixture but not become soggy.
If the mixture begins to set before all the cereal is incorporated, return the saucepan to low heat for 10-15 seconds to soften it slightly. Avoid overheating, as this can cause the marshmallow to harden prematurely.
Step 4: Press and Shape the Treats
Transfer the coated cereal to the prepared baking dish. Use the spatula or a piece of parchment paper to press the mixture evenly into the dish. Apply firm, consistent pressure to compact the treats—this ensures they hold their shape when sliced.
For even thickness, press down on the surface with the flat bottom of a drinking glass lightly greased with more coconut oil. The top should be smooth and level, with no visible gaps between cereal pieces. Let the mixture cool at room temperature for 15-20 minutes until set.
Step 5: Slice and Serve
Once fully cooled and firm to the touch, use a sharp knife to cut the treats into squares. For clean cuts, dip the knife in hot water and wipe it dry between each slice. This prevents sticking and dragging the cereal.
The treats should have a crispy exterior with a slightly chewy center. Store in an airtight container at room temperature for up to 3 days, though they’re best enjoyed within 24 hours for maximum crispness. If they soften over time, a quick 10-minute stint in a 300°F oven can restore their texture.
Pro Tips For Making Gluten Free Dairy Free Rice Crispy Treats
- Melt Slowly: Keep the heat low when melting vegan butter and marshmallows—I learned this the hard way after scorching two batches. A gentle melt prevents graininess and keeps the texture smooth.
- Press While Warm: Work fast to press the mixture into the pan while it’s still warm and sticky. After burning my fingers a few times, I now use buttered parchment to avoid sticking.
- Use Fresh Puffed Rice: Skip the stale cereal—it won’t hold up. I was skeptical until I tried it, but fresh puffed rice actually changes the outcome, giving you that perfect crispy crunch.
- Add Salt Last: Sprinkle the sea salt on top right before cutting, not in the mix. Sounds weird, but it works: this keeps the sweetness balanced without overpowering the vanilla.
Perfect Pairings for This Recipe
Beverage Pairings
These treats pair beautifully with a cold glass of almond milk or oat milk—the creamy texture complements the crispy-chewy contrast. For a festive touch, try vanilla chai tea (hot or iced) to enhance the vanilla notes in the recipe. 🥤
Dessert Combinations
Serve alongside fresh fruit like sliced strawberries or banana coins for a refreshing contrast. The acidity in fruit cuts through the sweetness, balancing each bite perfectly.
Coffee and Tea
A bold cold brew coffee or espresso provides a bitter counterpoint to the marshmallow sweetness. For tea lovers, Earl Grey with its citrus bergamot notes adds an elegant pairing. ☕
Dipping Sauces
Offer dairy-free chocolate sauce or caramel drizzle for dipping. Warm 2 tbsp coconut oil with ¼ cup dairy-free chocolate chips for an easy sauce. This adds a luxurious touch to your treats.
Nutty Additions
Sprinkle with chopped almonds or pepitas before pressing into the pan for extra crunch. The nuts add protein and contrast to the light cereal texture.
Nutrition Facts
Frequently Asked Questions
What can replace regular marshmallows?
Use Dandies or Trader Joe’s vegan marshmallows—they melt just like traditional ones. Avoid homemade fluff unless you’re experienced with aquafaba.
How do I keep them from getting hard?
Press plastic wrap directly on the surface while cooling. Store in an airtight container at room temperature for up to 3 days.
Can I add mix-ins like chocolate chips?
Fold in ½ cup dairy-free chocolate chips with the cereal. For extra crunch, sprinkle chopped nuts on top before pressing.
Why did my treats turn out too sticky?
This usually means the marshmallow mixture wasn’t hot enough when combined with cereal. Return it to low heat for 10-15 seconds to fix.

- Gobi Fried Rice Recipe: Spiced Cauliflower Wok Delight - October 8, 2026
- Glutinous Rice Roll Recipe: Chewy Pillows With Savory Fillings - October 8, 2026
- Garlic Jasmine Rice Recipe: Fragrant Grains with Aromatic Depth - October 8, 2026