
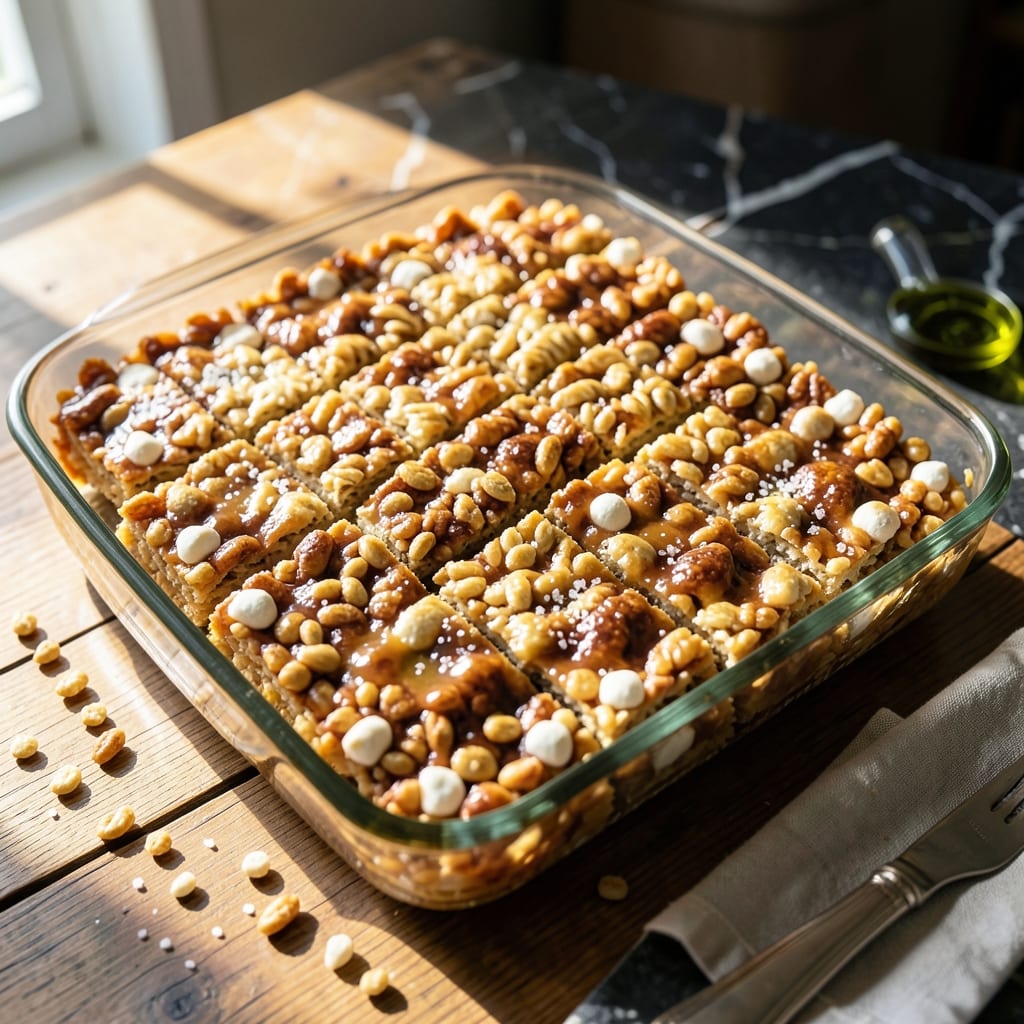
This no-bake recipe delivers crispy, gooey treats without traditional cereal. I’ve perfected the gluten-free version using certified safe ingredients that maintain the classic texture everyone loves.
The secret is timing—melt the marshmallows just until smooth, then quickly fold in the rice cereal before it sets. Press into the pan while still warm for perfectly crispy edges and soft centers.
Ingredients for Gluten Free Rice Crispy Treats
Certified gluten-free cereal and classic marshmallow magic combine for these crispy, gooey treats everyone loves.
| Ingredient | Amount | Notes |
|---|---|---|
| Gluten-Free Rice Cereal 🌾 | 6 cups | Certified gluten-free brand required |
| Mini Marshmallows ⚪ | 10 cups | Divided for melting and folding |
| Unsalted Butter 🧈 | ½ cup | For melting with marshmallows |
| Vanilla Extract 🌿 | 1 tsp | Pure extract for best flavor |
| Fine Sea Salt 🧂 | ¼ tsp | Enhances sweet and salty balance |
| Light Corn Syrup 💧 | ¼ cup | Prevents crystallization of marshmallows |
| Vegetable Oil 🫒 | 1 tbsp | For greasing pan and hands |
| Powdered Sugar ✨ | ¼ cup | Optional for dusting finished treats |
| Almond Butter 🥜 | ¼ cup | Optional for nutty depth |
| Cinnamon 🌶️ | ½ tsp | Optional for warm spice note |
The cereal is non-negotiable here—General Mills gluten-free Rice Chex or Erewhon are both certified safe and maintain the perfect crisp texture. Avoid off-brands without explicit gluten-free certification, as cross-contamination can ruin the batch. Whole Foods and Sprouts carry these reliably. The marshmallows should be fresh; stale ones won’t melt smoothly, leading to grainy treats.
No mini marshmallows? 16 oz of large marshmallows works—just cut them into quarters first. For a dairy-free version, swap the butter for Miyoko’s or Earth Balance. Skip the light corn syrup if needed, but the texture will be slightly denser. Agave or maple syrup can substitute in a pinch, though the flavor profile shifts slightly.
These keep 3-4 days at room temperature in an airtight container (separate layers with parchment). Freeze for up to 6 months—thaw before serving. Pressing while warm is critical for that crispy edge, so work quickly once the marshmallows are melted.
Why You’ll Love This Recipe
- One Pot Magic: I melt the butter, toss in marshmallows, stir in cereal—done. Honestly, cleanup is just one bowl and a spatula.
- Buttery Vanilla Crunch: That salty-sweet kick from the sea salt with the vanilla-kissed marshmallows? Ridiculously good.
- Party or Lunchbox: I pack these for picnics, birthday parties, or my kid’s school snack. They stay fresh for days in an airtight container.
- Budget-Friendly Batch: A box of cereal and a bag of marshmallows make 16 squares. Between us, it costs less than a fancy dessert and tastes better.
Step-by-Step Instructions for Gluten Free Rice Crispy Treats
This no-bake method ensures perfectly crispy, chewy treats with minimal effort and maximum flavor.
Step 1: Prepare the Pan and Melt the Base
Lightly grease a 9×13-inch baking dish with the 1 tablespoon Vegetable Oil, ensuring all surfaces are evenly coated. This prevents sticking and makes cleanup effortless. I also lightly oil my hands for the final pressing step.
In a large, heavy-bottomed pot, melt the 0.5 cup Unsalted Butter over low heat until fully liquid but not browned. Immediately add 8 cups Mini Marshmallows, the 0.25 cup Light Corn Syrup, 0.25 tsp Fine Sea Salt, and 1 tsp Vanilla Extract. Stir constantly with a heatproof spatula.
The marshmallows will begin to soften and collapse after 2-3 minutes. Continue stirring until the mixture becomes completely smooth with no visible lumps—this is your signal it’s ready for the cereal.
Step 2: Fold in the Gluten-Free Rice Cereal
Remove the pot from heat and immediately add all 6 cups Gluten-Free Rice Cereal. Using the same spatula, fold gently but thoroughly to ensure every piece is evenly coated. The cereal should glisten with the marshmallow mixture, with no dry spots remaining.
Work quickly—the mixture will begin to thicken as it cools. If using optional add-ins, now is the time to fold in the 0.25 cup Almond Butter or 0.5 tsp Cinnamon for extra depth. The almond butter adds a subtle nuttiness that complements the vanilla beautifully.
Step 3: Press and Shape the Treats
Transfer the mixture to your prepared baking dish. Using your lightly oiled hands or the back of the spatula, press it firmly and evenly into the pan. Apply consistent pressure to eliminate air pockets—this ensures the treats hold their shape when cut.
The mixture should fill the dish in an even layer, about 1-inch thick. For a cleaner finish, wet your hands slightly with cold water before the final press to prevent sticking.
Step 4: Cool and Set Before Cutting
Let the treats cool at room temperature for 1 hour until fully set. You’ll know they’re ready when the top is firm to the touch and no longer tacky. Resist the urge to cut too soon—premature slicing can cause the squares to lose their shape.
Once set, use a sharp knife to cut into 16 equal squares. For an optional finishing touch, dust the tops lightly with 0.25 cup Powdered Sugar using a fine-mesh sieve for an even, professional appearance.
Pro Tips For Making Gluten Free Rice Crispy Treats
- Melt Butter Low: Keep the heat on medium-low when melting the butter—too high and the marshmallows will burn before they even soften. I learned this the hard way after ruining a batch with blackened, bitter spots.
- Use Fresh Marshmallows: Skip the stale mini marshmallows; they harden faster and won’t blend smoothly with the cereal. Fresh ones melt evenly and give that perfect gooey texture every time.
- Press While Warm: Don’t wait for the mixture to cool before pressing it into the pan—it’ll set too fast and crumble. Spread and flatten it immediately while it’s still warm and pliable.
- Add Salt Last: Sprinkle the fine sea salt over the top after pressing the mixture into the pan, not during melting. This keeps the flavor balanced and prevents any grainy texture in the treats.
Essential Equipment for Perfect Results
Essential Pot
A large, heavy-bottomed pot is non-negotiable for even melting. I use my 5-quart Le Creuset because its thick base prevents hot spots that can scorch marshmallows. Thin pots risk burning the mixture before it fully melts. 🔥
Heatproof Spatula
A silicone spatula rated to 450°F is perfect for stirring and folding. I prefer OXO Good Grips—the flexible edge scrapes every last bit from the pot. Wooden spoons can stick, and metal might scratch your cookware.
Baking Dish
Use a 9×13-inch glass or metal pan for the right thickness. My Pyrex dish with straight sides makes pressing even and cutting clean. Avoid dark pans—they can over-brown the edges during the brief oven method some recipes use.
Measuring Tools
Accurate measurements matter—use dry measuring cups for cereal and liquid cups for syrups. I keep a set of color-coded cups from Cuisinox to avoid mix-ups. A kitchen scale isn’t essential here but helps with consistency.
Optional Add-Ins
For the almond butter or cinnamon variations, have a small whisk ready to blend them smoothly into the marshmallow mixture. I use a mini silicone whisk that fits perfectly in my pot’s corners. This ensures even distribution without overmixing.
Cooling Rack
After pressing, transfer the pan to a wire rack for even air circulation. My stainless steel rack from Chicago Metallic prevents soggy bottoms. Never skip cooling—cutting too soon ruins the texture.
Nutrition Facts
Frequently Asked Questions
Can I use regular marshmallows?
Yes, but check the label carefully. Many brands contain gluten due to cross-contamination. Kraft Jet-Puffed and Dandies are certified safe options. Always verify current labeling.
Why did my treats turn out hard?
Overcooking the marshmallow mixture is the usual culprit. Remove from heat as soon as it’s smooth. Pressing too hard or letting it cool too long before shaping can also cause this.
How can I make them dairy-free?
Simply swap the butter for an equal amount of vegan butter. Miyoko’s or Earth Balance work perfectly without affecting texture or flavor.
Can I add chocolate chips?
Fold in 1 cup of gluten-free chips after removing from heat. Let the mixture cool slightly first to prevent melting.

- Glutinous Rice Flour Bread Recipe: Soft Pillows with Nutty Depth - October 12, 2026
- Green Rice Casserole Recipe: Cheesy Baked Comfort with Vibrant Herbs - October 12, 2026
- Glutinous Rice Coconut Milk Recipe: Chewy Sweetness With Tropical Depth - October 12, 2026