
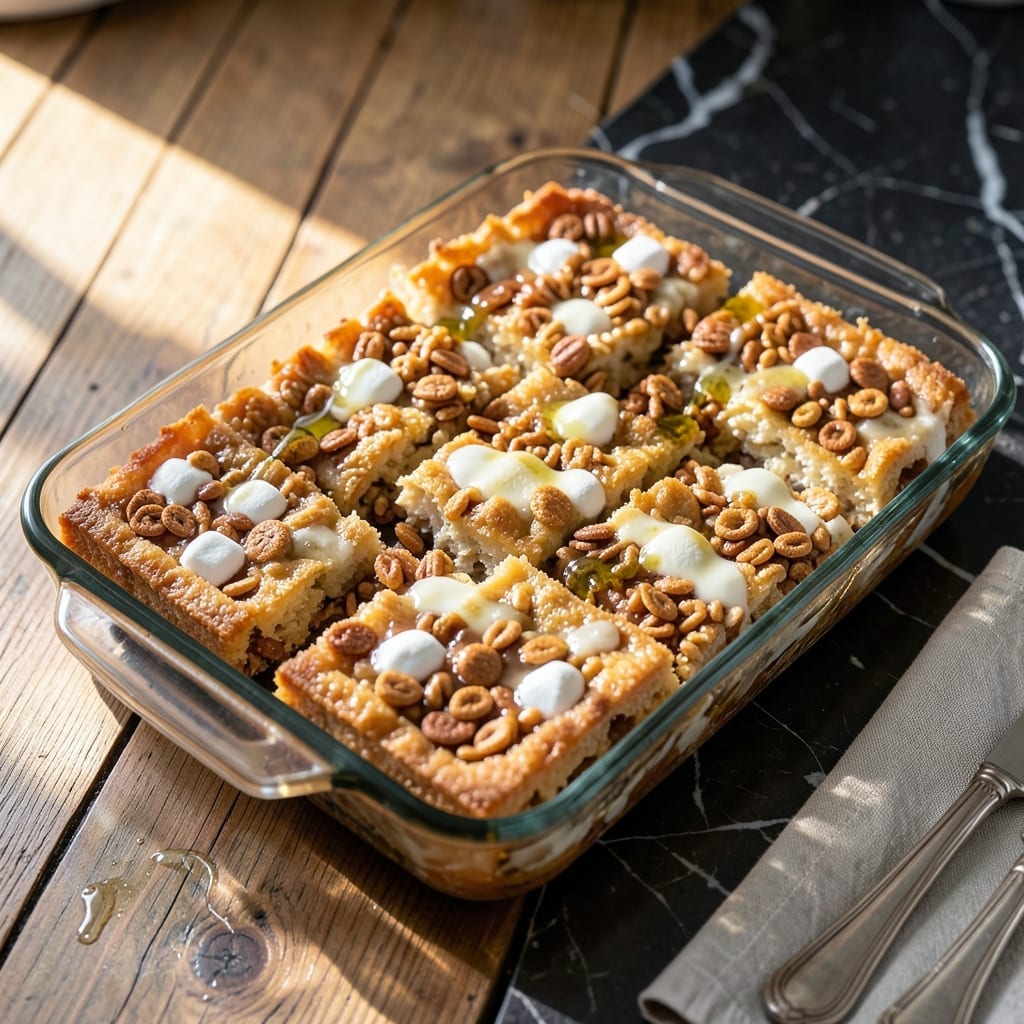
There’s something magical about combining Golden Grahams with classic rice crispy treats for a nostalgic twist. This recipe delivers the perfect balance of crispy texture and sweet marshmallow flavor in every bite.
I developed this version after testing multiple cereal combinations, and the graham cracker pieces add a caramelized depth that elevates the traditional recipe. The key is timing the marshmallow melt just right to coat every piece without making the treats too dense.
You’ll end up with squares that hold their shape but still offer that signature snap when you bite into them. The golden color from the cereal makes these treats as beautiful as they are delicious, perfect for parties or afternoon snacks.
This foolproof method works every time, even in my tiny Boston kitchen. The results speak for themselves.
Ingredients for Golden Graham Rice Crispy Treats
Golden Grahams and Rice Krispies join forces for nostalgic, crispy perfection in every square.
| Ingredient | Amount | Notes |
|---|---|---|
| Golden Grahams Cereal 🥣 | 6 cups | Plus extra for topping if desired |
| Rice Krispies Cereal 🥣 | 3 cups | Standard variety preferred |
| Mini Marshmallows ✨ | 10 oz | Or 40 regular marshmallows |
| Unsalted Butter 🧈 | ½ cup | 1 stick, for melting |
| Vanilla Extract 🌿 | 1 tsp | Pure extract recommended |
| Salt 🧂 | ¼ tsp | Fine sea salt preferred |
| Cooking Spray 💨 | 1 can | For greasing pan |
| Parchment Paper 📜 | 1 sheet | For easy removal |
The cereal is everything here. Golden Grahams from any grocery store work, but I grab mine from Target—they always have the freshest boxes. The Rice Krispies should be the standard kind (not the chocolate or fruity versions). For the marshmallows, Jet-Puffed or store brand both melt beautifully. Use fresh butter for the best flavor—it makes a noticeable difference.
No Golden Grahams? Cinnamon Graham Crunch works in a pinch (adds a nice spice note). Out of Rice Krispies? Corn Flakes give a similar crunch. Need to make this dairy-free? Earth Balance or coconut oil swaps in perfectly for the butter. The vanilla can be skipped if you’re out, but it adds a nice depth to the marshmallow coating.
These keep well at room temperature for 3-4 days in an airtight container. For longer storage, freeze for up to 2 months—just thaw at room temp before serving. Cut into squares only after fully cooled to prevent crumbling.
Why You’ll Love This Recipe
- Five Ingredient Magic: I love that this comes together with just Golden Grahams, Rice Krispies, mini marshmallows, butter, and vanilla—no fancy shopping required.
- Toffee Crunch Surprise: The Golden Grahams add this incredible toffee-like sweetness that takes the classic Rice Krispie treat to a whole new level. Honestly, it’s the reason I make these instead of the original.
- Crowd Pleaser: Whether it’s a bake sale or a weekend snack, these disappear faster than any other treat I bring. Between us, I always make a double batch.
- Stays Fresh: Unlike some treats that get stale overnight, these stay chewy and fresh for days in an airtight container—I’ll be real, they never last that long in my house.
Step-by-Step Instructions for Golden Graham Rice Crispy Treats
Here’s the method I’ve perfected for maximum crunch and gooey sweetness in every bite.
Step 1: Prepare the Pan and Melt the Butter
Line a 9×13-inch baking dish with the parchment paper, leaving an overhang on the sides for easy removal. Lightly mist the paper with cooking spray to prevent sticking. This step ensures your treats release cleanly without breaking apart.
In a large pot, melt the 0.5 cup unsalted butter over low heat. Watch for the foam to subside and the butter to turn a pale golden color—this takes about 3-4 minutes. Don’t let it brown; you want gentle melting, not frying.
Step 2: Create the Marshmallow Base
Add the 10 oz mini marshmallows to the melted butter and stir constantly with a silicone spatula. The marshmallows will begin to soften and collapse after 2-3 minutes. Keep the heat low to avoid scorching—this is where patience pays off.
Once the mixture is about 75% melted, remove the pot from heat. The residual warmth will finish the job. Stir in the 1 tsp vanilla extract and 0.25 tsp salt. The salt might seem like a small amount, but it balances the sweetness beautifully.
Step 3: Incorporate the Cereal
Working quickly, add the 6 cups Golden Grahams Cereal and 3 cups Rice Krispies Cereal to the marshmallow mixture. Use the spatula to fold everything together, pressing gently to coat all the pieces evenly. The cereal should glisten with the marshmallow mixture.
If the mixture seems too thick, don’t add anything—just keep folding. The heat from the marshmallow will soften the cereal slightly, making it easier to combine. You want every piece coated but not soggy.
Step 4: Press and Set
Transfer the mixture to your prepared pan. Use the spatula or buttered hands to press it down firmly and evenly. I like to sprinkle a handful of extra Golden Grahams on top for added texture, but that’s optional.
Press down hard—this ensures your treats hold together when sliced. Let them set at room temperature for at least 1 hour before cutting. If you’re in a hurry, 30 minutes in the refrigerator works, but room temperature gives the best texture.
Once set, lift the treats out using the parchment overhang and cut into 16 squares. Each piece should have that perfect combination of crispy cereal and gooey marshmallow.
Pro Tips For Making Golden Graham Rice Crispy Treats
- Melt Butter Low: Keep the heat on medium-low when melting butter for the marshmallows—I learned this the hard way after scorching two batches. It prevents the sugar from caramelizing too fast and keeps the mixture smooth.
- Use Fresh Marshmallows: Skip the stale mini marshmallows; fresh ones melt evenly and give that perfect gooey texture. After using old ones once, I finally figured out why my treats were dry and crumbly.
- Press While Warm: Start pressing the cereal mixture into the pan while it’s still warm, but not scorching—wait about 2 minutes after mixing. This makes a real difference in getting a firm, even layer without crushing the Golden Grahams.
- Add Vanilla Last: Stir in the vanilla extract after removing the marshmallow mixture from heat. Sounds weird, but it works: the alcohol in vanilla can make the sugar seize up if added too early, and nobody wants grainy treats.
Perfect Pairings for This Dish
Drink Pairings
Cold milk is my go-to with these treats—the creamy texture cuts through the sweetness perfectly. I use whole milk from my local Boston dairy for that rich, nostalgic flavor. For a grown-up twist, vanilla chai tea adds a warm spice contrast. 🥛
Sweet Additions
Drizzle with melted chocolate chips or caramel sauce for extra decadence. I melt 1 cup semi-sweet chocolate with 1 tbsp coconut oil for a smooth, glossy topping. Sprinkle with sea salt flakes to balance the sweetness.
Fruit Pairings
Fresh sliced strawberries or apple wedges add a refreshing contrast. The tartness of Granny Smith apples complements the cereal’s honey flavor beautifully. I serve these on the side for a light, balanced dessert plate.
Ice Cream Combo
Turn this into a sundae by crumbling squares over vanilla ice cream. I use Häagen-Dazs for its creamy texture. Add a drizzle of hot fudge and chopped peanuts for a nostalgic ice cream shop vibe. 🍦
Nutrition Facts
Frequently Asked Questions
Can I use regular marshmallows instead of mini?
Yes, swap 40 regular marshmallows for the minis. They melt the same way but may take an extra 1-2 minutes to soften completely. Cut them in half for faster melting.
Why do my treats turn out too hard?
This usually happens from over-pressing or letting the marshmallow mixture cool too much before mixing. Press firmly but don’t compact. Work quickly while the mixture is still warm and gooey.
Can I make these gluten-free?
Use certified gluten-free Rice Krispies and Golden Grahams. Check labels carefully, as some brands process cereals with gluten-containing grains. The rest of the ingredients are naturally gluten-free.
How do I store leftovers?
Keep in an airtight container at room temperature for up to 4 days. For longer storage, freeze for up to 2 months and thaw before serving.

- Ground Beef Rice and Beans Recipe: Slow-Simmered Savory Harmony - October 17, 2026
- Guyanese Fried Rice Recipe: Caribbean Spice With Wok-Charred Aromatics - October 17, 2026
- Hakka Thunder Tea Rice Recipe: Wok-Charred Herbal Infusion - October 17, 2026