
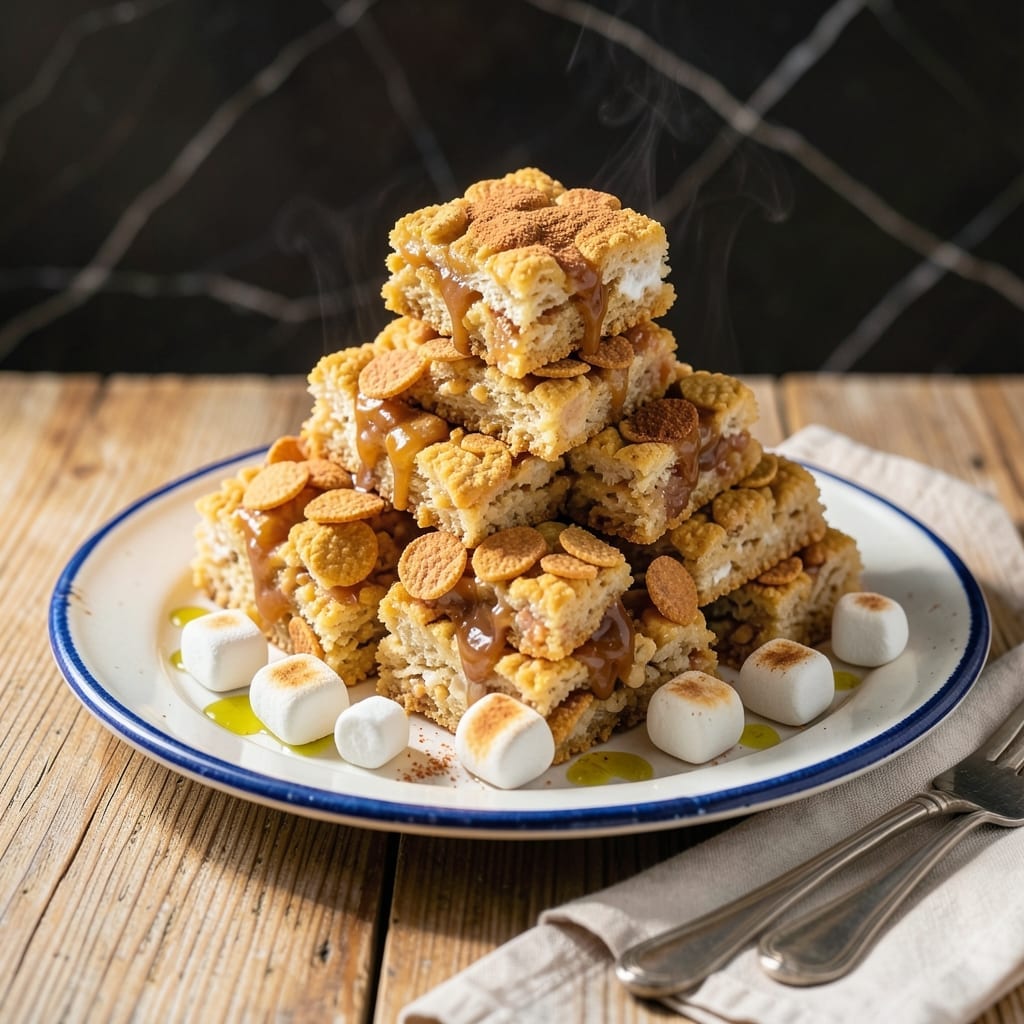
These treats combine the buttery crunch of Golden Grahams with classic marshmallow magic for a dessert that’s impossible to resist.
I developed this recipe after testing multiple cereal-to-marshmallow ratios, landing on the perfect balance of crispy and chewy textures. The key is melting the marshmallows low and slow to avoid a sticky mess.
The result is a no-bake treat that sets firm enough to cut into squares but stays soft enough to sink your teeth into.
Ideal for potlucks, school events, or whenever you need a sweet pick-me-up.
Ingredients for Golden Grahams Rice Krispie Treats
Golden Grahams and Rice Krispies team up with marshmallows for irresistible crunch and chew.
| Ingredient | Amount | Notes |
|---|---|---|
| Mini Marshmallows 🍬 | 10 cups | Divided for melting and mixing |
| Golden Grahams Cereal 🥣 | 8 cups | Crushed slightly for texture |
| Rice Krispies Cereal 🍚 | 3 cups | For extra crispiness |
| Unsalted Butter 🧈 | ½ cup | Melted for binding |
| Vanilla Extract 🌿 | 2 tsp | Pure for best flavor |
| Salt 🧂 | ¼ tsp | Fine grain for balance |
| Light Corn Syrup 💧 | ¼ cup | Helps marshmallows melt smoothly |
| Brown Sugar 🍚 | 2 tbsp | Packed, optional for caramel notes |
| Cinnamon 🌿 | ½ tsp | Ground, enhances golden flavor |
The marshmallows are the backbone here. Jet-Puffed or Kraft work great—avoid the giant ones, they melt unevenly. I grab mine at Target or Walmart in bulk for big batches. The Golden Grahams should be fresh (check the date on the box), and don’t sub regular graham crackers—the cereal’s buttery coating is key. Unsalted butter lets you control the salt, so don’t skip it (salted can make the treats too salty).
No mini marshmallows? 10 ounces of large marshmallows works—just cut them into quarters first. Want extra crunch? Add 1/2 cup crushed pretzels or nuts. Swap the Rice Krispies for Cocoa Krispies if you’re feeling chocolatey. The brown sugar is optional but adds a nice depth—honey works too (though it’ll be slightly stickier). Vanilla is non-negotiable for that classic flavor.
These keep at room temp for 3-4 days in an airtight container (or wrap individually in parchment). They freeze beautifully for up to 2 months—perfect for making ahead. Cut them with a buttered knife for clean slices (worth the extra minute).
Why You’ll Love This Recipe
- One Bowl Wonder: I melt the butter, dump in the marshmallows, and stir in both cereals—no extra bowls, no fuss.
- Crunch Meets Creamy: The Golden Grahams add this toasty, honeyed crunch while the Rice Krispies keep it light, and the vanilla ties it all together.
- Crowd Pleaser: Honestly, I’ve made these for bake sales, movie nights, and even snack-time bribes for the kids.
- Stays Fresh: They keep for days in a sealed container, and between us, they’re even better the next morning with a cold glass of milk.
Step-by-Step Instructions for Golden Grahams and Rice Krispie Treats
Here’s how to make these treats with the perfect balance of crunch and marshmallow magic.
Step 1: Melt the Butter and Marshmallow Base
In a large saucepan, melt the 0.5 cup Unsalted Butter over low heat. Once melted, add 8 cups Mini Marshmallows (reserve the remaining 2 cups for later), the 0.25 cup Light Corn Syrup, 2 tbsp Brown Sugar, and 0.25 tsp Salt.
Stir constantly with a silicone spatula until the mixture is smooth and fully melted. This should take about 5-7 minutes. Watch for the marshmallows to lose their shape completely and blend into a glossy, uniform mixture. Remove from heat once fully melted to avoid scorching.
Step 2: Add Flavor Enhancers
Stir in the 2 tsp Vanilla Extract and 0.5 tsp Cinnamon. The vanilla deepens the sweetness, while the cinnamon adds a warm, spiced note that pairs beautifully with the cereal’s golden flavor.
Mix thoroughly for 30 seconds to ensure the flavors are evenly distributed. You’ll notice the mixture becoming aromatic—this is your cue that the flavors are melding perfectly. Let it sit for 1 minute off the heat to cool slightly before proceeding.
Step 3: Combine with Cereals
Add the 8 cups Golden Grahams Cereal and 3 cups Rice Krispies Cereal to the marshmallow mixture. Gently fold everything together using the spatula, pressing lightly to ensure all the cereal is coated. The Golden Grahams will soften slightly, while the Rice Krispies add an extra snap.
Now, fold in the reserved 2 cups Mini Marshmallows. These will soften but retain some texture, giving your treats bursts of gooey marshmallow in every bite. The mixture should be sticky but manageable—if it’s too thick, let it sit for 2 minutes to soften slightly.
Step 4: Press and Set
Transfer the mixture to a greased 9×13-inch baking pan or line the pan with parchment paper for easy removal. Use the spatula or lightly greased hands to press the mixture evenly into the pan. Press firmly but don’t compact it too tightly—you want the treats to hold together but still have a light, airy texture.
Let the treats cool at room temperature for 30 minutes before slicing. If you’re impatient, you can refrigerate them for 15 minutes, but room temperature yields the best texture. Once set, cut into squares and enjoy the perfect blend of buttery crunch and marshmallow magic.
Pro Tips For Making Golden Grahams Rice Krispie Treats
- Melt Butter Slowly: Use low heat when melting the butter with marshmallows—high heat will scorch the sugar and leave a bitter taste. I learned this the hard way after ruining a batch with burnt, grainy marshmallows.
- Use Fresh Marshmallows: Skip the old, hardened mini marshmallows; they won’t melt smoothly. Fresh ones blend seamlessly with the butter and vanilla for that perfect gooey texture.
- Press While Warm: Don’t wait for the mixture to cool before pressing it into the pan—work fast while it’s still warm and sticky, or it’ll harden into a crumbly mess.
- Add Vanilla Last: Stir in the vanilla extract only after removing the marshmallow-butter mix from heat. Adding it too early can make the sugar seize up and turn grainy.
Make-Ahead Tips for This Recipe
Prep Ahead Strategy
I always measure all dry ingredients the night before—I combine 8 cups Golden Grahams and 3 cups Rice Krispies in a large zip-top bag. This saves 5-10 minutes on baking day and prevents cereal from getting stale in open boxes. 💡
Marshmallow Prep
Separate your 10 cups mini marshmallows into two bowls: 8 cups for melting and 2 cups reserved. I use Jet-Puffed from Target—they melt consistently. Keep them covered to avoid drying out overnight.
Butter and Flavorings
Pre-measure ½ cup unsalted butter, ¼ cup corn syrup, 2 tbsp brown sugar, 2 tsp vanilla, and ½ tsp cinnamon in small dishes. Cold butter cuts faster when you’re ready to start cooking.
Pan Preparation
Line your 9×13-inch pan with parchment paper the day before. I use Reynolds parchment—it has a non-stick coating that makes removal effortless. Leave overhang on the sides for easy lifting after setting.
Storage Timeline
These treats actually improve after 24 hours as flavors meld. I make them 1-2 days ahead for best texture. Store in an airtight container at room temperature for up to 4 days. ⏰
Freezing for Later
Cut into squares and wrap individually in parchment paper, then place in a freezer bag. They’ll keep frozen for 2 months. Thaw at room temperature for 30 minutes before serving. Perfect for school events or unexpected guests.
Nutrition Facts
Frequently Asked Questions
Can I use regular graham crackers instead of cereal?
No, the buttery coating on Golden Grahams is essential for flavor and texture. Regular graham crackers lack this and will make your treats dry. Stick with the cereal for best results.
How do I keep the treats from sticking to my hands?
Lightly butter or oil your hands before pressing the mixture into the pan. This prevents sticking and makes the process much smoother.
Why did my treats turn out hard?
Overheating the marshmallow mixture or pressing too firmly can make them hard. Melt on low heat and press just enough to hold the shape. Let them cool completely before cutting.
Can I make these gluten-free?
Yes! Use gluten-free versions of both cereals and ensure your marshmallows are certified gluten-free. Check labels carefully to avoid cross-contamination.

- Ground Beef Rice and Beans Recipe: Slow-Simmered Savory Harmony - October 17, 2026
- Guyanese Fried Rice Recipe: Caribbean Spice With Wok-Charred Aromatics - October 17, 2026
- Hakka Thunder Tea Rice Recipe: Wok-Charred Herbal Infusion - October 17, 2026