
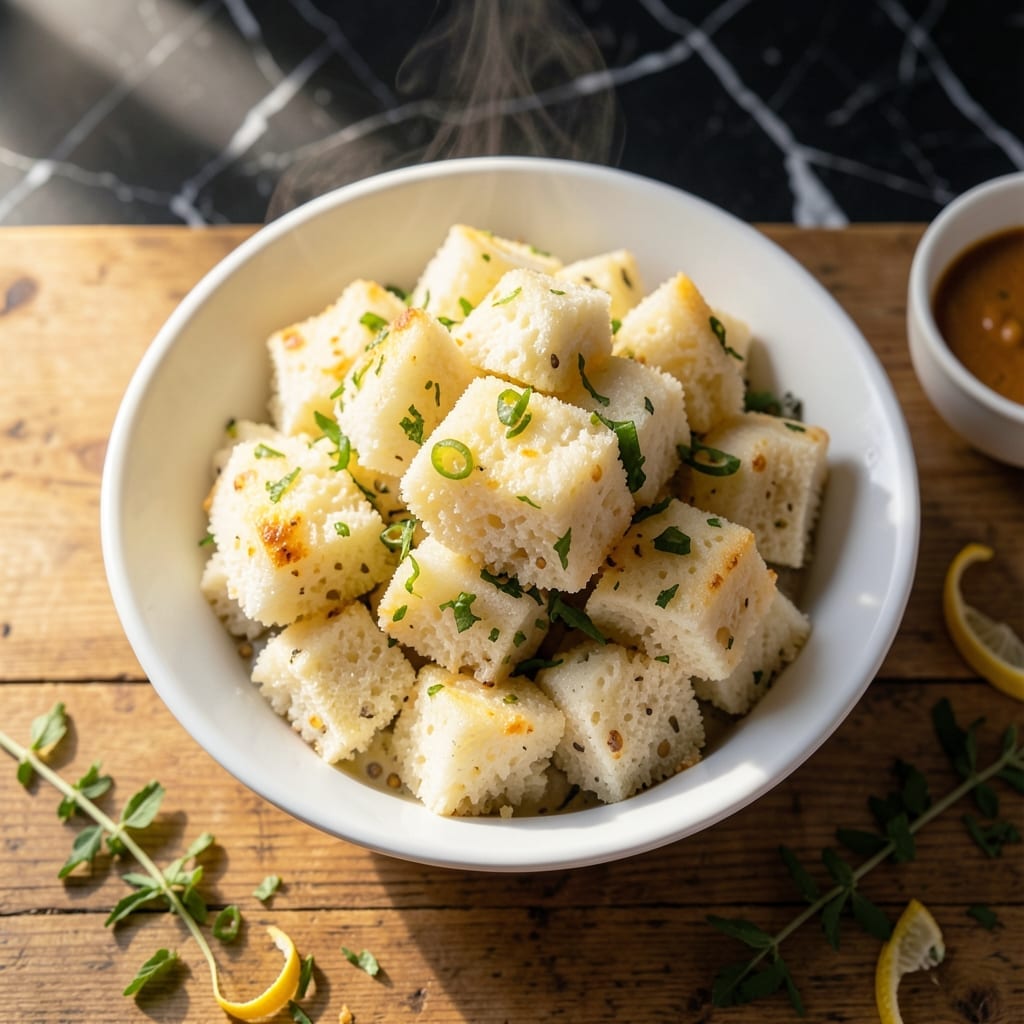
This traditional Gujarati dish brings the authentic taste of India to your kitchen with its soft and fluffy texture. I developed this version after testing multiple fermentation methods to achieve the perfect rise every time.
The combination of rice and chana dal creates a batter that steams into a light, airy cake with a slightly tangy flavor. This recipe stays true to the classic preparation while ensuring consistent results, even for beginners.
What emerges from the steamer is a golden, spongy dhokla that’s ready to be tempered with mustard seeds and curry leaves. The final touch of coconut and cilantro adds freshness to each bite.
Serve warm with green chutney for a complete, comforting meal that’s perfect for breakfast or a light dinner.
Ingredients for Gujarati Dhokla Recipe with Rice and Chana Dal
Traditional Gujarati ingredients create this light, airy, and tangy fermented delight with ease.
| Ingredient | Amount | Notes |
|---|---|---|
| Parboiled Rice 🌾 | 1 cup | Rinsed and soaked for 4 hours |
| Chana Dal 🥜 | ½ cup | Split and skinless, soaked |
| Yogurt 🥛 | ½ cup | Plain, unsweetened, room temperature |
| Water 💧 | 1 ½ cups | Adjust for batter consistency |
| Green Chili 🌶️ | 2 pieces | Finely chopped, adjust to taste |
| Fresh Ginger 🌿 | 1 whole | 1-inch piece, grated |
| Turmeric Powder 🌼 | ½ tsp | For vibrant yellow color |
| Salt 🧂 | 1 tsp | Adjust to taste after fermentation |
| Fruit Salt 🧂 | 1 tsp | Eno or similar, for leavening |
| Mustard Seeds 🌿 | 1 tsp | For tempering (tadka) |
| Curry Leaves 🍃 | 10 pieces | Fresh, for tempering |
| Asafoetida 🌿 | ¼ tsp | Pinch, optional for authentic flavor |
| Fresh Cilantro 🌿 | ¼ cup | Chopped, for garnish |
| Fresh Coconut 🥥 | ¼ cup | Grated, for garnish |
| Olive Oil 🫒 | 2 tbsp | For greasing and tempering |
The rice and chana dal are key here. Indian grocery stores carry both—look for parboiled rice labeled as ‘ponni’ or ‘idli rice’ and skinless chana dal. I usually stock up at Patel Brothers or BAPS. Soak them for at least 4 hours (overnight is even better) for optimal fermentation. The batter should be thick but pourable, like pancake batter. If it’s too thick, add water gradually.
No yogurt? Buttermilk at the same amount works as a substitute. Out of fresh ginger? Ginger paste at half the quantity is fine. Can’t find curry leaves? Skip them, but they add an authentic touch. For the fruit salt, Eno is the most common brand—found in the baking aisle of Indian stores. If using baking soda instead, use half the amount and mix with a bit of lemon juice to activate it.
The batter ferments best in a warm place—6-8 hours in summer, longer in winter. Store soaked rice and dal in the fridge for up to 24 hours. Once steamed, dhokla keeps well for 2 days at room temperature or 1 week refrigerated. Reheat by steaming briefly before serving.
Why You’ll Love This Recipe
- One Bowl Wonder: Soak the rice and chana dal overnight, blend with yogurt, and steam—no complicated steps.
- Flavor Explosion: The fermented batter with green chili gives that tangy, slightly spicy kick I crave every time.
- Breakfast or Snack: I make a big batch and pack it for lunch or serve it warm with chutney for tea-time.
- Budget Stretcher: Chana dal and rice are pantry staples, so this dish costs me pennies but feels like a treat.
Step-by-Step Instructions for Gujarati Dhokla With Rice and Chana Dal
This method ensures the perfect balance of fermentation and fluffiness for an authentic texture.
Step 1: Soak and Grind the Rice and Chana Dal
Drain the soaked 1 cup Parboiled Rice and 0.5 cup Chana Dal thoroughly, removing all excess water. Transfer them to a high-powered blender or wet grinder. Add the 1 whole Fresh Ginger (grated) and 2 pieces Green Chili (finely chopped) to the blender.
Blend with 1.5 cups Water until you achieve a smooth, thick batter—it should be slightly coarser than pancake batter but still pourable. The consistency is crucial; if it’s too thin, the dhokla won’t rise properly, and if it’s too thick, it won’t cook evenly.
Step 2: Ferment the Batter
Transfer the batter to a large bowl and stir in the 0.5 cup Yogurt, 0.5 tsp Turmeric Powder, and 1 tsp Salt. Mix well until the batter is uniform and vibrant yellow from the turmeric. Cover the bowl with a clean kitchen towel and let it ferment at room temperature for 4-6 hours.
You’ll know it’s ready when the batter rises slightly and develops a tangy aroma. The fermentation process is essential for that light, airy texture. If your kitchen is cool, place the bowl in a warm spot, like near the oven (turned off), to speed up fermentation.
Step 3: Leaven and Steam the Dhokla
Once fermented, gently fold in the 1 tsp Fruit Salt into the batter. You’ll see it fizz immediately—this reaction creates the air pockets that make dhokla fluffy. Stir just enough to combine, but avoid overmixing, which can deflate the batter.
Pour the batter into a greased steamer tray or shallow dish that fits inside your steamer. Tap the tray gently on the counter to remove any large air bubbles. Place the tray in a preheated steamer with boiling water, cover with a lid, and steam on medium-high heat for 15-20 minutes. The dhokla is done when a toothpick inserted comes out clean and the surface looks set.
Step 4: Prepare the Tempering (Tadka)
Heat 2 tbsp Olive Oil in a small pan over medium heat. Add the 1 tsp Mustard Seeds and let them splutter. Once they pop, add the 10 pieces Curry Leaves and 0.25 tsp Asafoetida, stirring for 10-15 seconds until the curry leaves turn crisp and the asafoetida releases its aroma.
Immediately pour this tempering evenly over the steamed dhokla. The hot oil will sizzle as it soaks into the cake, infusing it with rich, aromatic flavors. Let the dhokla cool slightly in the tray before slicing.
Step 5: Garnish and Serve
Sprinkle the top with 0.25 cup Fresh Cilantro (chopped) and 0.25 cup Fresh Coconut (grated). The cilantro adds a fresh, herby contrast, while the coconut brings a subtle sweetness that balances the tangy and spicy notes.
Cut the dhokla into squares or diamonds using a sharp knife. Serve warm with a side of green chutney or tamarind sauce. The texture should be soft and spongy, with a slightly crisp top from the tempering.
Pro Tips For Making Gujarati Dhokla Recipe With Rice And Chana Dal
- Soak Overnight: I learned this the hard way—parboiled rice and chana dal need at least 6-8 hours in water to soften properly for that perfect fluffy texture.
- Ferment Fully: After grinding, let the batter sit for 4-6 hours with a pinch of sugar to activate the yogurt’s fermentation—this gives dhokla its signature lightness.
- Skip Cold Yogurt: Resist the urge to use straight-from-the-fridge yogurt; room temperature curd blends smoother and ferments faster with the rice and dal.
- Steam Evenly: Use a tight-lidded steamer and medium heat—too high and the dhokla turns dense, too low and it won’t rise (yes, even if you’re impatient like me).
Troubleshooting Great gujarati dhokla recipe with rice and chana dal
Batter Too Thin
If your batter feels watery, add 2-3 tbsp rice flour to thicken it. I discovered this trick after a batch spread too thin in my Boston kitchen. Mix gently to avoid overworking the batter. 💡
Batter Too Thick
For overly thick batter, gradually add ¼ cup water at a time until it reaches pancake batter consistency. The rice and chana dal absorb liquid differently, so check after 10 minutes of resting.
Dhokla Not Rising
If your dhokla stays dense, the fruit salt may have expired. Use fresh Eno and ensure the batter is at room temperature. Also, steam immediately after adding the leavening agent—the reaction is time-sensitive.
Steaming Issues
Uneven cooking often comes from insufficient water in the steamer. I keep 1.5 inches of boiling water in my pot. Cover the lid with a cloth to prevent condensation from dripping onto the dhokla.
Tempering Troubles
If mustard seeds burn, lower your heat to medium-low. Curry leaves should sizzle but not blacken. Remove the pan from heat as soon as the seeds pop to prevent bitterness. 🔥
Fermentation Problems
In cooler kitchens, place the batter near a warm oven (turned off) or on top of the fridge. I’ve had success letting it ferment overnight in my Boston triple-decker during winter months.
Nutrition Facts
Frequently Asked Questions
Can I use regular rice instead of parboiled?
Regular rice can work but may produce a less soft texture. Parboiled rice gives the authentic fluffy consistency. If using regular rice, soak it for 6-8 hours for better results.
Why does the batter need to ferment?
Fermentation develops the tangy flavor and light texture. It also helps the rice and chana dal blend digest better. Skip this step and the dhokla will be dense.
How can I make it without a steamer?
Use a pressure cooker without the whistle or a deep pot with a rack. Add 1.5 inches of water, cover with a lid, and steam on medium heat. Works just as well!
What if my dhokla turns out sour?
Over-fermentation causes excess sourness. Reduce fermentation time to 4 hours in warm weather. Balance the flavor by adding a touch of sugar to the tempering.

- Ground Beef Rice and Beans Recipe: Slow-Simmered Savory Harmony - October 17, 2026
- Guyanese Fried Rice Recipe: Caribbean Spice With Wok-Charred Aromatics - October 17, 2026
- Hakka Thunder Tea Rice Recipe: Wok-Charred Herbal Infusion - October 17, 2026