
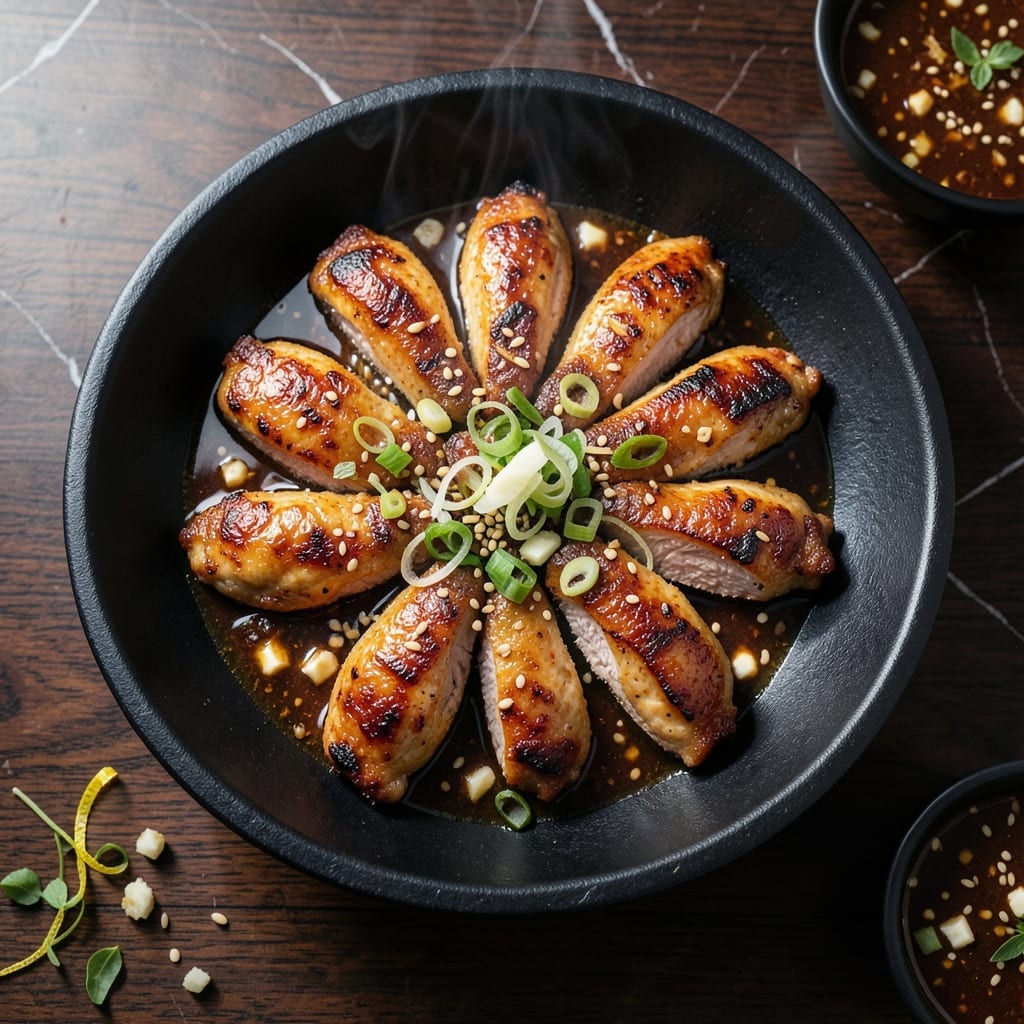
There’s something irresistible about hibachi chicken—that perfect balance of savory, buttery flavor with a hint of smokiness from the grill. This recipe captures the essence of your favorite Japanese steakhouse right in your own kitchen.
The secret lies in a simple yet flavorful marinade that tenderizes the chicken while infusing it with that signature hibachi taste. Cooking it hot and fast ensures juicy, tender meat with those beautiful char marks we all love.
You’ll achieve restaurant-quality results with just a few ingredients and 20 minutes of cooking time. The chicken comes out perfectly seared outside while staying moist and flavorful inside.
Serve it with steamed rice and vegetables for the full hibachi experience. Here’s how to make this crowd-pleasing dish.
Ingredients for Habachi Chicken
A few quality ingredients bring that sizzling steakhouse flavor home with ease.
| Ingredient | Amount | Notes |
|---|---|---|
| Boneless Skinless Chicken Thighs 🍗 | 1 ½ lb | Cut into bite-sized pieces |
| Soy Sauce 🫒 | ½ cup | Low-sodium preferred |
| Butter 🧈 | 4 tbsp | Unsalted, for cooking |
| Garlic Cloves 🧄 | 4 cloves | Minced for marinade |
| Fresh Ginger 🌿 | 1 tbsp | Grated, peeled first |
| Sesame Oil 🫒 | 1 tbsp | Toasted for depth |
| Rice Vinegar 💧 | 2 tbsp | For acidity balance |
| Brown Sugar 🍚 | 2 tbsp | Light or dark works |
| Vegetable Oil 🫒 | 2 tbsp | High smoke point |
| Sesame Seeds 🌰 | 1 tbsp | Toasted for garnish |
| Green Onions 🧅 | 4 whole | Thinly sliced for serving |
| Salt 🧂 | ½ tsp | Kosher or sea salt |
| Black Pepper 🌶️ | ½ tsp | Freshly ground preferred |
The chicken is everything here. Boneless, skinless thighs stay juicier than breasts on the high heat—look for uniform thickness so they cook evenly. I grab mine from Whole Foods or Costco (their organic thighs are great). For the soy sauce, Kikkoman low-sodium is my go-to, but any brand works as long as it’s not that super salty stuff.
No fresh ginger? Ground ginger at half the amount works in the marinade. Out of sesame oil? Toasted peanut oil gives a similar nutty depth. The brown sugar can be swapped for honey or maple syrup if that’s what you’ve got. If you’re avoiding gluten, tamari instead of soy sauce does the trick (just check the label on the tamari).
Marinated chicken keeps 24-48 hours in the fridge (any longer and the texture gets mushy). Cooked leftovers? Good for 3-4 days refrigerated. Reheats best in a skillet to keep that sear crisp.
Why You’ll Love This Recipe
- One Pan Wonder: I love that everything cooks together—chicken, garlic, ginger, and that buttery soy glaze. One pan, minimal cleanup.
- Umami Bomb: The combo of soy, butter, and fresh ginger creates this deep, savory richness that’s honestly addictive.
- Weeknight Hero: It’s my go-to for busy evenings—ready before the kids finish their homework. (Yes, even on a Tuesday night)
- Budget Stretcher: Chicken thighs stay juicy and flavorful, and they’re half the price of breasts. Leftovers? Even better the next day.
Step-by-Step Instructions for Hibachi Chicken
Here’s my proven method for achieving that restaurant-quality sizzle and flavor at home.
Step 1: Marinate the Chicken for Maximum Flavor
In a large bowl, whisk together the 0.5 cup soy sauce, 1 tbsp sesame oil, 2 tbsp rice vinegar, 2 tbsp brown sugar, 4 cloves minced garlic, and 1 tbsp grated fresh ginger until the sugar dissolves completely. This creates the signature umami-rich base that defines hibachi flavor.
Add the 1.5 lb bite-sized chicken thighs to the marinade, ensuring each piece is fully coated. Cover and refrigerate for at least 30 minutes, though I prefer 2 hours for deeper flavor penetration. The chicken should absorb the marinade and take on a slightly glossy sheen.
Step 2: Cook the Chicken on High Heat
Heat 2 tbsp vegetable oil in a large skillet or griddle over medium-high heat until shimmering but not smoking. Working in batches to avoid crowding, remove the chicken from the marinade (reserving the liquid) and cook for 5-6 minutes until deeply browned and cooked through.
The chicken should develop a beautiful caramelized crust and reach an internal temperature of 165°F. Don’t stir too frequently—let it develop that golden-brown sear that locks in the juices. The reserved marinade will come into play next.
Step 3: Create the Signature Buttery Sauce
Reduce heat to medium and add the 4 tbsp butter to the same skillet. Once melted, pour in the reserved marinade and let it simmer for 2-3 minutes until it thickens slightly and becomes glossy. This transforms the marinade into a rich, velvety sauce.
Return the cooked chicken to the skillet and toss to coat evenly in the sauce. Cook for an additional 1-2 minutes to allow the flavors to meld together. The sauce should cling beautifully to each piece of chicken.
Step 4: Garnish and Serve Immediately
Transfer the chicken to a serving platter and sprinkle with the 1 tbsp sesame seeds and 4 thinly sliced green onions. The sesame seeds should toast slightly from the residual heat, releasing their nutty aroma.
Serve hot with steamed rice to soak up every last bit of that incredible buttery sauce. The chicken should be tender and juicy with a glossy, flavorful coating that makes it impossible to resist seconds.
Pro Tips For Making Habachi Chicken
- Sear First, Sauce Later: I learned this the hard way—sear the chicken thighs in butter until golden brown before adding soy sauce, or you’ll end up steaming them instead of getting that crispy edge.
- Grind the Ginger: Fresh ginger is non-negotiable here, but grinding it (instead of mincing) releases more of its punch and blends seamlessly into the sauce.
- Skip the Overcrowding: After burning three batches, I finally figured out that crowding the pan drops the temperature too fast—cook in batches if needed.
- Rest in Sauce: Once off the heat, let the chicken sit in the soy-butter-garlic sauce for 5 minutes—it soaks up way more flavor than if you serve it right away.
Storing and Reheating habachi chicken
Refrigerator Storage
Let the chicken cool for no more than 2 hours before transferring to airtight containers. I use glass containers with snap-on lids—I find they keep flavors freshest. Store at 40°F or below for up to 3-4 days. The buttery sauce actually deepens in flavor overnight. ❄️
Freezer Storage
This freezes beautifully for up to 3 months without losing texture. I recommend flat freezer bags—quart size works perfectly for 1.5 lb servings. Squeeze out excess air and leave 1 inch headspace for expansion. Label with the date so you
Stovetop Reheating
My preferred method for maintaining texture. Heat in a skillet over medium-low heat with 1 tbsp water or chicken broth for 5-7 minutes, stirring occasionally. The liquid prevents drying while reviving that glossy sauce. Add a pat of butter at the end for fresh richness.
Microwave Reheating
For quick meals, microwave covered with a damp paper towel. Use 70% power for 2-3 minutes, stir, then continue in 30-second intervals until reaching 165°F. The damp towel prevents the chicken from toughening up. 🔥
Pro Tip
Never reheat more than once—it degrades the texture. If you know you’ll have leftovers, portion before storing. The sauce tends to separate slightly when reheated, but a quick stir brings it back together beautifully.
Nutrition Facts
Frequently Asked Questions
What’s the best cut of chicken to use?
Use boneless, skinless chicken thighs for the juiciest results. They stay tender at high heat while breasts can dry out. For even cooking, cut thighs into 1-inch pieces of similar size.
How do I prevent the sauce from burning?
Cook the butter and marinade at medium heat, not high. Stir constantly for 2-3 minutes until glossy. If it thickens too fast, add 1 tbsp water to loosen.
Can I make this ahead of time?
Marinate chicken up to 24 hours ahead. Store cooked chicken in the fridge for 3-4 days or freeze for 3 months. Reheat gently to preserve texture.
What should I serve with it?
Classic pairings include steamed white rice, stir-fried veggies, or a simple cucumber salad. The rice soaks up the buttery sauce perfectly.

- Jollof Rice Sauce Recipe: West African Tomato and Spice Infusion - September 25, 2026
- Japanese Rice Soup Recipe: Umami-Rich Comfort in a Bowl - September 25, 2026
- Homemade Cream Of Rice Recipe: Silk-Smooth Breakfast in Minutes - September 25, 2026