
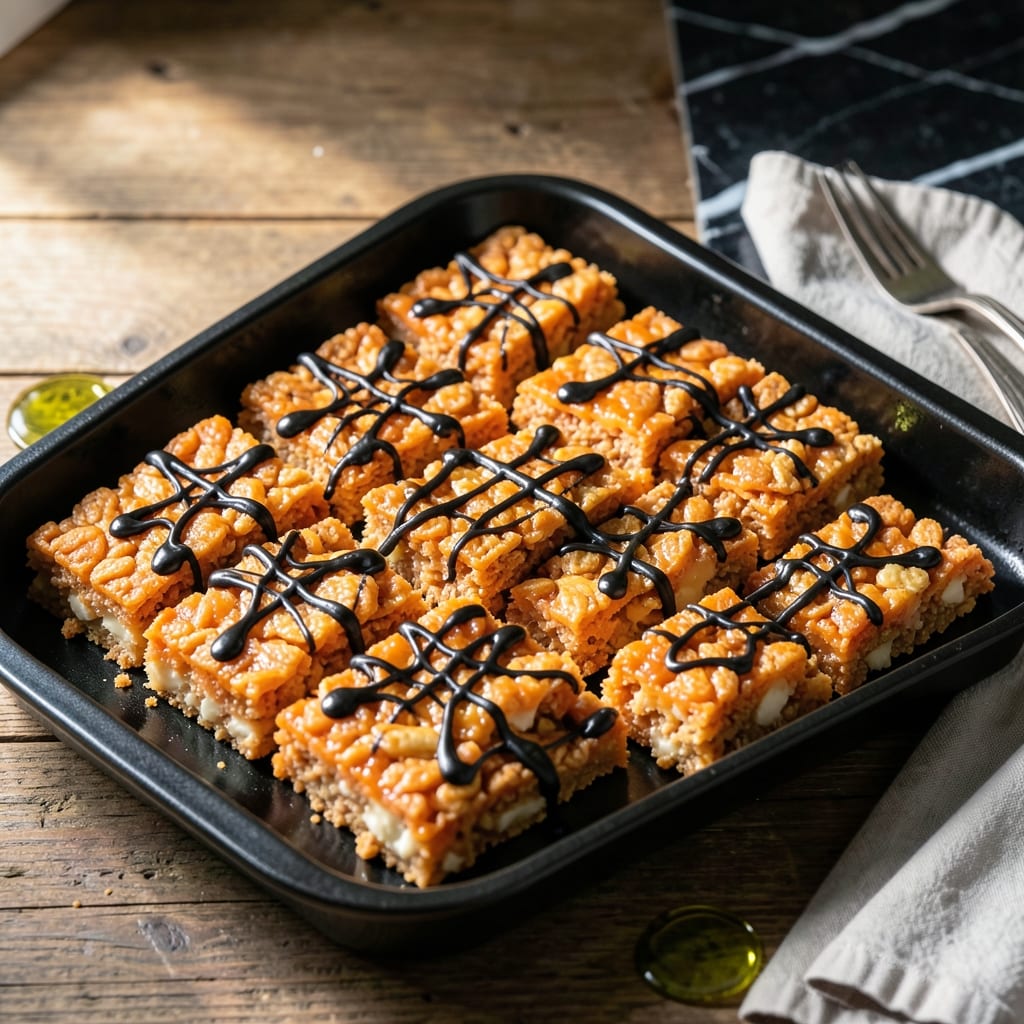
This Halloween-inspired treat transforms classic Rice Krispie squares into festive orange and black swirls. The secret lies in dividing the melted marshmallow mixture and tinting it with natural colors before combining.
You’ll achieve perfectly chewy, spooky squares with minimal effort. The orange and black create a striking visual effect that’s ideal for parties, classroom treats, or a fun kitchen project with kids.
Ingredients for Halloween Rice Krispie Treats Recipe Marshmallows
Nine ingredients create festive orange and black swirls. Nothing complicated, just Halloween fun.
| Ingredient | Amount | Notes |
|---|---|---|
| Butter 🧈 | ½ cup | Unsalted, for melting |
| Mini Marshmallows 🍬 | 10 cups | Divided for coloring |
| Rice Krispies Cereal 🥣 | 6 cups | Standard variety preferred |
| Orange Food Coloring 🟠 | 1 tsp | Gel-based for vibrant color |
| Black Food Coloring ⚫ | 1 tsp | Gel-based for deep hue |
| Vanilla Extract 🌿 | 1 tsp | Pure for best flavor |
| Salt 🧂 | ¼ tsp | Fine grain for balance |
| Vegetable Oil 🫒 | 1 tbsp | For greasing pan |
| Powdered Sugar ✨ | ¼ cup | Optional for dusting |
The marshmallows are the foundation here. Jet-Puffed mini marshmallows melt faster and more evenly than regular ones—look for them at Target or Walmart. Butter quality matters less here since it’s mostly for structure, but unsalted keeps the flavor clean. For the cereal, Kellogg’s Rice Krispies are the gold standard (the generic stuff just isn’t as crispy). Pro tip: buy an extra box for snacking while you work.
No orange gel? Red and yellow mixed together gets you close. Black food coloring can be tricky—use a true black gel (not purple-based) or mix dark blue with a tiny bit of red. Want to skip artificial colors? Turmeric for orange, activated charcoal for black (just a pinch). The vanilla extract is optional but adds depth—imitation works fine if that’s what you’ve got.
These keep at room temperature for 3-4 days in an airtight container. Separate layers with parchment to prevent sticking. They also freeze beautifully for up to 2 months—perfect for making ahead.
Why You’ll Love This Recipe
- No-Fuss Fun: Honestly, it’s just melt, mix, and shape—no baking, no fancy tools, just a pot and a spatula.
- Goey Goodness: That buttery marshmallow pull with the crispy Rice Krispies? Ridiculously good every single bite.
- Party Ready: I shape them into pumpkins or ghosts, and they steal the show at classroom parties or our neighborhood potluck.
- Budget Friendly: A box of cereal and a bag of mini marshmallows feed a crowd for pennies. I’ll be real: it’s my cheap thrill for Halloween.
Step-by-Step Instructions for Halloween Rice Krispie Treats
Here’s the method for creating that perfect spooky swirl effect in every batch.
Step 1: Prepare the Pan and Divide Marshmallows
Grease a 9×13-inch baking pan thoroughly with the 1 tbsp vegetable oil, making sure to coat all sides and the bottom. This prevents sticking and makes it easier to remove the treats later.
Divide the 10 cups mini marshmallows into two equal portions of 5 cups each. You’ll color one portion orange and the other black for the Halloween swirl effect. Set them aside in separate bowls.
Step 2: Melt Butter and Create Colored Marshmallow Mixtures
In a large pot, melt the 0.5 cup butter over low heat. Once fully melted, add 5 cups mini marshmallows and stir constantly until completely melted and smooth. Remove from heat and stir in the 1 tsp vanilla extract and 0.25 tsp salt.
Divide this melted marshmallow mixture equally between two bowls. Stir the 1 tsp orange food coloring into one bowl and the 1 tsp black food coloring into the other, mixing thoroughly until each reaches a uniform, vibrant color.
Step 3: Incorporate Rice Krispies Cereal
Working quickly while the marshmallow mixtures are still warm, stir 3 cups rice krispies cereal into the orange mixture until fully coated. Repeat with the remaining 3 cups rice krispies cereal and the black mixture. You want to work fast here—the cereal will start to crisp up as it cools.
The cereal should be completely saturated with the colored marshmallow, with no dry spots visible. If the mixture starts to set up before you’re finished, return it to low heat for 10-15 seconds to soften, but don’t let it get too hot or it may burn.
Step 4: Layer and Swirl in the Pan
Press the orange rice krispies mixture into the prepared pan, spreading it evenly to cover the bottom. Then carefully add the black mixture on top, pressing gently but not flattening completely. The layers should be distinct but will naturally start to blend at the edges.
For the signature Halloween swirl, use a butter knife or offset spatula to gently drag through both layers, creating marbled patterns. Don’t overmix—you want distinct streaks of orange and black rather than a muddy gray. Press the top lightly to even it out.
Step 5: Cool, Cut, and Finish
Let the treats cool at room temperature for 1-2 hours until completely set. You’ll know they’re ready when they hold their shape and the top feels firm to the touch. For faster cooling, you can refrigerate for 30-45 minutes, but don’t skip this step or they’ll be too sticky to cut.
Once set, cut into 12 equal squares using a sharp knife. For extra flair, dust the tops lightly with the 0.25 cup powdered sugar using a fine-mesh sieve. The powdered sugar adds a subtle sweetness and enhances the spooky aesthetic with a ghostly white finish.
Pro Tips For Making Halloween Rice Krispie Treats Recipe Marshmallows
- Melt Butter First: Start by melting the butter completely in the pot before adding marshmallows—this prevents uneven melting and sticking. I learned this the hard way after scraping burnt bits off the bottom one too many times.
- Use Fresh Marshmallows: Stale mini marshmallows turn hard and won’t melt smoothly, so check the bag’s freshness date. Fresh ones give that perfect gooey texture that holds the Rice Krispies together just right.
- Color Before Cereal: Mix the food coloring into the melted marshmallow-butter mixture before adding the cereal. This ensures even distribution instead of streaky, half-colored treats.
- Press Lightly: When shaping the treats, resist the urge to compact them too tightly—this makes them dense and hard. A gentle press keeps them airy and crispy.
Make-Ahead Tips for halloween rice krispie treats recipe marshmallows
Prep Ahead Strategy
I always make the colored marshmallow mixtures the night before and store them in separate airtight containers. They’ll keep beautifully at room temperature for up to 24 hours—just reheat gently in the microwave for 20-30 seconds before mixing with cereal. This cuts your active prep time in half on party day. 💡
Batch Production
Double the recipe and press half into the pan, then refrigerate the remaining mixture for 30 minutes while the first batch sets. This gives you perfectly timed layers without rushing. I use parchment paper between batches to prevent sticking.
Storage Before Serving
Once cooled and cut, stack the treats between sheets of parchment in an airtight container. They’ll stay fresh for 3-4 days at room temperature. For longer storage, freeze for up to 2 months—just thaw at room temperature for 1 hour before serving.
Day-Of Assembly
If making the full treats ahead, let them cool completely, then wrap individually in plastic wrap. This keeps them fresh and makes transport easy. The swirls actually look more defined after 12-24 hours as the colors settle.
Re-Crisping Trick
If your treats lose their snap after storage, pop them in a 200°F oven for 5-10 minutes to restore the cereal’s crunch. Watch closely—they’ll soften again as they cool, so time this right before serving. 🔥
Last-Minute Touch
Save the powdered sugar dusting for the day of serving. This keeps the ghostly white finish looking fresh and prevents it from dissolving into the treats. Use a fine-mesh sieve for even coverage.
Nutrition Facts
Frequently Asked Questions
Can I use regular marshmallows instead of mini?
Yes, but they melt more slowly. Use 16 oz of regular and cut them into smaller pieces first. Mini versions work better for even melting and quicker mixing.
How do I get vibrant colors without artificial dyes?
For orange, try 1/2 tsp turmeric. For black, a pinch of activated charcoal works but may add a slight earthy taste. Natural colors won’t be as bold as gel.
What if my swirls turn gray instead of black and orange?
You likely overmixed the colors. Next time, use less black coloring and swirl more gently with a knife. The colors will deepen as the treats cool.
How far ahead can I make these?
They stay fresh for 3-4 days at room temperature or 2 months frozen. Re-crisp in a 200°F oven for 5 minutes if needed.

- Ground Beef Rice and Beans Recipe: Slow-Simmered Savory Harmony - October 17, 2026
- Guyanese Fried Rice Recipe: Caribbean Spice With Wok-Charred Aromatics - October 17, 2026
- Hakka Thunder Tea Rice Recipe: Wok-Charred Herbal Infusion - October 17, 2026