
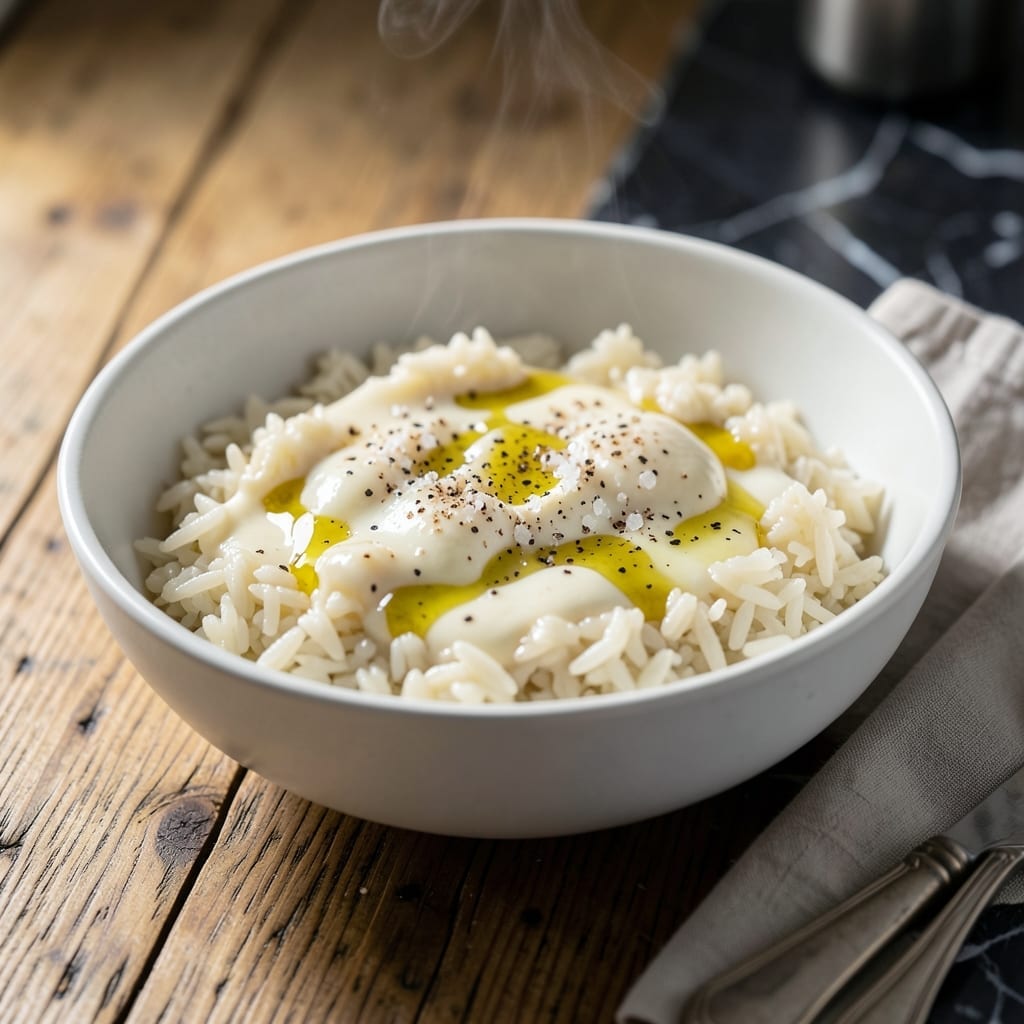
This Amish-style hot rice delivers pure comfort in every bite, just like the kind served at Hartville Kitchen. The secret lies in the simple yet precise method that transforms basic ingredients into something extraordinary.
With a creamy texture and subtle seasoning, this dish proves that comfort food doesn’t need to be complicated. It’s the kind of meal that warms you from the inside out, perfect for any day of the week.
Ingredients for Hartville Kitchen Hot Rice
Simple pantry staples transform into Amish-style comfort with this creamy, subtly spiced dish.
| Ingredient | Amount | Notes |
|---|---|---|
| Long-Grain White Rice 🍚 | 2 cups | Uncooked, rinsed thoroughly |
| Whole Milk 🥛 | 4 cups | Full-fat for creaminess |
| Unsalted Butter 🧈 | ½ cup | Cubed for easy melting |
| Granulated Sugar 🍚 | 1 tbsp | Balances savory notes |
| Kosher Salt 🧂 | 1 ½ tsp | Diamond Crystal preferred |
| Ground Black Pepper 🌶️ | ½ tsp | Freshly ground optimal |
| Large Eggs 🥚 | 2 whole | Lightly beaten for binding |
| All-Purpose Flour 🌾 | 2 tbsp | For thickening the mixture |
| Vanilla Extract 🌿 | 1 tsp | Pure extract recommended |
| Ground Nutmeg 🌰 | ¼ tsp | Freshly grated for best flavor |
| Raisins 🍇 | ½ cup | Optional, for sweetness |
| Chopped Fresh Parsley 🌿 | 2 tbsp | For garnish and color |
The rice is foundational—long-grain white gives the right texture. Whole milk is non-negotiable here; lower-fat versions thin the mixture. Use real butter (none of that margarine), and if you can source Amish-rolled butter from Hartville Kitchen or a local farm stand, even better. The eggs should be fresh, and Diamond Crystal kosher salt ensures even seasoning without overpowering.
No whole milk? Half-and-half cut with water works in a pinch. Out of nutmeg? A dash of cinnamon adds warmth. Skip the raisins if you prefer savory over sweet. The flour can be all-purpose or bread flour—both thicken well. For a richer dish, heavy cream can replace half the milk, though this strays from traditional Amish simplicity.
This keeps 3-4 days refrigerated, though it thickens as it cools. Reheat gently with a splash of milk. For long-term storage, freeze portions for up to 2 months—thaw overnight before reheating.
Why You’ll Love This Recipe
- One Pot Wonder: I love that this comes together in a single saucepan—just rice, milk, butter, sugar, and salt simmering away while I do other things.
- Creamy Sweet Comfort: The whole milk and butter make it rich, and that hint of sugar gives it a subtle sweetness that’s just right.
- Breakfast or Dessert: Honestly, it’s my go-to for a cozy morning or a simple after-dinner treat.
- Budget-Friendly Fill: A big batch costs pennies, and leftovers taste even better the next day.
Step-by-Step Instructions for Hartville Kitchen Hot Rice
This Amish-inspired method delivers creamy, comforting results with precise technique and traditional flavors.
Step 1: Prepare the Rice Base
Rinse the 2 cups Long-Grain White Rice thoroughly under cold water until the water runs clear. This removes excess starch and prevents the grains from clumping together during cooking.
Combine the rinsed rice with the 4 cups Whole Milk in a large, heavy-bottomed saucepan. The full-fat milk is essential for achieving that signature creamy texture that defines this dish.
Step 2: Create the Flavor Foundation
Add the 0.5 cup Unsalted Butter, 1 tbsp Granulated Sugar, 1.5 tsp Kosher Salt, and 0.5 tsp Ground Black Pepper to the rice and milk mixture. The butter should be cubed for even melting and distribution throughout the dish.
Place the saucepan over medium heat and bring to a gentle simmer, stirring frequently to prevent the milk from scorching. You’ll notice the butter beginning to melt and the sugar dissolving as the mixture heats.
Step 3: Thicken and Enrich the Mixture
In a separate bowl, whisk together the 2 whole Large Eggs, 2 tbsp All-Purpose Flour, 1 tsp Vanilla Extract, and 0.25 tsp Ground Nutmeg until smooth. This egg-flour mixture will thicken the dish and add richness.
Slowly pour the egg mixture into the simmering rice, stirring constantly with a wooden spoon. The mixture will begin to thicken almost immediately. Continue cooking for 15-20 minutes, stirring frequently, until the rice is tender and the mixture has the consistency of thick porridge.
Step 4: Incorporate Final Elements
Stir in the 0.5 cup Raisins during the last 5 minutes of cooking. The raisins will plump up as they absorb the creamy liquid, adding natural sweetness that balances the savory notes.
Watch for the mixture to pull away slightly from the sides of the pan and develop a smooth, pudding-like texture. This visual cue indicates it’s nearly done. Remove from heat when the rice is fully tender and the mixture has thickened to your desired consistency.
Step 5: Rest and Serve
Let the hot rice stand for 5 minutes off the heat. This resting period allows the flavors to meld together and the mixture to set slightly.
Garnish with the 2 tbsp Chopped Fresh Parsley just before serving. The parsley adds a fresh, vibrant contrast to the rich, creamy dish. Serve warm in bowls for a comforting, hearty meal that embodies traditional Amish cooking.
Pro Tips For Making Hartville Kitchen Hot Rice
- Pre-Rinse the Rice: Rinse the long-grain white rice under cold water until the water runs clear—I learned this the hard way after ending up with gummy pudding instead of creamy rice.
- Simmer, Don’t Boil: Keep the heat at a gentle simmer once you add the whole milk, or the dairy will scorch and ruin the smooth texture.
- Use Room-Temp Milk: Pull the whole milk out of the fridge 30 minutes early; cold milk slows down cooking and can make the rice take forever to soften.
- Stir Every 5 Minutes: Give it a quick stir every 5 minutes while cooking to prevent a thick skin from forming on the bottom—yes, even if you’re tempted to walk away.
Dietary Considerations for hartville kitchen hot rice
Gluten-Free Adaptation
For a gluten-free version, replace the 2 tbsp all-purpose flour with cornstarch or a gluten-free flour blend. I recommend Bob’s Red Mill 1:1 for best results. Mix the cornstarch with the eggs first to prevent clumping.
Dairy-Free Version
Swap the whole milk for full-fat coconut milk and use vegan butter like Miyoko’s. The texture will be slightly different but still creamy. Omit the vanilla extract if using flavored coconut milk.
Egg-Free Option
Replace the 2 eggs with 3 tbsp cornstarch mixed with 3 tbsp cold water to create a slurry. Add this slowly while stirring constantly. The dish will be slightly less rich but still delicious. 💪
Lower Sugar Variation
Reduce the granulated sugar to 1 tsp or omit entirely. The raisins add natural sweetness, so you won’t miss much. For extra depth, add ½ tsp cinnamon to enhance the warm spices.
Vegan Modifications
Combine the dairy-free and egg-free swaps for a fully vegan version. Use flax eggs (2 tbsp ground flaxseed + 6 tbsp water) if avoiding cornstarch. The dish will have a nuttier flavor but remains comforting.
Nut Allergy Note
This recipe is naturally nut-free, but always check labels on your milk and butter. For extra safety, use dedicated nut-free brands like Challenge Butter. Serve with confidence to those with nut allergies.
Nutrition Facts
Frequently Asked Questions
Can I use a different type of rice?
Long-grain white rice works best for this recipe. Jasmine or basmati are acceptable substitutes, but avoid instant or short-grain varieties as they can become mushy. The texture won’t be the same with brown rice either.
Why does the mixture need to rest before serving?
Resting for 5 minutes allows the starches to fully absorb the liquid, creating a creamier texture. It also lets the flavors meld together, making every bite more delicious. Don’t skip this step!
How can I prevent the milk from scorching?
Use a heavy-bottomed saucepan and cook over medium heat. Stir frequently, especially as the mixture thickens. If you notice any browning, lower the heat immediately.
Can I make this ahead of time?
Yes! Prepare the dish completely, then refrigerate for up to 3-4 days. Reheat gently on the stovetop with a splash of milk to restore creaminess.

- Ground Beef Rice and Beans Recipe: Slow-Simmered Savory Harmony - October 17, 2026
- Guyanese Fried Rice Recipe: Caribbean Spice With Wok-Charred Aromatics - October 17, 2026
- Hakka Thunder Tea Rice Recipe: Wok-Charred Herbal Infusion - October 17, 2026