
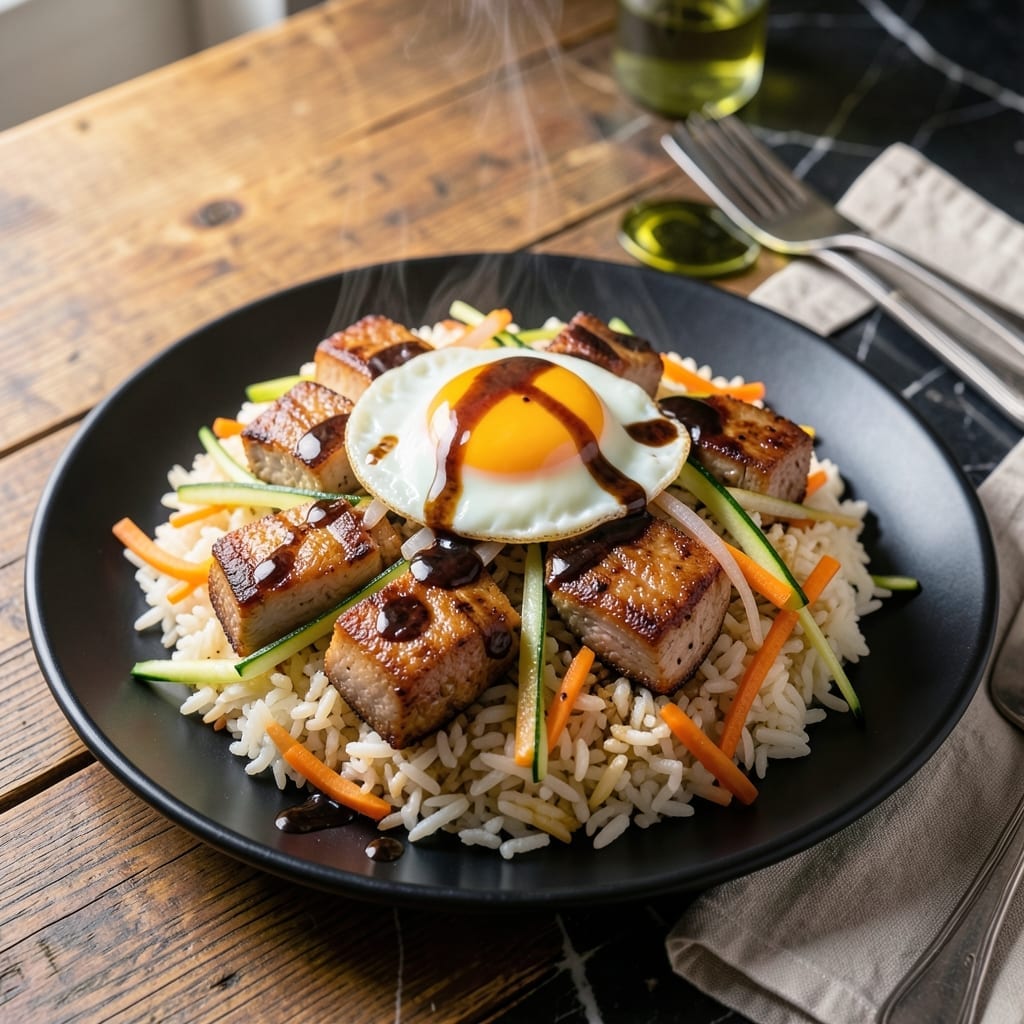
This hibachi-style fried rice brings the sizzle of the teppanyaki grill right to your kitchen. The secret lies in cooking the pork and rice separately before combining them for maximum flavor and texture.
I’ve refined this method to ensure every bite delivers tender pork, perfectly charred rice, and that signature smoky aroma. The key is high heat and a well-seasoned wok or skillet.
What you’ll get is a dish with restaurant-quality results—each grain of rice coated in savory sauce, studded with juicy pork and crisp vegetables. The flavor is bold, balanced, and deeply satisfying.
Ready to recreate that hibachi magic at home? Here’s how to make it happen.
Ingredients for Hibachi Pork Fried Rice
Simple ingredients for that sizzling hibachi flavor right at home.
| Ingredient | Amount | Notes |
|---|---|---|
| Pork Shoulder 🐖 | 1 lb | Cut into small cubes |
| White Rice 🍚 | 3 cups | Day-old, cooked |
| Large Eggs 🥚 | 2 whole | Beaten lightly |
| Carrots 🥕 | 2 whole | Diced into small pieces |
| Zucchini 🥒 | 1 whole | Diced into small pieces |
| Onion 🧅 | 1 whole | Finely diced |
| Garlic Cloves 🧄 | 3 cloves | Minced finely |
| Soy Sauce 🫙 | ¼ cup | Low-sodium preferred |
| Sesame Oil 🫒 | 1 tbsp | Toasted for best flavor |
| Vegetable Oil 🫒 | 2 tbsp | For high-heat cooking |
| Green Onions 🧅 | ½ cup | Sliced thinly for garnish |
| Salt 🧂 | ½ tsp | Adjust to taste |
| Black Pepper 🌶️ | ¼ tsp | Freshly ground preferred |
| Ginger Root 🌿 | 1 tbsp | Freshly grated |
The pork shoulder is non-negotiable here—boneless cuts from Costco or your local butcher work best. Look for good marbling to keep it tender during high-heat cooking. Day-old rice is key (fresh gets mushy), and I always use jasmine or short-grain for that sticky, slightly chewy texture. The veggies can be swapped, but keep them small and uniform so they char properly in the wok.
No pork? Chicken thighs cut small stay juicy and take the same cooking time. Short on rice? Leftover takeout rice works perfectly if it’s been in the fridge overnight. Soy sauce can be tamari for gluten-free, and if you’re out of sesame oil, a little extra vegetable oil plus a dash of toasted sesame seeds at the end gets you close. The ginger is worth grating fresh—powder just doesn’t hit the same.
Cooked pork keeps in the fridge for 3-4 days, but the rice is best used within 2 days (it dries out fast). The whole dish reheats well—just splash a little water and cover with a lid to steam the rice back to life. Freezes for up to 3 months if you’re meal prepping (that’s it).
Why You’ll Love This Recipe
- One Pan Wonder: I toss everything—pork, rice, veggies—into one pan and let the flavors mingle while I do the dishes.
- Umami Bomb: The pork shoulder soaks up all the soy and garlic, and those little charred bits from the zucchini? Ridiculously good.
- Weeknight Hero: Between us, this is my Tuesday night lifesaver—filling, fast, and my kids actually eat the carrots.
- Stretches Far: I make a double batch on purpose. The leftovers taste even better the next day, and it’s gentle on the grocery budget.
Step-by-Step Instructions for Hibachi Pork Fried Rice
Here’s the method that delivers that restaurant-quality char and tenderness at home.
Step 1: Cook and Season the Pork Shoulder
Heat 1 tbsp vegetable oil in a large skillet or wok over medium-high heat. Add the 1 lb pork shoulder cubes and cook for 5-6 minutes, stirring occasionally, until the pieces are browned on all sides and cooked through.
Season the pork with 0.5 tsp salt and 0.25 tsp black pepper as it cooks. The pork is done when it reaches an internal temperature of 145°F and the juices run clear. Remove the pork from the skillet and set aside—it’ll finish cooking when added back later.
Step 2: Scramble the Eggs and Sauté Vegetables
In the same skillet, add the remaining 1 tbsp vegetable oil and heat over medium-high heat. Pour in the 2 beaten large eggs and scramble quickly until just set but still slightly soft—about 1-2 minutes. Remove the eggs and set aside with the pork.
Add the onion, carrots, and zucchini to the skillet. Stir-fry for 4-5 minutes until the vegetables soften but still retain some bite. Add the 3 minced garlic cloves and 1 tbsp grated ginger root, cooking for 30 seconds until fragrant—don’t let them burn.
Step 3: Combine Everything with Sauce
Return the pork and eggs to the skillet with the vegetables. Add the 3 cups day-old cooked white rice, breaking up any clumps with your spatula. The rice should be cold and dry—this prevents the dish from becoming mushy.
Drizzle the 0.25 cup soy sauce and 1 tbsp sesame oil over everything. Stir-fry for 3-4 minutes until all ingredients are evenly distributed and the rice takes on a light golden color. Taste and adjust seasoning if needed.
The rice should develop a slight crispness where it contacts the hot skillet—this is the sizzling wok char you’re after. Keep the heat high and the ingredients moving constantly.
Step 4: Finish and Garnish
Once everything is heated through and the flavors have melded, remove from heat. The pork should be tender with no pink remaining, and the rice should have absorbed the sauce without becoming soggy.
Garnish with the 0.5 cup sliced green onions and give it one final toss. Serve immediately while hot—the texture is best right off the heat. Each bite should deliver tender pork, crisp-tender vegetables, and that signature hibachi char flavor.
Pro Tips For Making Hibachi Pork Fried Rice
- Chill the Rice: Use day-old, cold rice straight from the fridge—fresh rice turns mushy when stir-fried. I learned this the hard way after ruining two batches with warm, sticky grains.
- Small Pork Pieces: Cut the pork shoulder into ¼-inch cubes before cooking so it sears quickly and stays tender. Any larger and you’ll end up with chewy bits instead of that perfect hibachi texture.
- Scramble Eggs First: Push the scrambled eggs to one side of the pan before adding the pork and veggies—this keeps them soft and distinct instead of disappearing into the mix.
- High Heat Only: Crank the burner to max and work in batches if needed. After burning my first attempt on medium, I realized hibachi-style rice demands that smoky, high-heat char.
Perfect Pairings for hibachi pork fried rice
Beverage Pairings
An ice-cold Asian lager like Sapporo or Asahi cuts through the richness beautifully. The crisp, clean finish complements the savory soy and smoky pork. I always keep a few bottles chilled for fried rice nights. 🍺
Side Dish Ideas
A simple cucumber salad with rice vinegar and sesame seeds adds refreshing crunch. Toss 2 cups sliced cucumber with 1 tbsp vinegar and ½ tsp sugar. Alternatively, edamame sprinkled with sea salt makes a protein-packed starter.
Light Wine Options
For white wine lovers, a chilled Riesling with its citrus notes balances the dish’s saltiness. I prefer a dry German Kabinett. Avoid heavy, oaky whites that will compete with the bold flavors. The acidity cleanses your palate between bites.
Dessert Pairing
End with green tea ice cream for a traditional Japanese finish. The subtle bitterness contrasts the umami of the fried rice. I like Matcha Love brand for authentic flavor. Serve in small bowls to keep it light. 💛
Nutrition Facts
Frequently Asked Questions
Can I use fresh rice instead of day-old?
Fresh rice will turn mushy. Day-old has less moisture and fries up fluffier with that coveted char. Spread hot rice on a tray and refrigerate for 1 hour if you’re in a pinch.
What’s the best oil for high heat?
Use oils with a high smoke point like vegetable, canola, or peanut oil. Avoid olive oil—it burns at hibachi temps. Sesame oil is for finishing, not cooking.
How do I prevent the pork from drying out?
Cut pork into ½-inch cubes and cook in batches to avoid crowding. Remove from pan once it hits 145°F—it stays juicy when added back later.
Can I add other vegetables?
Try bell peppers, mushrooms, or snap peas. Keep pieces small and uniform so they char evenly in 4-5 minutes.

- Jollof Rice Sauce Recipe: West African Tomato and Spice Infusion - September 25, 2026
- Japanese Rice Soup Recipe: Umami-Rich Comfort in a Bowl - September 25, 2026
- Homemade Cream Of Rice Recipe: Silk-Smooth Breakfast in Minutes - September 25, 2026