
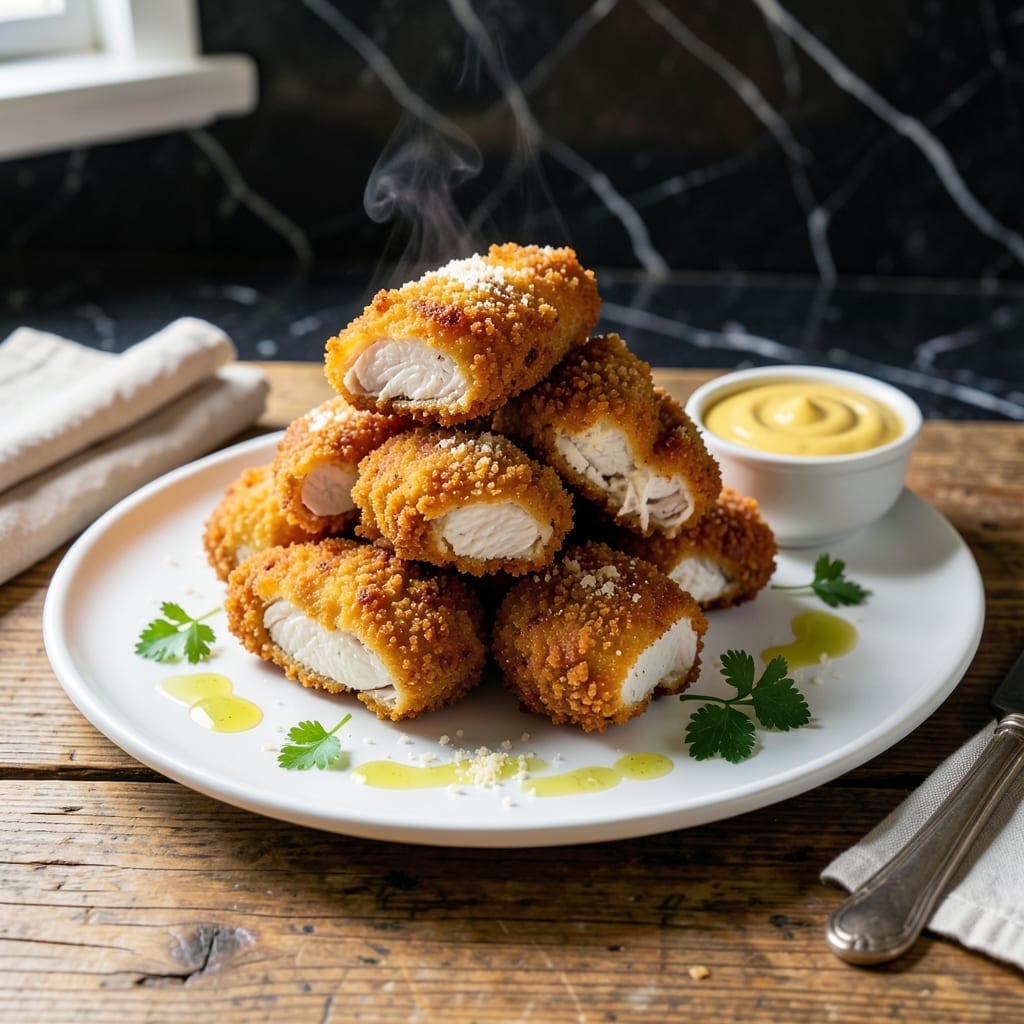
There’s nothing like the satisfaction of making chicken fingers from scratch, especially when they turn out golden, crispy, and packed with hidden nutrients. This method ensures a perfect crunch every time without deep frying.
The secret lies in a double-coating technique using panko breadcrumbs and a subtle veggie boost that even picky eaters won’t notice. Each bite delivers a tender interior with a shatteringly crispy exterior, all baked to perfection.
Ready in under 30 minutes, this recipe transforms a classic into something wholesome yet indulgent. The oven does most of the work, while you enjoy the anticipation of a meal that’s both fun and nourishing.
Serve with your favorite dipping sauces for a crowd-pleasing appetizer or a family-friendly dinner. Here’s how to make them.
Ingredients for Homemade Chicken Finger
Pantry staples, fresh chicken, and a clever veggie twist. Simple but brilliant.
| Ingredient | Amount | Notes |
|---|---|---|
| Boneless Skinless Chicken Breasts 🍗 | 1 ½ lb | Cut into 1-inch thick strips |
| Panko Breadcrumbs 🍞 | 2 cups | For extra crispy texture |
| All-Purpose Flour 🌾 | ¾ cup | For first coating layer |
| Large Eggs 🥚 | 2 whole | Beaten for egg wash |
| Grated Parmesan Cheese 🧀 | ½ cup | Freshly grated preferred |
| Garlic Powder 🧄 | 1 tsp | For seasoning breading |
| Onion Powder 🧅 | 1 tsp | For seasoning breading |
| Paprika 🌶️ | ½ tsp | Adds color and depth |
| Salt 🧂 | 1 tsp | Divided for seasoning steps |
| Black Pepper 🌶️ | ½ tsp | Freshly ground preferred |
| Finely Grated Carrots 🥕 | ½ cup | Hidden veggie boost |
| Finely Grated Zucchini 🥒 | ½ cup | Squeeze out excess moisture |
| Olive Oil 🫒 | 3 tbsp | For baking sheet coating |
| Cooking Spray 💨 | 1 can | For crispy finish |
The panko is non-negotiable here—Kikkoman or Progresso brands have the best crunch. I grab mine from Whole Foods in bulk (cheaper and you control the quantity). For chicken, organic, air-chilled breasts stay juicier, but any boneless, skinless will work. The Parmesan? Freshly grated melts better than pre-shredded (which has anti-caking agents that make it clumpy). Look for good marbling if you’re buying whole breasts to cut yourself.
No panko? Crush cornflakes or Ritz crackers for a similar crunch. Out of fresh Parm? Pecorino Romano at half the amount works too. The veggie boost can be finely grated sweet potato or butternut squash if you’re out of carrots or zucchini. Skip the egg wash? Buttermilk or Greek yogurt thinned with a splash of water does the trick. The garlic and onion powder can be swapped for 1 tbsp fresh minced garlic and onion if you prefer.
Bread the chicken right before baking—it loses crispness if left sitting. Leftovers keep 3-4 days in the fridge (reheat in oven or air fryer to revive crunch). Freeze unbaked fingers for up to 3 months on a tray first, then transfer to a bag. Perfect for quick meals later.
Why You’ll Love This Recipe
- One Pan Wonder: I just coat, bake, and serve—no greasy stovetop mess, and the panko does all the crispy work for me.
- That Parmesan Crunch: The grated parmesan mixed with panko gives these fingers a salty, golden crust that’s honestly addictive.
- Kid-Approved Classic: My picky nephew devours these, and they’re just as good in lunches the next day as they are fresh out of the oven.
- Budget Stretcher: Boneless chicken breasts go further when cut into strips, and a little parmesan makes them taste way fancier than they are.
Step-by-Step Instructions for Panko-Crusted Chicken Fingers
Here’s how I get that perfect crunch with a sneaky veggie boost every time.
Step 1: Prep Chicken and Hidden Veggies
Cut the 1.5 lb boneless skinless chicken breasts into 1-inch thick strips. Pat them completely dry with paper towels—this ensures the coating sticks properly. Season lightly with ½ tsp salt and ¼ tsp black pepper.
Place the ½ cup finely grated carrots and ½ cup finely grated zucchini in a clean kitchen towel. Squeeze out all excess moisture over the sink. This prevents a soggy coating and keeps the breading crisp. Mix the squeezed veggies into the 2 cups panko breadcrumbs—they’ll disappear into the crunch.
Step 2: Set Up Breading Station
In a shallow dish, combine the 0.75 cup all-purpose flour with remaining ½ tsp salt, ¼ tsp black pepper, 1 tsp garlic powder, 1 tsp onion powder, and ½ tsp paprika. This seasoned flour adds flavor at every layer.
In another shallow dish, beat the 2 whole large eggs until uniform. In a third dish, mix the veggie-infused 2 cups panko breadcrumbs with ½ cup grated parmesan cheese. The parmesan melts into the coating, adding a savory depth that takes these chicken fingers to the next level.
Step 3: Bread the Chicken Fingers
Working one piece at a time, dredge each chicken strip in the seasoned flour, shaking off excess. Dip it into the beaten eggs, letting any excess drip off. Then press it firmly into the panko-parmesan mixture, turning to coat completely. I like to press the crumbs into the chicken to ensure maximum adhesion.
Place breaded fingers on a plate and let them rest for 5-10 minutes. This helps the coating set. Meanwhile, preheat your oven to 400°F and line a baking sheet with parchment paper. Drizzle the 3 tbsp olive oil over the parchment and spread evenly.
Step 4: Bake to Golden Perfection
Arrange the chicken fingers on the prepared baking sheet in a single layer, leaving space between each piece so they crisp up rather than steam. Lightly mist the tops with cooking spray—this promotes even browning without needing to flip.
Bake for 12-15 minutes, then flip each piece and bake for another 8-10 minutes until they’re golden brown and the internal temperature reaches 165°F. The coating should be crisp to the touch and the chicken juicy inside. For extra crunch, broil for the last 1-2 minutes, watching closely to prevent burning.
Step 5: Rest and Serve
Let the chicken fingers rest on the baking sheet for 5 minutes after removing them from the oven. This allows the juices to redistribute, keeping the meat moist. The coating will firm up slightly as it cools, making it easier to handle.
Serve warm with your favorite dipping sauces. The hidden veggies add moisture and a subtle sweetness that pairs perfectly with the savory parmesan and crispy panko. These disappear faster than I can make them, so consider doubling the batch for leftovers.
Pro Tips For Making Homemade Chicken Finger
- Cut Even Strips: Slice the chicken breasts into uniform 1-inch thick strips—this guarantees even cooking and a consistent crunch in every bite.
- Double Dredge: Dip each strip in flour, egg, then panko, but repeat the egg and panko step for a thicker, crispier crust that actually stays put.
- Skip Wet Chicken: Pat the chicken dry with paper towels before dredging—I learned this the hard way after my first batch of soggy, sliding-off breading.
- Add Parmesan Early: Mix the grated Parmesan directly into the panko before coating; it melts into the crust and adds a salty depth that sprinkling it on after just can’t match.
Common Mistakes When Making Perfect Results
Overcrowding the Pan
Never place chicken fingers too close together on the baking sheet. They need 1-2 inches of space between each piece to crisp properly. Crowding causes steam buildup, resulting in soggy breading instead of that perfect crunch. I learned this the hard way my first attempt! 🔥
Skipping the Drying Step
Always pat the chicken strips completely dry before breading. Excess moisture creates a barrier between the meat and coating, preventing proper adhesion. Use paper towels and press firmly—this takes 30 seconds but makes all the difference.
Uneven Coating Thickness
Apply even pressure when pressing the panko mixture onto each strip. Thin spots burn easily while thick areas stay undercooked. Aim for a uniform ¼-inch layer of breading on all sides. I find pressing the crumbs in with my fingertips gives the best results.
Not Preheating the Oven
Start with a fully preheated 400°F oven for consistent cooking. Adding chicken to a cool oven leads to uneven browning and longer cook times. My oven takes about 15 minutes to reach temperature—use that time to finish breading.
Skipping the Rest Period
Let breaded fingers rest for 5-10 minutes before baking. This allows the coating to set and adhere better to the chicken. Skipping this step often results in breading that slides off during cooking. Patience pays off here!
Forgetting to Flip
Always flip the fingers halfway through baking for even crispiness. Bake for 12-15 minutes first, then flip and bake 8-10 minutes more. This ensures both sides get that golden-brown finish without overcooking the chicken inside. 💡
Nutrition Facts
Frequently Asked Questions
Can I use regular breadcrumbs instead of panko?
Yes, but panko gives the best crunch. For a substitute, use 1.5 cups regular breadcrumbs mixed with ½ cup crushed cornflakes for extra crispiness. The texture won’t be identical, but it’ll still be delicious.
How do I know when they’re fully cooked?
The internal temperature should reach 165°F on a meat thermometer. Visually, look for golden-brown breading and clear juices when pierced. Never guess—undercooked chicken is unsafe.
Can I make these ahead of time?
Bread the fingers and freeze on a tray for 1 hour, then transfer to a bag. Bake from frozen, adding 5-7 minutes to the cook time. No need to thaw!
Why did my breading fall off?
This usually happens if the chicken wasn’t dry or didn’t rest after breading. Always pat strips completely dry and let them rest for 5-10 minutes before baking. Press crumbs firmly onto each piece.

- Jollof Rice Sauce Recipe: West African Tomato and Spice Infusion - September 25, 2026
- Japanese Rice Soup Recipe: Umami-Rich Comfort in a Bowl - September 25, 2026
- Homemade Cream Of Rice Recipe: Silk-Smooth Breakfast in Minutes - September 25, 2026