
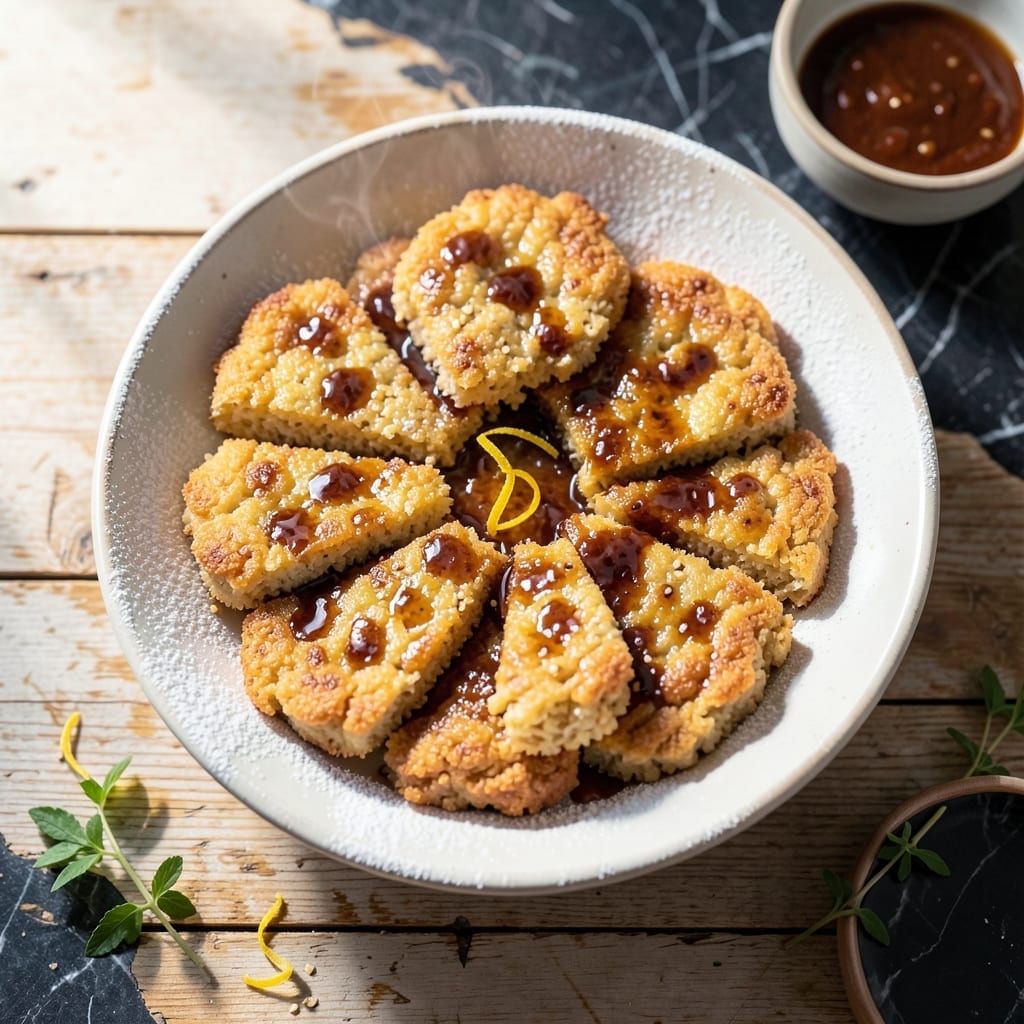
This homemade recipe transforms simple rice into crispy, airy cakes with minimal effort. I developed this method after years of experimenting with texture and cooking times.
The secret lies in using pre-cooked rice and achieving the perfect balance of moisture and heat. These bites come together in minutes, making them ideal for a quick snack or elegant appetizer.
You’ll end up with golden, crispy puffed rice cakes that are light as air on the inside. Their delicate texture and neutral flavor make them versatile for both sweet and savory toppings.
Perfect for entertaining or enjoying as a wholesome treat. Here’s how to make them at home.
Ingredients for Homemade Puffed Rice Cake
Simple pantry staples create these golden, airy rice cakes with effortless ease.
| Ingredient | Amount | Notes |
|---|---|---|
| Cooked White Rice 🍚 | 3 cups | Day-old, chilled preferred |
| Rice Vinegar 💧 | 1 tbsp | For slight tang |
| Soy Sauce 🫕 | 1 tsp | Low-sodium or tamari |
| Sesame Oil 🫒 | ½ tsp | Toasted for aroma |
| Cornstarch 🌾 | 2 tbsp | For binding and crispness |
| Water 💧 | 2 tbsp | For moisture balance |
| Neutral Oil 🫒 | ½ cup | For frying, like avocado or vegetable |
| Sea Salt 🧂 | ½ tsp | Fine grain for even seasoning |
| Garlic Powder 🧄 | ¼ tsp | Optional for savory flavor |
| Onion Powder 🧅 | ¼ tsp | Optional for depth |
| Sugar 🍚 | ½ tsp | Optional for sweet variation |
| Nori Sheets 🌿 | 2 sheets | Crushed, for garnish |
The rice is everything here. Day-old, chilled white rice (jasmine or short-grain) gives the best texture—freshly cooked is too moist. Trader Joe’s or any Asian market will have great options. For the oil, avocado or vegetable oil works best for high-heat frying. Avoid extra-virgin olive oil here; its low smoke point makes it unsuitable for the crisping process.
No rice vinegar? Apple cider vinegar at half the amount works in a pinch. For gluten-free, swap soy sauce for tamari or coconut aminos. The cornstarch is non-negotiable—it’s what gives these cakes their signature crispness. Want to experiment? Arrowroot powder can replace cornstarch, but the texture will differ slightly. Skip the sugar if you’re going savory, or add a pinch of cinnamon for warmth.
These keep 3-4 days in an airtight container at room temperature, though they’re best eaten fresh. To reheat, pop them in a 350°F oven for 5 minutes to restore crispness. Freezing isn’t recommended—it ruins the airy texture you worked so hard to achieve.
Why You’ll Love This Recipe
- One Bowl Wonder: I just dump cooked rice, a splash of rice vinegar, and soy sauce in a bowl, mix, and shape—no fancy equipment needed.
- Umami Bomb: Sesame oil and soy sauce give these cakes that deep, savory richness that makes them irresistibly moreish.
- Party or Snack: I serve these as appetizers for guests or pack them in lunchboxes for the kids—equally loved both ways.
- Budget Stretcher: Honestly, leftover rice turns into something special here, and a little cornstarch makes it crispy without extra cost.
Step-by-Step Instructions for Homemade Puffed Rice Cakes
Transform day-old rice into crispy, airy bites with this precise frying technique.
Step 1: Prepare the Rice Mixture
Combine the 3 cups Cooked White Rice with 1 tbsp Rice Vinegar, 1 tsp Soy Sauce, 0.5 tsp Sesame Oil, 0.5 tsp Sea Salt, 0.25 tsp Garlic Powder, 0.25 tsp Onion Powder, and 0.5 tsp Sugar in a large bowl. The vinegar and soy sauce add subtle depth while the sesame oil provides its signature aroma.
In a small bowl, whisk together the 2 tbsp Cornstarch and 2 tbsp Water until smooth, then fold this slurry into the rice mixture. The cornstarch acts as a binder and ensures the cakes hold their shape while achieving that desirable crispness upon frying.
Step 2: Form the Rice Cakes
Divide the seasoned rice mixture into 8 equal portions (about ⅓ cup each). Shape each portion into a compact, flat disc approximately ½-inch thick and 2½ inches wide. Press firmly to eliminate air pockets, which can cause the cakes to break apart during frying.
For best results, chill the formed cakes in the refrigerator for 15-20 minutes. This resting period allows the cornstarch to fully hydrate and the rice to adhere, creating a more stable structure that will puff beautifully when fried.
Step 3: Fry to Golden Perfection
Heat the ½ cup Neutral Oil in a deep skillet or Dutch oven over medium-high heat until it reaches 350°F. To test the temperature, drop in a small piece of rice—if it sizzles immediately and floats to the surface, the oil is ready.
Carefully slide 2-3 rice cakes into the hot oil, being careful not to overcrowd the pan. Fry for 3-4 minutes per side until deep golden brown and visibly puffed. The cakes should rise slightly as moisture turns to steam, creating that signature airy texture.
Step 4: Drain and Garnish
Using a slotted spoon, transfer the fried rice cakes to a paper towel-lined plate to drain excess oil. The paper towels absorb any residual grease while maintaining the crisp texture you’ve worked to achieve.
While still warm, crush the 2 sheets Nori Sheets into small flakes and sprinkle over the puffed rice cakes. The nori adds a subtle oceanic note that complements the savory-sweet balance of the cakes. Serve immediately while hot and crispy.
Pro Tips For Making Homemade Puffed Rice Cake
- Chill the Rice: Use day-old, refrigerated cooked white rice—it’s drier and binds better than fresh, preventing a gummy texture. I learned this the hard way after my first batch turned into a sticky mess.
- Toast the Cornstarch: Lightly toast the cornstarch in a dry pan for 1-2 minutes before mixing it in; it removes the raw taste and gives the cakes a subtle nuttiness.
- Skip the Overmixing: Stir the rice mixture just until combined—overworking it releases too much starch and makes the cakes dense instead of crispy.
- Press Firmly: When shaping, pack the rice mixture tightly into the mold or pan (about 1-inch thick) so the cakes hold together when fried. Sounds obvious, but loose patties fall apart.
Regional Styles of This homemade puffed rice cake
Korean Tteok Style
In Korea, these become tteok with a chewy texture. Use short-grain rice for authenticity, and add 1 tsp gochugaru (Korean chili flakes) to the mixture for a subtle kick. Serve with kimchi or soy dipping sauce. 🌶️
Japanese Senbei
Japanese versions are thinner and crispier, like senbei. Press the rice mixture into ¼-inch thick discs and fry at 340°F for 2-3 minutes per side. Brush with soy sauce mixed with mirin for glossy finish.
Indian Poha Chivda
In India, flattened rice is used for chivda. Skip frying and toast flattened rice in 2 tbsp oil with ½ tsp turmeric and ½ tsp cumin seeds until golden. This creates a spiced, crunchy snack mix. 💛
Thai Khao Krub
Thai-style khao krub uses jasmine rice and adds 1 tbsp coconut milk to the mixture for richness. Shape into small balls and fry until puffed. Serve with sweet chili sauce for dipping.
Chinese Nian Gao
For a sweet version, mix in 2 tbsp brown sugar and 1 tsp ginger. Fry until golden, then glaze with honey while warm. These are especially popular during Lunar New Year celebrations.
Nutrition Facts
Frequently Asked Questions
Can I use fresh rice instead of day-old?
Day-old rice works best because it’s drier, which helps achieve that crisp texture. Fresh rice is too moist and may fall apart. If you must use fresh, spread it on a tray and refrigerate for 1-2 hours first.
Why didn’t my rice cakes puff?
They need proper heat and moisture balance. Ensure oil is at 350°F and don’t overcrowd the pan. Also, pressing out all air pockets when shaping prevents uneven cooking.
Can I bake instead of fry?
Baking at 400°F for 20-25 minutes works, but the texture will be less crispy. Brush with oil and flip halfway for even browning. Frying still gives the best puff and crunch.
How do I make them gluten-free?
Swap soy sauce for tamari or coconut aminos. Ensure all other ingredients, like vinegar and cornstarch, are certified gluten-free. The rest of the recipe remains the same.

- Jollof Rice Sauce Recipe: West African Tomato and Spice Infusion - September 25, 2026
- Japanese Rice Soup Recipe: Umami-Rich Comfort in a Bowl - September 25, 2026
- Homemade Cream Of Rice Recipe: Silk-Smooth Breakfast in Minutes - September 25, 2026