
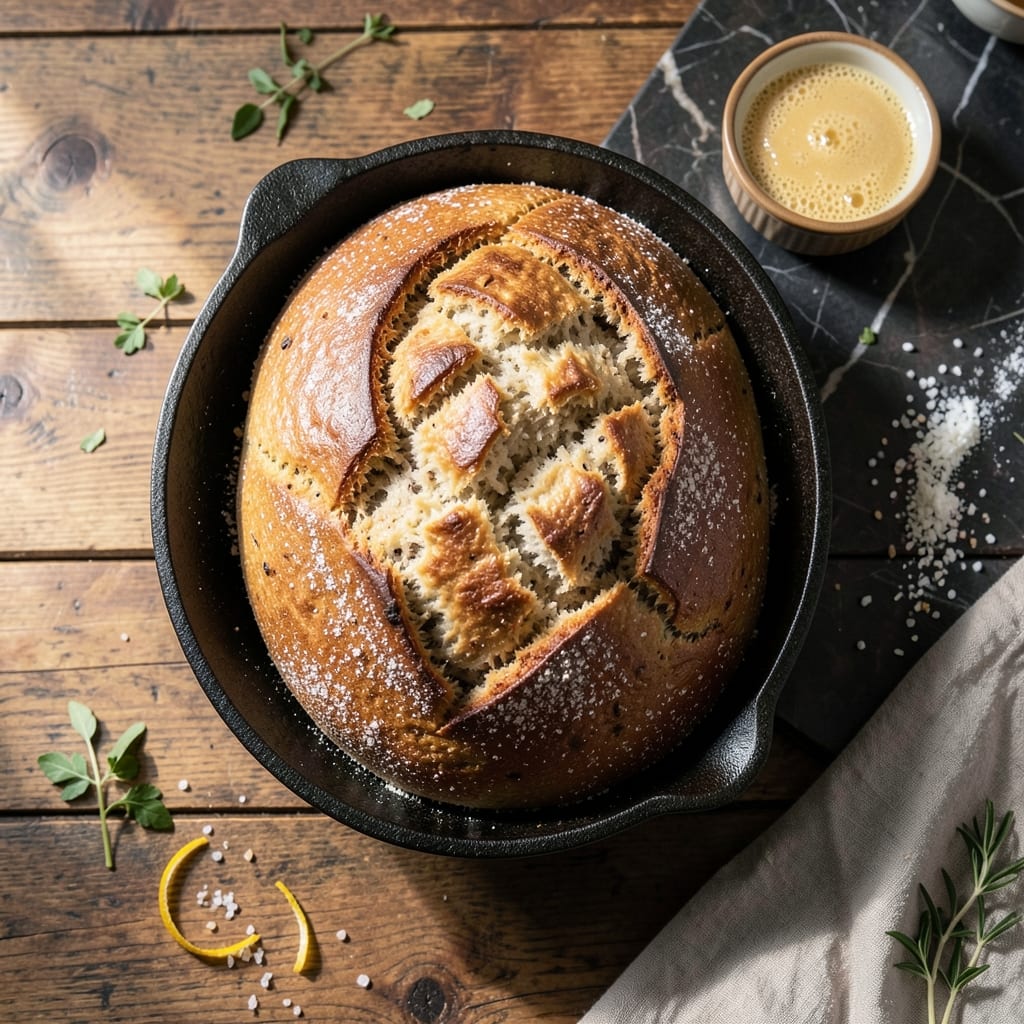
This gluten-free rice bread delivers homemade quality with a light, airy texture that rivals traditional loaves. The secret lies in a precise blend of rice flour and binding agents that create structure without gluten.
I developed this recipe after years of testing gluten-free alternatives, focusing on achieving proper rise and softness. The proofing step is crucial—don’t rush it, as it ensures maximum fluffiness.
What emerges from the oven is a golden loaf with a tender crumb and slightly crisp crust. It holds together beautifully for sandwiches and toasts like a dream.
Perfect for those avoiding gluten but unwilling to compromise on texture or flavor. Here’s how to make it.
Ingredients for Homemade Rice Bread
Precision matters here—these gluten-free staples create structure without compromise.
| Ingredient | Amount | Notes |
|---|---|---|
| White Rice Flour 🌾 | 2 ½ cups | Fine grind, not coarse |
| Brown Rice Flour 🌾 | 1 cup | Adds depth of flavor |
| Tapioca Starch 🌾 | ½ cup | For elasticity and chew |
| Xanthan Gum 🧪 | 1 tsp | Essential binder for structure |
| Active Dry Yeast 🍞 | 2 ¼ tsp | One packet, proofed until foamy |
| Granulated Sugar 🧈 | 2 tbsp | Feeds the yeast for rise |
| Salt 🧂 | 1 tsp | Fine sea salt preferred |
| Warm Water 💧 | 1 ½ cups | 110°F, divided for yeast and dough |
| Unsweetened Applesauce 🍎 | ½ cup | Vegan egg substitute for moisture |
| Olive Oil 🫒 | 2 tbsp | Light or extra-virgin for richness |
| Apple Cider Vinegar 🍏 | 1 tbsp | Enhances rise and texture |
| Psyllium Husk Powder 🌿 | 2 tbsp | Key for binding and structure |
The rice flours are non-negotiable for authentic texture. Bob’s Red Mill offers consistent quality, but Authentic Foods produces superior results for serious bakers. Xanthan gum and psyllium husk powder act as the structural backbone—skip neither. Proofing the yeast is critical; water at 110°F activates it perfectly without killing the culture.
No psyllium husk powder? Ground flaxseed at one-third the amount works in a pinch but alters texture slightly. Brown rice flour can be swapped for white, though the nuttier flavor is noticeable. For sweeter bread, maple syrup replaces sugar at one-to-one. The vinegar is subtle—white vinegar substitutes fine.
Store flours in the freezer to prevent rancidity—lasts 6-12 months. Baked loaves keep wrapped at room temperature for 3 days, or freeze slices for 3 months (toast straight from frozen).
Why You’ll Love This Recipe
- I’ll be real: it stays soft for days, so I can bake once and pack lunches all week without a dry crumb in sight.
- Mix and Rise: I just dump the rice flours, tapioca starch, xanthan gum, and yeast in one bowl—no fancy steps, and it’s ready to proof.
- Warm, Nutty Bite: The brown rice flour gives it this cozy, almost toasted flavor that makes every slice feel like a hug.
- Gluten-Free Hero: Honestly, it’s my go-to for sandwiches, toast, or even as a base for mini pizzas—no gluten, all satisfaction.
Step-by-Step Instructions for Homemade Rice Bread
Master the technique for perfect gluten-free bread with a soft, airy crumb and golden crust.
Step 1: Proof the Yeast and Activate Binders
In a small bowl, combine the 2.25 tsp Active Dry Yeast, 2 tbsp Granulated Sugar, and ½ cup of the 1.5 cups Warm Water. Stir gently and let sit for 5-7 minutes until the mixture becomes foamy and bubbly—this confirms your yeast is active.
Meanwhile, in a large mixing bowl, whisk together the 2 tbsp Psyllium Husk Powder with the remaining 1 cup Warm Water. Let this gel for 2-3 minutes until it thickens to a pudding-like consistency. The psyllium acts as a critical binder in gluten-free baking, mimicking the elasticity of gluten.
Step 2: Combine Dry Ingredients for Structure
In a separate bowl, sift together the 2.5 cups White Rice Flour, 1 cup Brown Rice Flour, 0.5 cup Tapioca Starch, 1 tsp Xanthan Gum, and 1 tsp Salt. This blend creates the perfect texture balance: the white rice flour provides a light base, while the brown rice flour adds depth and the tapioca starch contributes chewiness.
The xanthan gum is non-negotiable—it replaces the gluten network that would otherwise hold the bread together. Without it, your loaf may crumble. Whisk these dry ingredients thoroughly to ensure even distribution, as clumps can lead to dense pockets in the finished bread.
Step 3: Form the Dough and First Rise
Pour the proofed yeast mixture and the psyllium gel into the bowl with the dry ingredients. Add the 0.5 cup Unsweetened Applesauce, 2 tbsp Olive Oil, and 1 tbsp Apple Cider Vinegar. The vinegar enhances the rise and improves the crumb structure, while the applesauce adds moisture without additional fat.
Mix with a wooden spoon or dough whisk for 2-3 minutes until the batter is smooth and slightly sticky. Unlike traditional bread dough, this will be more like a thick cake batter. Cover the bowl with a damp towel and let rise in a warm place for 45-60 minutes, or until the dough has doubled in volume and is bubbly.
Step 4: Second Rise and Preparation for Baking
Grease a 9×5-inch loaf pan with a bit of the Olive Oil or line it with parchment paper. Transfer the risen dough into the pan, smoothing the top with a wet spatula to prevent sticking. Cover again and let rise for a second time for 30-45 minutes, or until the dough domes 1-2 inches above the rim of the pan.
Preheat your oven to 375°F during the last 15 minutes of the rise. This ensures the oven reaches the correct temperature just as your dough is ready, preventing overproofing. The second rise is crucial for developing the air pockets that create a light, fluffy texture in the finished loaf.
Step 5: Bake to Golden Perfection
Bake the loaf on the center rack for 50-60 minutes, or until the top is deep golden brown and the internal temperature reaches 205-210°F. If the top browns too quickly, tent the pan loosely with aluminum foil to prevent burning while the interior finishes cooking.
Remove the bread from the oven and let it cool in the pan for 10 minutes. Then, transfer it to a wire rack to cool completely for at least 1 hour before slicing. This cooling period allows the structure to set, ensuring clean, even slices without gumminess. The finished loaf should have a tender crumb and a slightly crisp crust.
Pro Tips For Making Homemade Rice Bread
- Proof the Yeast: I learned this the hard way—always activate your dry yeast in warm (110°F) water with a pinch of sugar for 5-10 minutes before mixing. If it doesn’t bubble, your bread won’t rise, no matter how long you wait.
- Chill the Dough: After mixing, let the dough rest in the fridge for 30 minutes. This makes it easier to handle and prevents the rice flours from getting gummy during shaping.
- Skip Cold Eggs: Sounds weird, but it works: use room-temperature eggs if your recipe calls for them. Cold eggs can cause the xanthan gum to clump, leaving you with a dense, uneven texture.
- Bake Low and Slow: Resist the urge to crank the oven high—rice bread does best at 350°F for 45-50 minutes. Any hotter and the outside burns before the inside cooks through.
Essential Equipment for Great homemade rice bread
Mixing Bowls
I recommend using large stainless steel mixing bowls for this recipe. They’re durable, easy to clean, and provide ample space for the dough to rise. A 5-quart bowl works perfectly for this volume of ingredients.
Measuring Tools
Precision is key with gluten-free baking. Use dry measuring cups for flours and liquid measuring cups for water and oil. A kitchen scale is even better for accuracy, especially with ingredients like xanthan gum.
Whisk and Spoons
A dough whisk is ideal for mixing the batter—it prevents lumps and handles the thick consistency better than a regular whisk. Keep a wooden spoon on hand for scraping down the sides of the bowl.
Loaf Pan
Use a 9×5-inch loaf pan for the best rise and structure. I prefer light-colored metal pans for even baking. Grease it well or line with parchment paper to prevent sticking. 🔥
Proofing Setup
Create a warm, draft-free environment for rising. I turn my oven to 100°F, then turn it off and place the bowl inside. A damp towel over the bowl prevents the top from drying out.
Cooling Rack
A wire cooling rack is essential for proper airflow around the loaf. This prevents the bottom from becoming soggy as it cools. Let the bread cool completely before slicing for the best texture.
Nutrition Facts
Frequently Asked Questions
Can I use only white rice flour?
Yes, but the texture will be less complex. Brown rice flour adds depth and structure, but you can replace it with white in a pinch. Expect a slightly lighter color and milder flavor.
Why does the dough look like cake batter?
Gluten-free breads often have a thicker, stickier consistency. The psyllium husk and xanthan gum create the necessary structure without gluten. Trust the process—it bakes into a proper loaf!
How do I know when it’s fully baked?
Check for a deep golden crust and internal temperature of 205-210°F. If the top browns too fast, tent with foil and continue baking. Cooling completely ensures clean slices.
Can I make this without a loaf pan?
Use a 9-inch round cake pan or shape into rolls, but adjust baking time. A loaf pan provides the best rise and structure. Avoid glass pans—they can overbrown the crust.

- Iranian Jeweled Rice Recipe: Saffron-Infused Celebration on a Plate - October 19, 2026
- Jimmy Dean Sausage and Rice Recipe: Hearty One-Pot Savory Delight - October 19, 2026
- Indian Jasmine Rice Recipe: Fragrant Basmati-Free Elegance - October 19, 2026