
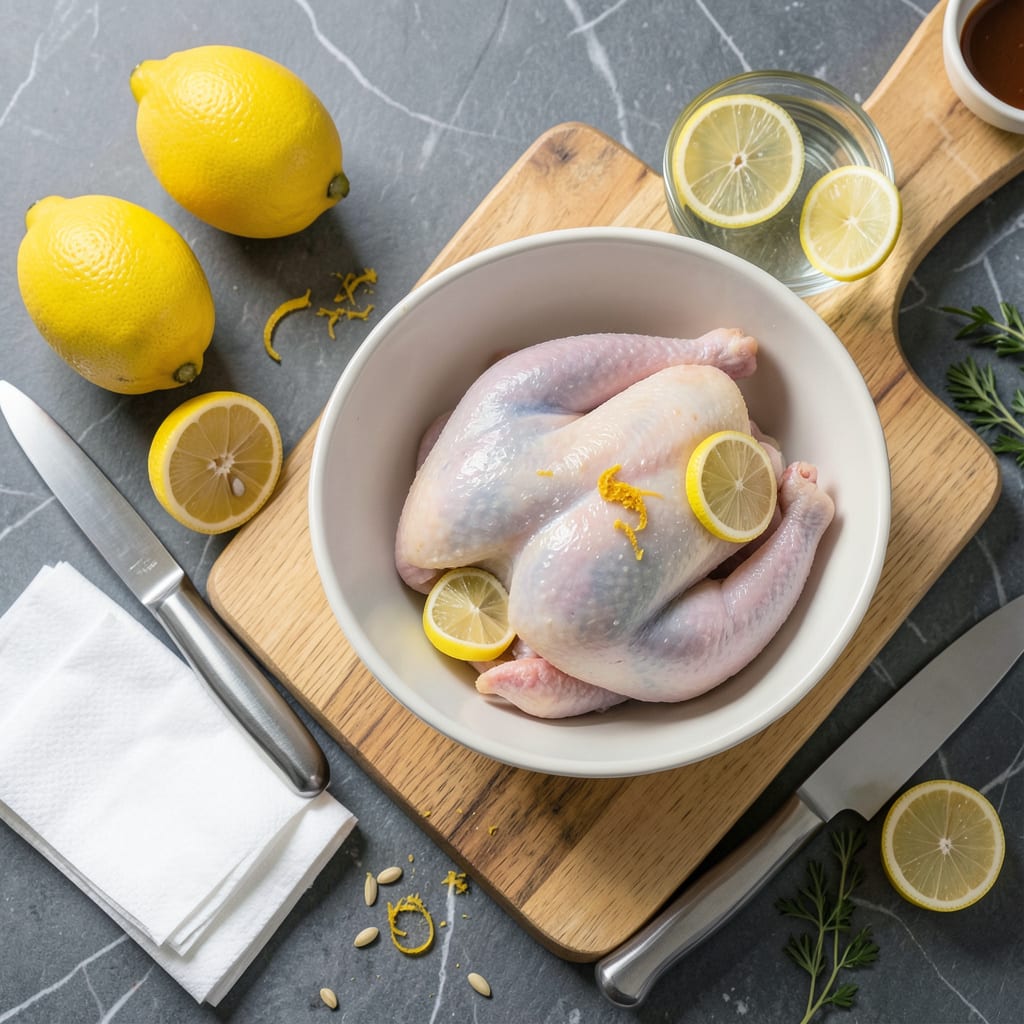
Cleaning raw chicken properly is one of the most important steps in food safety—yet many home cooks overlook this critical preparation. Using lemon as a natural disinfectant not only helps remove bacteria but also eliminates unpleasant odors while adding subtle brightness to your final dish. This method has been trusted for generations in many cultures as a safer alternative to plain water rinsing.
The process is straightforward but precise: a thorough rinse, a lemon juice wash, and proper drying create a cleaner surface before cooking. Unlike vinegar or chemical washes, lemon’s natural acidity effectively breaks down contaminants without leaving harsh residues. The technique takes less than 5 minutes and significantly reduces cross-contamination risks when handled correctly.
What makes this method particularly valuable is how it prepares chicken for cooking. The slight acidity helps tenderize the meat while the citrus aroma neutralizes any gamey notes. This creates an ideal foundation for dishes like lemon-herb roasted chicken or grilled lemon pepper chicken, where the prep method enhances the final flavor.
Whether you’re preparing whole chicken, breasts, or thighs, this natural cleaning approach ensures safer handling and better-tasting results. The difference in both safety and flavor will change how you prepare poultry moving forward.
📚 In This Guide
- What You’ll Need
- Instructions
- Tips and Common Mistakes
What Youll Need
- ● 1 whole chicken (or 2-4 lbs of chicken pieces—legs, thighs, breasts, or wings)
- ● 2-3 fresh lemons (organic preferred, for extra juice and zest)
- ● 1-2 tablespoons of salt (kosher or sea salt works best for scrubbing)
- ○ 1 tablespoon of white vinegar (optional, for extra disinfection)
- ● 1 sharp knife (or kitchen shears for trimming excess fat)
- ● 1 cutting board (preferably plastic or glass for easy sanitizing)
- ● 1 large bowl or colander (for rinsing)
- ● 1 clean kitchen towel or paper towels (for patting dry)
- ○ 1 lemon squeezer or reamer (optional, for easier juicing)
- ○ 1 pair of disposable gloves (optional, for hygiene)
- ● Cold running water (for thorough rinsing)
Instructions for Cleaning Chicken With Lemon
This method ensures thorough cleaning while maintaining food safety standards throughout the process.
Prepare Your Workspace and Ingredients
Begin by sanitizing your workspace with hot, soapy water, then rinse with clean water. Gather all necessary items: whole lemons, a sharp knife, a cutting board, a large bowl, and paper towels. I recommend using a dedicated cutting board for raw poultry to prevent cross-contamination.
Wash your hands thoroughly with warm water and antibacterial soap for at least 20 seconds before handling the chicken. This initial preparation is crucial for maintaining food safety throughout the cleaning process. The USDA recommends this duration specifically to eliminate potential bacteria.
Create the Lemon Cleaning Solution
Cut 2-3 lemons in half crosswise to expose the maximum flesh surface. The natural citric acid in lemon acts as a mild disinfectant while helping to neutralize odors. Squeeze the lemon halves into a large bowl, then add the spent lemon halves to the bowl as well.
Fill the bowl with cold water until it’s about three-quarters full. The cold temperature helps maintain the chicken’s texture while cleaning. Stir the solution gently to distribute the lemon juice evenly. The ideal ratio is approximately 1 cup of lemon juice per gallon of water for optimal cleaning effectiveness.
Clean the Chicken Thoroughly
Submerge the whole chicken in the lemon water solution, ensuring all surfaces are completely covered. Use your hands to gently rub the chicken, paying particular attention to the cavity and skin folds where bacteria often accumulate. The lemon’s natural acidity helps break down surface contaminants.
Let the chicken soak in the solution for 5-10 minutes. This duration allows the citric acid sufficient time to work without beginning to “cook” the chicken’s surface proteins. During this time, you’ll notice the water becoming slightly cloudy as it lifts impurities from the chicken’s surface.
Rinse and Pat Dry
Remove the chicken from the lemon solution and discard the used water. Rinse the chicken thoroughly under cold running water for at least 1 minute, ensuring all lemon residue and loosened contaminants are completely removed. The rinsing process should be comprehensive, covering all surfaces.
Pat the chicken dry with clean paper towels, pressing gently but firmly to remove all surface moisture. Proper drying is essential as it inhibits bacterial growth and ensures better cooking results. The chicken should feel slightly tacky to the touch when properly dried, indicating most moisture has been removed.
Final Sanitation and Storage
Wash all utensils, bowls, and surfaces that came into contact with the raw chicken using hot, soapy water. I recommend using a bleach solution (1 tablespoon bleach per gallon of water) for the cutting board and sink to ensure complete sanitation. This step prevents cross-contamination in your kitchen.
If not cooking immediately, place the cleaned chicken on a clean plate, cover loosely with plastic wrap, and refrigerate. Use within 1-2 days for optimal freshness. The lemon cleaning method extends shelf life slightly by reducing surface bacteria, but proper refrigeration remains essential for food safety.
Tips and Common Mistakes for Cleaning Chicken With Lemon
Mastering this natural cleaning method requires attention to detail and proper technique. Here are the key factors that ensure both safety and effectiveness.
Solution Optimization: The 5-10 minute soaking time in Step 3 is critical for the citric acid to effectively break down surface contaminants without altering the chicken’s texture. I recommend using the full 10 minutes for maximum bacterial reduction, especially if the chicken has been previously frozen. The water should become noticeably cloudy during this period, indicating the lemon is actively lifting impurities from the surface.
Temperature Control: Maintaining cold water throughout the process (as specified in Steps 2 and 4) preserves the chicken’s natural texture while preventing bacterial proliferation. I use water straight from the cold tap—approximately 40°F—rather than adding ice, which could dilute the lemon solution’s effectiveness. This temperature also helps maintain the chicken’s firmness for easier handling during the cleaning process.
Sanitation Protocol: The 20-second handwashing requirement in Step 1 isn’t arbitrary—it’s the minimum duration needed to physically remove bacteria according to USDA guidelines. I time this precisely using the “Happy Birthday” song twice method. Similarly, the 1-minute rinse in Step 4 ensures complete removal of both lemon residue and dislodged contaminants without over-exposing the chicken to water, which could promote bacterial growth.
Surface Preparation: The bleach solution ratio of 1 tablespoon per gallon of water in Step 5 represents the CDC-recommended concentration for food contact surfaces. I prepare this fresh for each cleaning session rather than reusing solutions, as bleach’s effectiveness diminishes over time. This concentration is strong enough to kill salmonella and campylobacter—common poultry-borne pathogens—without leaving harmful residues when properly rinsed.
Pro Tips for Clean Chicken With Lemon
- Mastering this natural cleaning method requires attention to detail and proper technique. Here are the key factors th…
- Solution Optimization: The 5-10 minute soaking time in Step 3 is critical for the citric acid to effectively break do…
- Temperature Control: Maintaining cold water throughout the process (as specified in Steps 2 and 4) preserves the chic…
Frequently Asked Questions
Does lemon really kill bacteria on chicken?
Yes! Lemon’s citric acid (pH ~2) helps break down bacteria like Salmonella and E. coli on the surface. However, it’s not a full substitute for cooking—always heat chicken to 165°F (74°C) to kill deeper pathogens. Think of lemon as an extra safety step, not a magic fix!
How long should I soak chicken in lemon juice?
Aim for 10–15 minutes max. Longer soaks (30+ minutes) can start “cooking” the meat with acid, making it mushy. For whole chickens, rub lemon juice inside/out and rinse after 10 minutes. Pro tip: Use fresh lemon juice—bottled lacks potency!
Can I use vinegar or lime instead of lemon?
White vinegar (5% acidity) or lime juice work similarly. Ratio: 1 part vinegar/lime to 1 part water. Vinegar’s stronger odor fades when cooked, while lime offers a milder citrus flavor. Avoid apple cider vinegar—it’s less effective.
Why does my chicken smell weird after cleaning with lemon?
A faint citrus scent is normal, but a strong, sour odor means over-soaking or spoiled meat. Rinse thoroughly with cold water and pat dry. If the smell persists, discard the chicken—trust your nose! Always refrigerate chicken during cleaning to prevent bacteria growth.
Do I still need to wash the chicken after using lemon?
Yes! Rinse under cold running water to remove loosened bacteria, lemon residue, and juices. Skip this step, and you risk cross-contamination or a bitter taste. Bonus: Wash your sink, hands, and tools with hot, soapy water afterward!
Cleaning chicken with lemon isn’t just a natural way to eliminate bacteria and odors—it’s a simple step toward healthier, tastier meals! 🍋 With just a few minutes and basic ingredients, you can remove impurities while adding a subtle citrus brightness to your dishes. Next time you prep chicken, give this method a try and taste the difference for yourself.
Ready to cook? Check out our favorite lemon-marinated chicken recipes to put your freshly cleaned meat to delicious use!

- Jollof Rice Sauce Recipe: West African Tomato and Spice Infusion - September 25, 2026
- Japanese Rice Soup Recipe: Umami-Rich Comfort in a Bowl - September 25, 2026
- Homemade Cream Of Rice Recipe: Silk-Smooth Breakfast in Minutes - September 25, 2026