
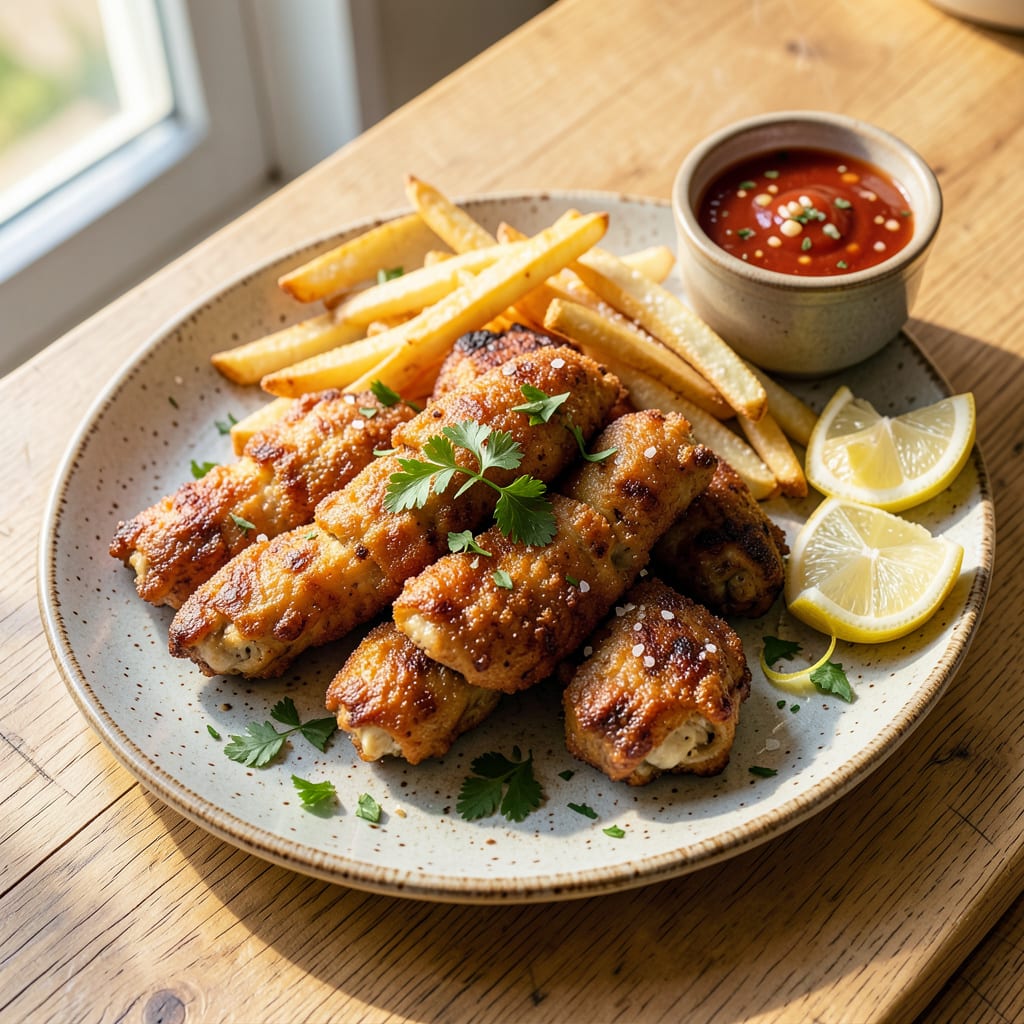
Let me tell you, reheating chicken tenders in the oven is the only way to bring them back to life—crispy on the outside, juicy on the inside, every single time. I’ve ruined more tenders in the microwave than I’d like to admit, but this method changed everything. No soggy breading, no dry meat, just perfectly reheated tenders that taste almost as good as fresh.
Here’s the deal: your oven is basically a magic box for reviving leftovers. Set it to 375°F, give the tenders a quick spritz of oil (or a light brush), and let the heat work its magic. The key is timing—too long and they dry out, too short and they’re still cold inside. Ten minutes is the sweet spot, with one crucial flip halfway through to ensure even crispiness.
What you’ll end up with are tenders that actually have that satisfying crunch when you bite in, with meat that stays tender and moist. No sad, rubbery texture, no disappointing chew. And if you really want to take it up a notch? Toss them on a wire rack over a baking sheet so the heat circulates all around—game-changer for that all-over crisp.
Serve them up with your favorite dipping sauces (honey mustard and BBQ are my go-tos), and honestly, no one will guess these weren’t made fresh. Ready to save your leftovers from the sad-microwave fate? Let’s get those tenders heating the right way.
📚 In This Guide
- What You’ll Need
- Instructions
- Tips and Common Mistakes
What Youll Need
- ● Pre-cooked chicken tenders: 4–6 tenders (frozen or refrigerated, check package for weight 🍗).
- ● Baking sheet: 1 standard (12×17-inch) or similar size—avoid warping!
- ○ Parchment paper or aluminum foil: 1 sheet (optional but prevents sticking 📄).
- ● Cooking oil or spray: 1 tsp olive/avocado oil or non-stick spray (for extra crispiness 🌟).
- ○ Oven thermometer: 1 (optional but ensures accurate temp 🌡️).
- ● Tongs or spatula: 1 (for safe flipping 🔄).
- ○ Wire rack: 1 (optional, for air circulation if reheating multiple batches).
- ○ Seasonings (optional): Pinch of garlic powder, paprika, or salt (for extra flavor boost 🧂).
- ● Timer: Phone or kitchen timer (critical for perfect timing! ⏱️).
Instructions
Here’s the simple method I use to get perfectly reheated tenders every time—no soggy disappointments.
Preheat Your Oven Properly
Start by setting your oven to 375°F. This is the sweet spot—not too hot that the outside burns before the inside warms, but hot enough to restore that crispy texture you love. I always use the conventional bake setting (not convection) for even heating.
While the oven heats up, take your chicken tenders out of the fridge and let them sit at room temperature for about 5 minutes. This quick rest prevents the cold center from making the outside overcook while waiting for the inside to warm through.
Arrange the Tenders for Even Heating
Line a baking sheet with parchment paper or aluminum foil for easy cleanup. Place a wire rack on top of the baking sheet—this is crucial for getting that crispy texture back. The rack allows hot air to circulate all around the tenders instead of steaming them from below.
Arrange your chicken tenders in a single layer on the rack, leaving about 1 inch of space between each piece. Don’t overcrowd the pan or they’ll steam instead of crisp. If you’re reheating a large batch, use two pans rather than piling them up.
Reheat with Careful Timing
Slide the baking sheet into the preheated oven and set your timer for 8 minutes. This is when the magic starts happening—the outside begins to crisp while the inside gently warms. I check them at the halfway mark to make sure they’re heating evenly.
After 8 minutes, flip each tender using tongs. This ensures both sides get equal exposure to the hot air. Return them to the oven for another 2-4 minutes until they reach an internal temperature of 165°F. You’ll know they’re ready when the coating looks golden and crispy again.
Rest Briefly Before Serving
Remove the tenders from the oven and let them rest on the wire rack for about 2 minutes. This short rest allows the juices to redistribute throughout the meat, keeping them tender and juicy. If you skip this step, all those delicious juices will end up on your plate instead of in your chicken.
Serve immediately while they’re still hot and crispy. I like to pair them with fresh dipping sauces—something cool and creamy contrasts perfectly with the hot, crunchy tenders. The texture should be just like when they were first made: crispy outside with moist, tender meat inside.
Tips and Common Mistakes
Getting that perfect crispy texture when reheating chicken tenders is easier than you think. Here’s what I’ve learned from years of trial and error to help you avoid common mistakes and achieve restaurant-quality results every time.
Temperature Control: The 375°F oven setting in Step 1 isn’t arbitrary—it’s the perfect balance between crisping the exterior and gently warming the interior. I’ve found that conventional bake works better than convection here because it provides more even heat distribution without risking uneven browning. If your oven runs hot, you might want to check the tenders a minute or two early to prevent over-browning.
The Wire Rack Difference: Don’t skip the wire rack in Step 2—it’s the secret to avoiding soggy bottoms. When tenders sit directly on a baking sheet, steam gets trapped underneath, turning that crispy coating into a soft mess. The 1-inch spacing between pieces is equally important; it allows hot air to circulate freely, ensuring each tender crisps up evenly rather than steaming from crowding.
Timing Secret: Those 8 minutes in Step 3 are crucial for reviving the texture. I always set a timer and check at the halfway mark—this is when you can spot any pieces that might be heating faster than others. The 2-4 minute flip time might seem short, but it’s just enough to crisp the second side without drying out the meat. Trust me, those extra minutes make all the difference between just-warm and perfectly crispy.
Resting Matters: The 2-minute rest in Step 4 isn’t just about cooling—it’s about keeping your tenders juicy. When you cut into hot meat immediately, all the juices rush out onto your plate. That brief rest allows the meat fibers to relax and reabsorb those juices, giving you tender, moist chicken in every bite. I learned this the hard way after serving dry tenders too many times!
Pro Tips for Heat Up Chicken Tenders In Oven
- Getting that perfect crispy texture when reheating chicken tenders is easier than you think. Here’s what I’ve learned…
- Temperature Control: The 375°F oven setting in Step 1 isn’t arbitrary—it’s the perfect balance between crisping the e…
- The Wire Rack Difference: Don’t skip the wire rack in Step 2—it’s the secret to avoiding soggy bottoms. When tenders …
Frequently Asked Questions
How long should I heat chicken tenders in the oven to keep them crispy?
For best results, bake at 400°F (200°C) for 8–10 minutes. Flip halfway to ensure even crispiness! Overcrowding the tray can make them soggy—leave space for airflow. If frozen, add 2–3 extra minutes.
Can I reheat chicken tenders in an air fryer instead?
An air fryer works even faster—3–4 minutes at 375°F (190°C). Shake the basket halfway for that perfect crunch. It’s a great alternative if you’re short on time or want extra crispiness.
Why do my reheated chicken tenders turn out dry or rubbery?
Overheating is the usual culprit! Avoid temperatures above 400°F or baking too long. Pro tip: Spritz lightly with oil or water before reheating to lock in moisture. Check internal temp—it should hit 165°F (74°C).
Do I need to thaw frozen chicken tenders before reheating?
Not necessarily! You can bake them frozen—just add 3–5 extra minutes and flip halfway. For even cooking, space them out on the tray. Thawing first? Pat dry to avoid sogginess.
What’s the best way to store leftover chicken tenders for reheating?
Store in an airtight container in the fridge for up to 3–4 days or freeze for 1–2 months. Separate layers with parchment paper to prevent sticking. Avoid plastic wrap—it traps moisture and makes them soggy!
Heating up chicken tenders in the oven doesn’t have to mean soggy leftovers—just 10 minutes is all it takes to bring back that crispy, golden crunch and juicy center! 🍗 Whether you’re prepping a quick snack or reviving meal-prepped tenders, the right temperature and technique make all the difference.
Now that you’ve got the know-how, grab those tenders and give it a try! For extra flavor, pair them with your favorite dipping sauce or turn them into a hearty wrap. Hungry for more easy kitchen hacks? Check out our guide on reheating other fried foods without losing texture!

- Jollof Rice Sauce Recipe: West African Tomato and Spice Infusion - September 25, 2026
- Japanese Rice Soup Recipe: Umami-Rich Comfort in a Bowl - September 25, 2026
- Homemade Cream Of Rice Recipe: Silk-Smooth Breakfast in Minutes - September 25, 2026