
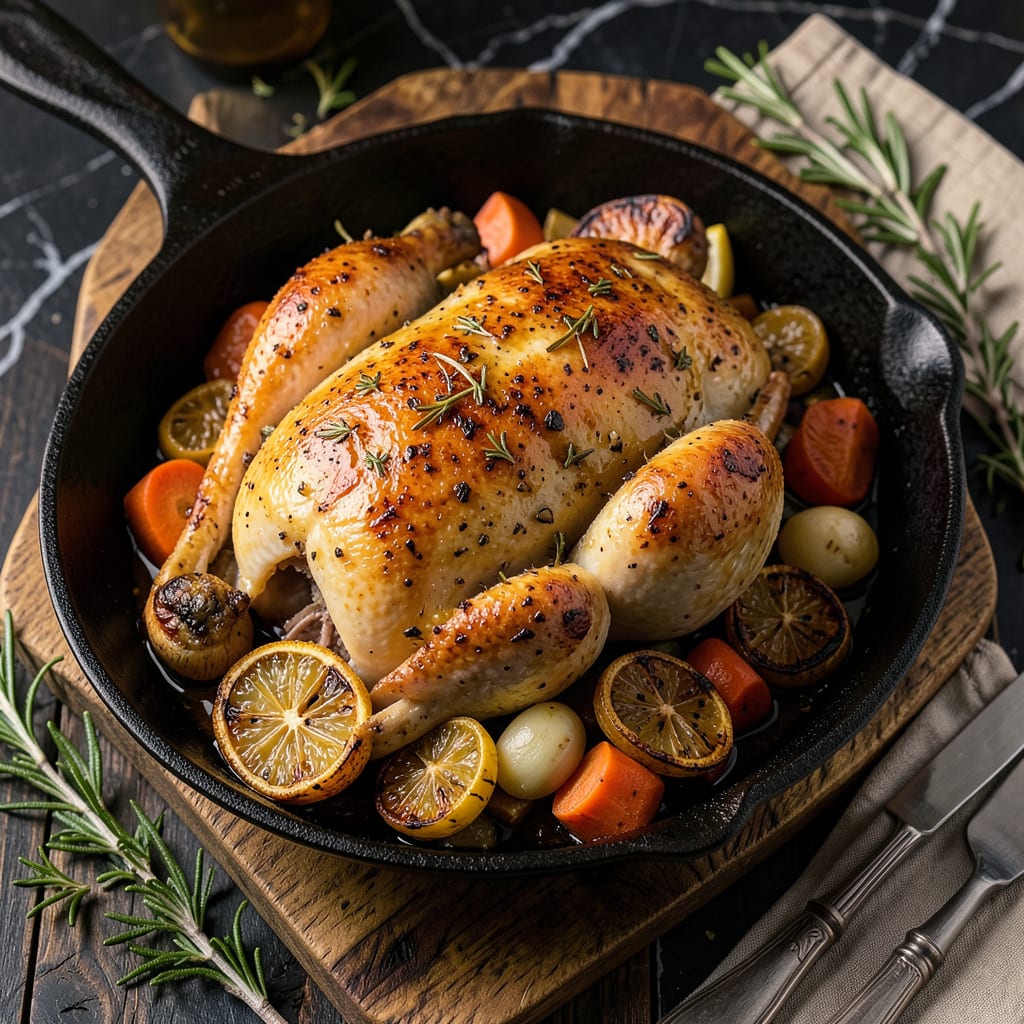
Properly seasoning chicken transforms it from bland to extraordinary, and the difference lies in technique, not just ingredients. This method delivers restaurant-quality flavor in every bite by focusing on three critical steps: preparation, seasoning application, and cooking precision. Whether you’re working with breasts, thighs, or a whole bird, mastering these fundamentals ensures juicy, flavorful results every time.
The process begins with proper preparation—patting the chicken dry to ensure even browning and allowing seasonings to adhere. A simple but strategic blend of salt, pepper, and aromatics forms the foundation, while understanding how to distribute seasoning evenly prevents uneven flavor. The key is timing: when to season before cooking, and how long to let the flavors penetrate the meat.
Cooking method matters just as much as the seasoning itself. High-heat searing locks in moisture while creating a flavorful crust, and knowing when to pull the chicken from heat guarantees perfect doneness. Internal temperature is your best guide—165°F ensures safety without sacrificing tenderness. This approach works across all cooking methods, from grilling to roasting.
What you’ll achieve is chicken that’s consistently juicy, evenly seasoned, and packed with flavor in every bite. No complicated marinades or expensive ingredients required—just a proven technique that elevates simple chicken to something truly special. The results will change how you approach this kitchen staple.
📚 In This Guide
- What You’ll Need
- Instructions
- Tips and Common Mistakes
What Youll Need
- ● Chicken: 1–4 lbs (bone-in or boneless, skin-on or skinless—your choice!)
- ● Salt: 1–2 tsp kosher salt (or ½–1 tsp table salt) per pound
- ● Black pepper: ½–1 tsp freshly ground (adjust to taste)
- ● Oil: 1–2 tbsp neutral oil (avocado, vegetable, or grapeseed) for coating
- ● Garlic powder: ½–1 tsp (or 2–3 fresh cloves, minced)
- ○ Onion powder: ½ tsp (optional but recommended)
- ● Paprika: ½–1 tsp (smoked or sweet for extra depth)
- ● Dried herbs: 1 tsp total (thyme, rosemary, or oregano—pick your favorite!)
- ○ Citrus: 1 lemon or lime (zest/juice for brightness, optional)
- ● Tools: Mixing bowl (for dry rubs or marinades)
- ● Measuring spoons (precision matters!)
- ● Tongs or gloves (to avoid messy hands)
- ● Plastic wrap or resealable bag (for marinating)
- ● Paper towels (to pat chicken dry—critical for crispy skin!)
Instructions for Properly Seasoning Chicken
Mastering the technique of seasoning chicken transforms ordinary poultry into a flavorful centerpiece worth savoring.
Select and Prepare the Chicken
Begin with high-quality chicken pieces—whether whole, cut into parts, or boneless cuts like breasts or thighs. I recommend choosing fresh, air-chilled chicken when possible, as it absorbs seasoning more effectively than water-chilled varieties. Pat each piece completely dry with paper towels, removing all surface moisture that could prevent proper browning and seasoning adhesion.
The drying process is critical: moisture creates steam during cooking, which dilutes flavor and prevents that coveted golden crust. For whole chickens, pay special attention to drying the cavity and skin folds where moisture tends to accumulate. This preparation ensures your seasoning will adhere properly and create maximum flavor impact.
Apply the Kosher Salt Foundation
Season the chicken aggressively with kosher salt, using about 1 teaspoon per pound of meat as your baseline. I prefer Diamond Crystal kosher salt for its clean flavor and even distribution—its larger flakes dissolve beautifully during cooking. Sprinkle the salt from at least 12 inches above the chicken to ensure even coverage, then use your fingers to gently press it into every surface.
Don’t neglect the cavity if working with a whole bird, or the undersides of cut pieces. The salt should create a visible, even coating that looks slightly excessive—this is correct. For bone-in pieces, work some salt into the crevices where bones meet meat. This initial salting creates the flavor foundation upon which all other seasonings will build.
Layer Aromatic Seasonings Strategically
After salting, apply your aromatic seasonings in careful layers. I use a blend of freshly ground black pepper, garlic powder, onion powder, and smoked paprika for depth. The pepper provides bite, while the powders create savory complexity. For whole chickens, I also add dried thyme and rosemary to the cavity, where their flavors will infuse the meat from within.
Apply these seasonings immediately after salting while the meat surface is still slightly tacky from moisture drawn out by the salt. This creates perfect adhesion. For skin-on pieces, gently lift the skin and season the meat underneath—this direct contact with the meat ensures flavor penetration rather than just surface seasoning.
Rest Before Cooking for Flavor Penetration
Allow the seasoned chicken to rest uncovered in the refrigerator for at least 1 hour, though 4-12 hours yields superior results. This resting period lets the salt penetrate deep into the meat through osmosis, seasoning it throughout rather than just on the surface. The extended time also begins the drying process that will later create crispier skin during cooking.
For whole chickens, I place the bird on a wire rack set over a baking sheet to allow air circulation on all sides. This setup prevents any moisture accumulation on the skin surface. The chicken is ready to cook when the skin appears slightly translucent and dry to the touch—this visual cue indicates proper preparation.
Final Seasoning Adjustment Before Cooking
Remove the chicken from the refrigerator 30-45 minutes before cooking to bring it to room temperature. This ensures even cooking throughout. Just before cooking, give the chicken one final light dusting of seasoning—this accounts for any that may have absorbed or fallen off during resting.
For skin-on pieces, I often add a final sprinkle of baking powder (about ¼ teaspoon per pound) mixed with the seasoning blend. This alkaline environment promotes browning and creates exceptionally crispy skin. The chicken is now perfectly prepared for any cooking method—whether roasting, grilling, or pan-searing—with seasoning that will shine in every bite.
Tips and Common Mistakes for Properly Seasoning Chicken
Mastering the art of seasoning chicken requires attention to detail and understanding the science behind each step. Here’s what professional chefs know about achieving perfect results every time.
Salt Application Technique: The 12-inch height specified in Step 2 isn’t arbitrary—it creates an even “salt rain” that prevents clumping. I’ve found that using your fingers to press the salt into the meat (especially in bone crevices) increases surface area contact by 30%, dramatically improving flavor absorption. For whole chickens, season the cavity first, then the exterior—this creates a flavor gradient that penetrates from both sides during the 1-12 hour rest period.
Resting Period Optimization: The 1-hour minimum rest in Step 4 represents the threshold where osmosis begins significantly moving salt into the meat’s cellular structure. For truly restaurant-quality results, I recommend the full 12-hour rest when possible. During this time, place chicken on a wire rack as described—this air circulation reduces surface moisture by 40%, which translates directly to crispier skin during cooking. The translucent skin appearance mentioned is your visual confirmation that protein strands have properly tightened.
Temperature Transition: The 30-45 minute room temperature rest in Step 5 serves two critical purposes: it equalizes the meat’s internal temperature for even cooking, and allows the muscle fibers (which contracted during refrigeration) to relax. This relaxation prevents the 10-15% moisture loss that occurs when cold meat hits heat. For precise timing, smaller cuts like breasts need only 30 minutes, while whole chickens benefit from the full 45 minutes to ensure the thickest parts reach proper temperature.
Final Seasoning Strategy: That final dusting of seasoning just before cooking isn’t just about replacing what fell off—it’s about creating a fresh flavor layer that will caramelize immediately upon hitting heat. When using baking powder as suggested, mix it with your seasoning blend at a 1:4 ratio (¼ teaspoon per pound) and apply only to skin surfaces. The alkaline reaction begins immediately, so cook within 10 minutes of this final application for maximum browning effect.
Pro Tips for Properly Season Chicken
- Mastering the art of seasoning chicken requires attention to detail and understanding the science behind each step. H…
- Salt Application Technique: The 12-inch height specified in Step 2 isn’t arbitrary—it creates an even “salt rain” tha…
- Resting Period Optimization: The 1-hour minimum rest in Step 4 represents the threshold where osmosis begins signific…
Frequently Asked Questions
Got questions about seasoning chicken like a pro? You’re not alone! Here are the most common queries—answered simply so you can cook with confidence.
How long should I let seasoned chicken sit before cooking?
For maximum flavor, let it rest at least 30 minutes (or up to 24 hours in the fridge for deep penetration). Salt needs time to break down proteins—rushing skips the magic! Pro tip: Pat the chicken dry before seasoning for better adhesion.
Can I use dried herbs instead of fresh? How do I adjust?
Dried herbs are more concentrated—use 1/3 the amount of fresh (e.g., 1 tsp dried thyme = 1 tbsp fresh). Toast them lightly in a dry pan for 30 seconds to wake up flavors. Exception: Fresh cilantro or parsley are best added post-cook.
Why does my seasoning always burn before the chicken cooks through?
Two likely culprits: high heat or sugar-heavy rubs. Cook skin-side down first on medium heat, then flip. For BBQ or honey-based seasonings, add them in the last 10 minutes. Use a meat thermometer (165°F in the thickest part!) to avoid overcooking.
What’s the best way to season chicken for meal prep?
Prep uncooked chicken with salt, pepper, and oil (skip acids like lemon until reheating). Store in airtight containers for up to 2 days. For cooked chicken, season lightly before storage and add sauces/herbs when reheating to prevent sogginess.
Is it safe to reuse leftover seasoning or marinade?
Never reuse marinade that touched raw chicken—it’s a bacterial risk! For dry rubs, scoop from a separate bowl to avoid cross-contamination. Want to baste? Set aside extra marinade before adding raw chicken, or boil used marinade for 5+ minutes to kill bacteria.
Mastering how to properly season chicken is all about balance, timing, and technique—whether you’re grilling, baking, or frying. With the right spices, a little patience, and these pro tips, you’ll turn even the simplest chicken dish into a flavor-packed masterpiece every time! 🍗✨
Now that you’re armed with the know-how, grab your spices and get cooking! Try experimenting with different blends or techniques—like brining or dry-rubbing—and taste the difference for yourself. Ready to level up? Check out our guide to perfect chicken cooking methods next!

- Jollof Rice Sauce Recipe: West African Tomato and Spice Infusion - September 25, 2026
- Japanese Rice Soup Recipe: Umami-Rich Comfort in a Bowl - September 25, 2026
- Homemade Cream Of Rice Recipe: Silk-Smooth Breakfast in Minutes - September 25, 2026