
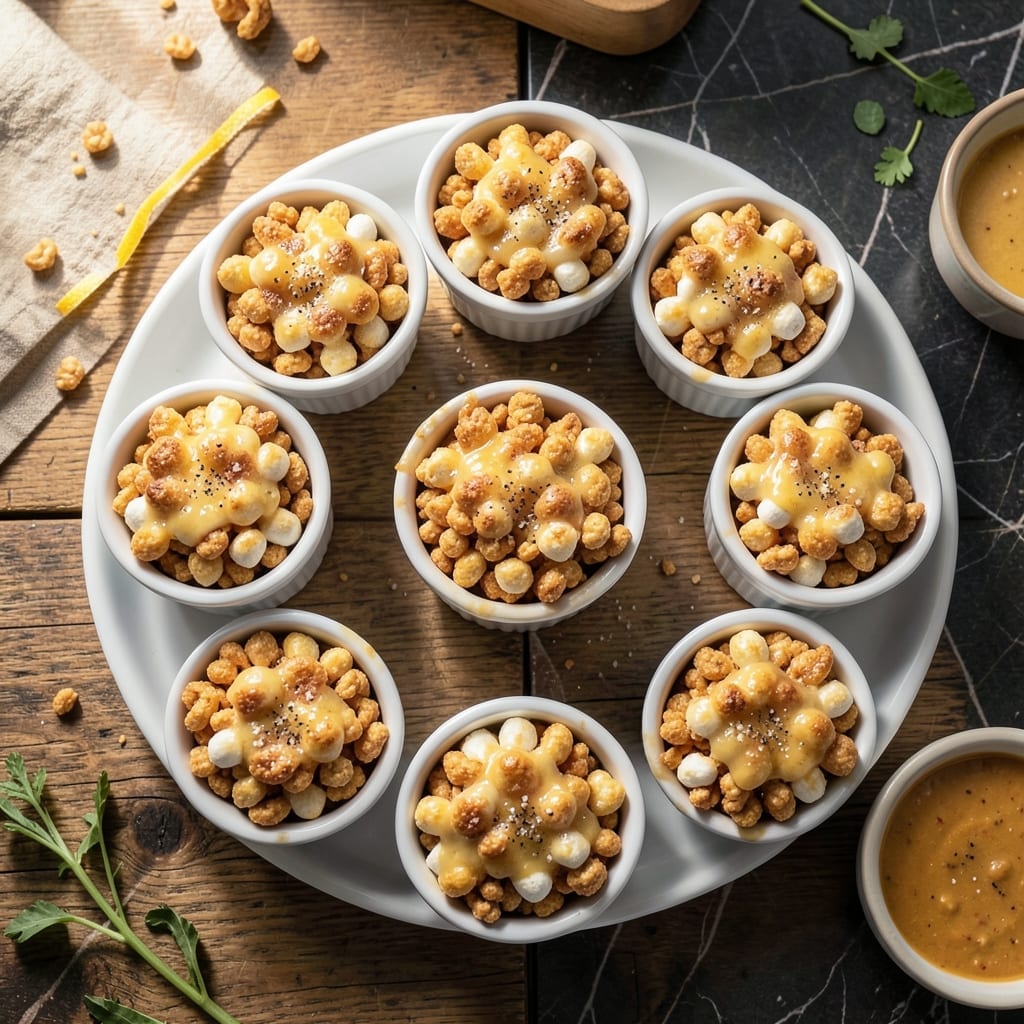
There’s something special about perfectly portioned treats that feel both indulgent and practical. This method delivers perfect results every time with minimal effort and maximum satisfaction.
I developed this approach after too many batches stuck to the pan or turned out uneven. The key is precise measurements and proper pan preparation to ensure each square holds its shape without crumbling.
The result is individual treats with the ideal balance of crispy and chewy textures. Each bite offers that classic combination of buttery marshmallow and toasted cereal we all love.
These are ideal for parties, lunchboxes, or whenever you want a sweet treat without commitment to a full batch.
Ingredients for Individual Rice Krispie Treat
Just cereal, marshmallows, butter, and a few basics for perfect individual treats.
| Ingredient | Amount | Notes |
|---|---|---|
| Rice Krispies Cereal 🥣 | 6 cups | Fresh, for best texture |
| Mini Marshmallows 🍬 | 10 oz | Or 40 regular marshmallows |
| Unsalted Butter 🧈 | ½ cup | 1 stick, for binding |
| Vanilla Extract 💧 | 1 tsp | Pure extract for best flavor |
| Salt 🧂 | ¼ tsp | Fine grain for balance |
| Cooking Spray 🫴 | 1 can | For pan preparation |
| Parchment Paper 📜 | 1 sheet | To prevent sticking |
The marshmallows are doing the heavy lifting here. Jet-Puffed mini marshmallows melt faster and more evenly than the big ones—saves you a few minutes of stirring. I usually grab them at Target or Walmart in the baking aisle. For the cereal, Kellogg’s Rice Krispies is the gold standard (the generic stuff can be hit or miss). One batch makes about 16 squares, but you can scale up easily.
Out of mini marshmallows? Regular ones work too—40 large marshmallows equals 10 oz. No vanilla? Skip it, they’ll still taste great. Want a little extra flavor? A pinch of cinnamon or almond extract pairs perfectly. The salt might seem optional, but don’t skip it—it balances all that sweetness. And if you’re feeling fancy, swap half the butter for coconut oil.
These keep well in an airtight container at room temp for 3-4 days. For longer storage, freeze for up to 6 weeks. Let them thaw before serving (or don’t—cold treats are underrated). Pro tip: Press the mixture into the pan with buttered hands to avoid sticking.
Why You’ll Love This Recipe
- One-Bowl Wonder: I love that I can melt the butter, toast the mini marshmallows, and mix in the Rice Krispies all in the same pot—zero extra dishes.
- Vanilla Kiss: That splash of vanilla extract turns the gooey marshmallow and crispy cereal combo into something ridiculously good.
- Party-Ready Portions: Honestly, these individual treats are my go-to for bake sales, lunchboxes, or even a quick dessert for company.
- Budget-Friendly Batch: A box of cereal and a bag of marshmallows make dozens of these—cheap, filling, and always a hit.
Step-by-Step Instructions for Individual Rice Krispie Treats
Here’s the method that guarantees perfectly portioned squares with that classic crispy-chewy texture.
Step 1: Prepare Your Workspace and Molds
Line a 9×13-inch baking dish with the parchment paper, leaving overhang on all sides for easy removal. Lightly coat the paper and a silicone spatula with cooking spray—this prevents sticking when pressing the mixture later. I also prepare a small bowl of cold water to dip my fingers in, which keeps the mixture from clinging to my hands during portioning.
For individual treats, I use a standard muffin tin. Lightly spray each cup with cooking spray as well. This dual preparation ensures clean release whether you’re making one large batch to cut or perfectly portioned individual squares. The parchment paper is non-negotiable; it’s your insurance against a frustrating, sticky mess.
Step 2: Melt Butter and Marshmallows to Silky Perfection
In a large pot, melt the 0.5 cup unsalted butter over low heat. Once fully melted, add all 10 oz mini marshmallows at once. Stir constantly with a wooden spoon—the mixture will look lumpy at first, but keep stirring until it becomes completely smooth and glossy.
This step takes about 5-7 minutes. Watch for the marshmallows to lose their shape entirely and the mixture to become a uniform, ivory-colored liquid. Remove from heat immediately once smooth to prevent scorching. Stir in the 1 tsp vanilla extract and 0.25 tsp salt—the vanilla adds depth, while the salt balances the sweetness perfectly.
Step 3: Incorporate the Cereal Evenly
Working quickly (the mixture sets fast), add all 6 cups Rice Krispies cereal to the pot. Fold gently with your spatula until every piece is thoroughly coated. You’ll know it’s ready when the cereal is evenly distributed and glistens with the marshmallow mixture. Be careful not to overmix, which can crush the cereal and make the treats dense.
The cereal should maintain its crispness initially but will soften slightly as it absorbs the warm marshmallow mixture. This is normal. If you’re making individual portions, transfer the mixture to the prepared muffin tin now, dividing it evenly among the cups. For a single slab, transfer to your parchment-lined dish.
Step 4: Press and Portion with Precision
Using your spatula (or buttered fingers for individual portions), press the mixture firmly into the pan or muffin cups. For the baking dish, press until the top is even and flat. For muffin cups, fill each about ¾ full and press down gently to create a slight dome—this gives your individual treats that classic bakery-style shape.
Dip your fingers in cold water between presses to prevent sticking. The mixture will be very sticky at this stage, but resist the urge to add more butter. The warmth from your hands helps the treats set properly. Let them cool at room temperature for at least 30 minutes before cutting or removing from the muffin tin.
Step 5: Cut and Serve at the Perfect Moment
For slab-style treats, lift the entire set mixture out of the pan using the parchment paper overhang. Place on a cutting board and use a sharp knife (dipped in hot water and wiped dry between cuts) to slice into squares. For individual portions, simply pop each treat out of the muffin tin.
Let them cool completely—about 1 hour—before serving. This cooling time is crucial for the treats to achieve that perfect combination of crispy edges and chewy centers. Store in an airtight container at room temperature for up to 3 days, though they’re best enjoyed the day they’re made. The parchment paper makes cleanup effortless—just lift and discard.
Pro Tips For Making Individual Rice Krispie Treat
- Melt Butter Low: Use low heat when melting the butter and marshmallows—high heat will scorch the marshmallows and make them seize up. I learned this the hard way after ruining two batches.
- Press While Warm: Shape the treats into individual portions immediately after mixing, while the marshmallow is still pliable. Waiting even 5 minutes makes them harder to mold and less sticky.
- Use Fresh Marshmallows: Skip the old, dried-out mini marshmallows; they won’t melt as smoothly. Fresh ones blend into the butter more evenly, giving that perfect gooey texture.
- Grease Your Hands: Lightly butter your hands or use a greased spoon when pressing the mixture into molds—it prevents sticking and makes the process way less messy. Sounds simple, but it actually changes the outcome.
Essential Equipment for individual rice krispie treat
Essential Pan Prep
I never skip lining my 9×13-inch baking dish with parchment paper, leaving extra on the sides. This makes lifting the entire batch out for cutting a breeze. A quick spray with cooking spray on both the paper and my spatula prevents any sticking during pressing. 💡
Muffin Tin for Portions
For individual treats, a standard 12-cup muffin tin works perfectly. I spray each cup lightly with cooking spray before adding the mixture. This ensures each treat pops out cleanly without breaking apart.
Large Pot for Melting
Use a 4-quart or larger pot for melting the butter and marshmallows. The mixture expands as it heats, and you need room to stir. I prefer heavy-bottomed stainless steel for even heat distribution.
Wooden Spoon for Stirring
A wooden spoon is my go-to for stirring the marshmallow mixture. It won’t scratch your pot and handles the thick mixture better than silicone. Plus, it’s easy to clean afterward.
Silicone Spatula for Folding
When incorporating the cereal, a silicone spatula is ideal. It scrapes every last bit of marshmallow from the pot and folds the cereal gently without crushing it. I keep one dedicated just for baking.
Cooling Rack for Setting
After portioning, I place the pan or muffin tin on a wire cooling rack. This allows air to circulate underneath, helping the treats set evenly and preventing a soggy bottom. 💫
Nutrition Facts
Frequently Asked Questions
Can I use regular marshmallows instead of mini?
Yes! Use 40 regular marshmallows to equal 10 oz of minis. They’ll take slightly longer to melt, so keep the heat on low and stir patiently.
How do I prevent them from sticking to the pan?
Line your pan with parchment paper and spray it lightly with cooking spray. For muffin tins, grease each cup well. This ensures clean release every time.
Why are my treats hard instead of chewy?
Overmixing or pressing too firmly can make them dense. Stir just until combined and press lightly. Also, avoid overheating the marshmallow mixture.
Can I make these ahead of time?
Store in an airtight container at room temperature for up to 3 days. For longer storage, freeze for up to 6 weeks.

- Mujadara Rice and Lentils Recipe: Earthy Spiced Lentils With Caramelized Onions - November 1, 2026
- Naija Fried Rice Recipe: Street-Style Spice With Veggie Crunch - November 1, 2026
- Mushy Rice Recipe: Fluffy Grains Transformed in Minutes - November 1, 2026